4
B. PACKED LIFTING LEVER
There are several designs of packed cap constructions.
Refer to the appropriate section below for your particular cap
construction.
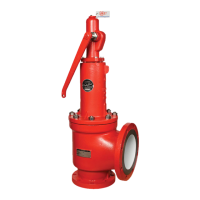
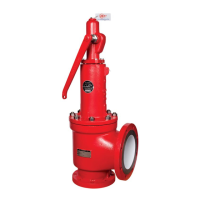
(a) Fig. 3.2
1 .Remove groove pin from lever and slide lever off the cam
2. Remove gland from gland nut. Unscrew gland nut from
bonnet and remove packing ring and cam. If any signs of
leakage exist, replace packing ring.
3. Break wire seal and unscrew cap from bonnet. Holding
the stem with pliers, remove stem jam nut and stem test
washer.
4. Reassemble in reverse order making sure the cam lobe is
pointing down. The stem test washer should be adjusted
to ensure the cam will make contact with the stem test
washer and lift the stem when the lever is actuated.
(b) Fig. 3.3
1 .Remove groove pin from lever and slide lever off the cam shaft.
2. Complete disassembly is only required if the packing ring is
to be replaced or intemal inspection is required. To remove
assembly, rotate the leve, down and unscrew the cap.
3. To complete disassembly, remove the gland packing ring
and retaining ring.
4. Pull the cam shaft from the cap. The cam can then be
removed through the bottom of the cap.
5. Remove the stem jam nut and stem test washer.
6. Reassemble in reverse order making sure the cam rests
beneath the stem test washer.
(c) Fig. 3.4
1. Remove lever jam nut and washer. Slide lever off the cam
shaft.
2. Follow steps 2 to 6 in section (b).
STEil JAIl NUT
STEil TEST WASNER
CAIISHArT
STEIl
GlAND
CRDDV-PlN
PACKING RING
CLAND NUT
TEST LEYER
BONNET
SPRING ADJUSTING SCREW
SEAL
CAP
CAP GASKET
Figure 3.2 Packed Lifting Lever (a)
STEM TEST -.sHEW
CAM mu
ST[W JAW WUT
!T[W ftST WASHER
CAP
CAW~
STEW
CAP CASK£T 111 i
~NN£T
./
CAP GAS«[T---:'" ~ i !-
_MET /" .
rm l£VtR \Q)
Figure 3.4 Packed Lifting Lever (c)
TEST l£VER ~
Figure 3.3 Packed Lifting Lever (b)
TELEDYNE FLUID SYSTEMS
Farris Engineering
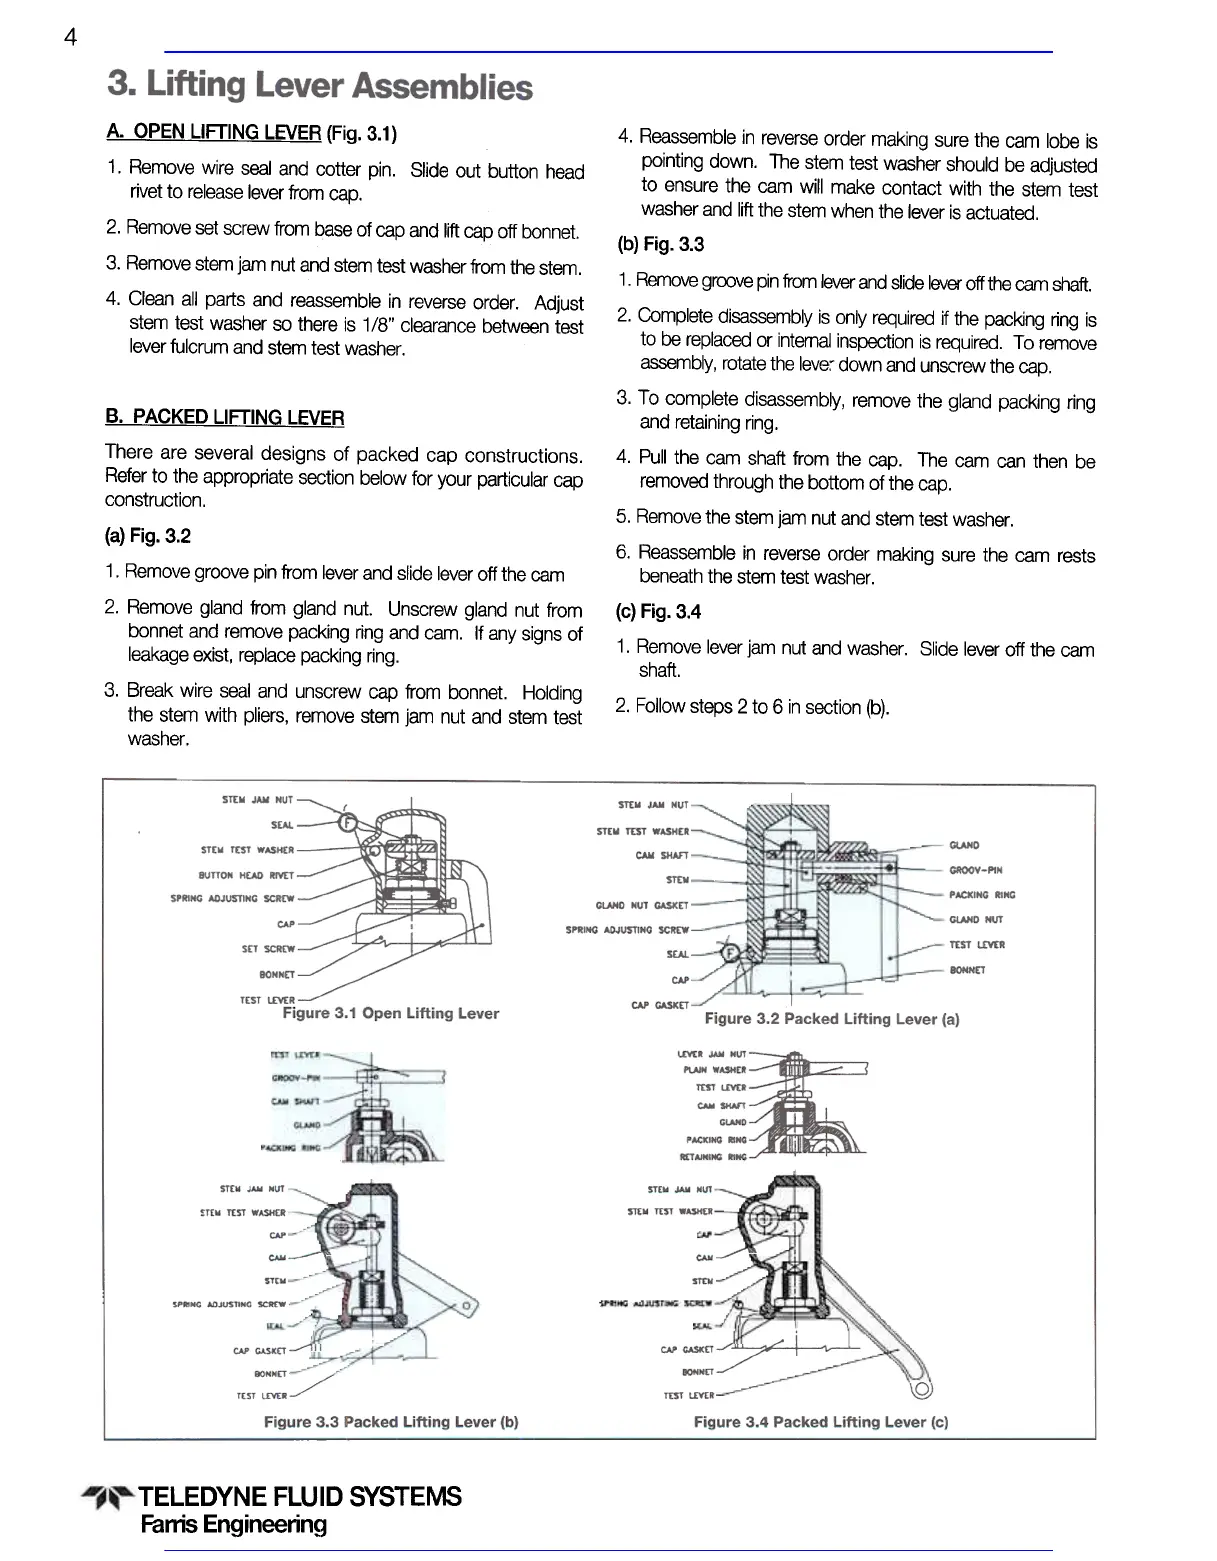
A. OPEN LIFTING LEVER (Fig. 3.1)
1. Remove wire seal and cotter pin. Slide out button head
rivet to release lever from cap.
2. Remove set screw from base of cap and lift cap off bonnet.
3. Remove stem jam nut and stem test washer from the stem.
4. Clean all parts and reassemble in reverse order. Adjust
stem test washer so there is 1/8" clearance between test
lever fulcrum and stem test washer.
Visit www.boighill.com to request a quote.
Visit www.boighill.com to request a quote.