Do you have a question about the FEI Tecnai G2 F20 and is the answer not in the manual?
Verify vacuum status in the setup menu, ensuring specific values are green.
Procedure for filling the LN2 dewar and its refill frequency.
Steps for inserting a room temperature sample holder.
Steps for inserting a cryo sample holder.
Adjusting Z height to minimize image displacement during eucentric height adjustment.
Center the beam using trackball and position knobs at ~10,000x magnification.
Obtain a triangular crossover beam using X and Y stigmator knobs at 135,000x.
Center the beam in the middle of the phosphor screen using Multifunction knobs X and Y.
Minimize beam movement by adjusting pivot points X and Y at crossover.
Minimize displacement of an identifiable object using MF X and Y.
Correct alignment using live FFT to show zeros at same frequencies.
Center aperture around the un-diffracted beam at 50,000x.
Make objective lens stigmation rings circular using MF X and Y knobs.
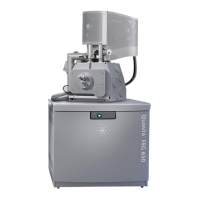
This document outlines the operating procedures for the FEI Tecnai G² F20 microscope, covering startup, specimen handling, microscope alignments, STEM mode operation, and shutdown, along with specific settings for using the Falcon II detector.
The FEI Tecnai G² F20 is a high-resolution transmission electron microscope (TEM) designed for advanced materials science and biological imaging. It supports various imaging modes, including standard TEM and Scanning Transmission Electron Microscopy (STEM), and is equipped with a Falcon II detector for high-performance imaging. The microscope allows for precise control over electron beam parameters, specimen positioning, and image acquisition, making it suitable for detailed structural and compositional analysis at the nanoscale.
The microscope boasts a line resolution of 0.144 nm, indicating its capability to resolve extremely fine details. It features a Cs objective of 2.0 mm and a Cc objective of 2.0 mm, which are critical parameters influencing image quality and aberration correction. The focal length is 2.7 mm. The primary detector specified is the FEI Falcon II, which has a physical pixel size of 14 µm. These specifications highlight the microscope's ability to achieve high-resolution imaging with good contrast and signal-to-noise ratio.
The startup sequence involves launching the Tecnai User Interface, Digital Micrograph, and TIA (TEM Imaging and Analysis) software in a specific order. This ensures all necessary control and imaging functionalities are active.
A critical startup step is checking the vacuum status. The system provides real-time feedback on GUN, COLUMN, and CAMERA vacuum levels, which should be highlighted in green, with the Gun always at 1 Log. This ensures optimal operating conditions and prevents damage to the electron optics.
The cold trap dewar must be filled with liquid nitrogen (LN2) at startup and refilled every 3 hours to maintain a high vacuum and protect the column from contamination. An initial refill after 30 minutes is recommended for the first user of the day.
Before inserting a specimen, the objective aperture must be removed, and the stage reset using the "Control then Holder" function under the Search tab to prevent damage. The specimen holder is inserted carefully, rotated clockwise to its final pumping position, and then slowly slid into the microscope after the red Compustage light turns off and the turbo pump reaches operating speed. The system provides a countdown in the Vacuum Overview window.
For cryo samples, the procedure is similar but includes additional steps for tilting the stage to -55 degrees using "Search>Stage²>alpha toggle" and prepumping the airlock via "Setup>Vacuum>Cryo" before insertion. After insertion, the stage is reset to 0 degrees, the turbo is switched off, and the liquid nitrogen in the holder is topped up.
This mode involves finding an area of interest at low magnification (~10 k), activating STEM mode, deactivating diffraction mode, performing specific Direct Alignments (Beam Shift, Beam-Tilt Pivot Points X/Y, Rotation Center, Condenser astigmatism), re-entering diffraction mode, inserting the STEM detector, choosing a camera length (100-150 mm for LM STEM) and spot size, and then using "Search" or "Preview" to view and "Focus" to adjust the image. "Acquire" obtains the image, which can then be saved via "Export Data" in TIA.
For optimal imaging with the Falcon II detector, all microscope alignments should be performed outside of Low Dose mode. TIA must be open, and a specific low dose file (50K_recommended.lds) should be loaded, or custom settings applied. Recommended settings include:
The removal process involves resetting the stage ("Search>Stage²>Reset Holder"), closing column valves ("Setup>Vacuum>Column Valves"), and then carefully retracting the holder by pushing against the purple plate of the stage, rotating it clockwise ~120°, and pulling it out gently and parallel to the stage axis, overcoming the vacuum pull.
The finishing steps include closing column valves, resetting the specimen holder position, removing the specimen, retracting apertures, and checking the web scheduler. If the last user, the LN2 dewar must be removed, a paper towel placed on the dewar stand, and the "Cryo Cycle" initiated from the Vacuum panel under the Setup menu (this process takes 4 hours to complete).
| Brand | FEI |
|---|---|
| Model | Tecnai G2 F20 |
| Category | Microscope |
| Language | English |