Limp Mode
If the battery State of Charge (SoC) drops to a critically low
level, or if the battery temperature becomes too hot or too
cold, a Pop-Up Alert will alert the operator to either condition,
and the unit will enter 'Limp Mode'. See the table that follows.
In Limp Mode, the mower blades turn off, and the ground
speed range is reduced to Low. This allows the operator to
safely drive the unit to a charge location, or, if needed, to
a location that will allow the battery to return to its normal
operating temperature range.
Once the unit enters Limp Mode, promptly address the issue
identified in the Pop-Up Alert. Otherwise the unit will power
down.
Condition Unit Enters
Limp Mode *
Unit Powers
Down *
Battery State of Charge
(SoC)
Below 10% Below 5%
Battery Temperature Below 41° F (15° C) /
Above 140° F (60° C)
Below 28° F (-2° C) /
Above 142° F (61° C)
* Estimates only. Battery State of Charge (SoC) and Battery
Temperature are affected by several variables.
Auto Shut-Down
The unit has a auto shut-down feature. When started, the unit
will automatically shut down if:
• left unattended for fifteen minutes (approximately).
• left unattended with the parking brake disengaged and a
low battery State of Charge (SoC).
If an auto shut-down occurs, turn the key switch to OFF. The
unit can then be started again. See Start the Unit.
Driving Operation
Zero-Turn Riding Mower Driving Practice
Before you try to drive the zero-turn riding mower, make sure
that you have read the FEATURES AND CONTROLS section
and understand the location and function of all of the unit
controls.
The ground speed control levers of this zero-turn riding
mower are responsive. It will take practice to gain smooth
and efficient control of the unit's forward, reverse, and turning
movements.
Before you begin to mow, study the maneuvers in this section
and become familiar with how the unit accelerates, travels,
and steers.
To practice:
• Locate a smooth, flat area of your lawn with plenty of
room to maneuver.
• Clear the area of objects, people, and animals.
• Set the Ground Speed range to Low (see Display /
Control Console).
• Begin with the Smooth Travel section, then proceed
through the Basic and Advanced sections.
• Turn slowly to prevent tire slippage and damage to your
lawn.
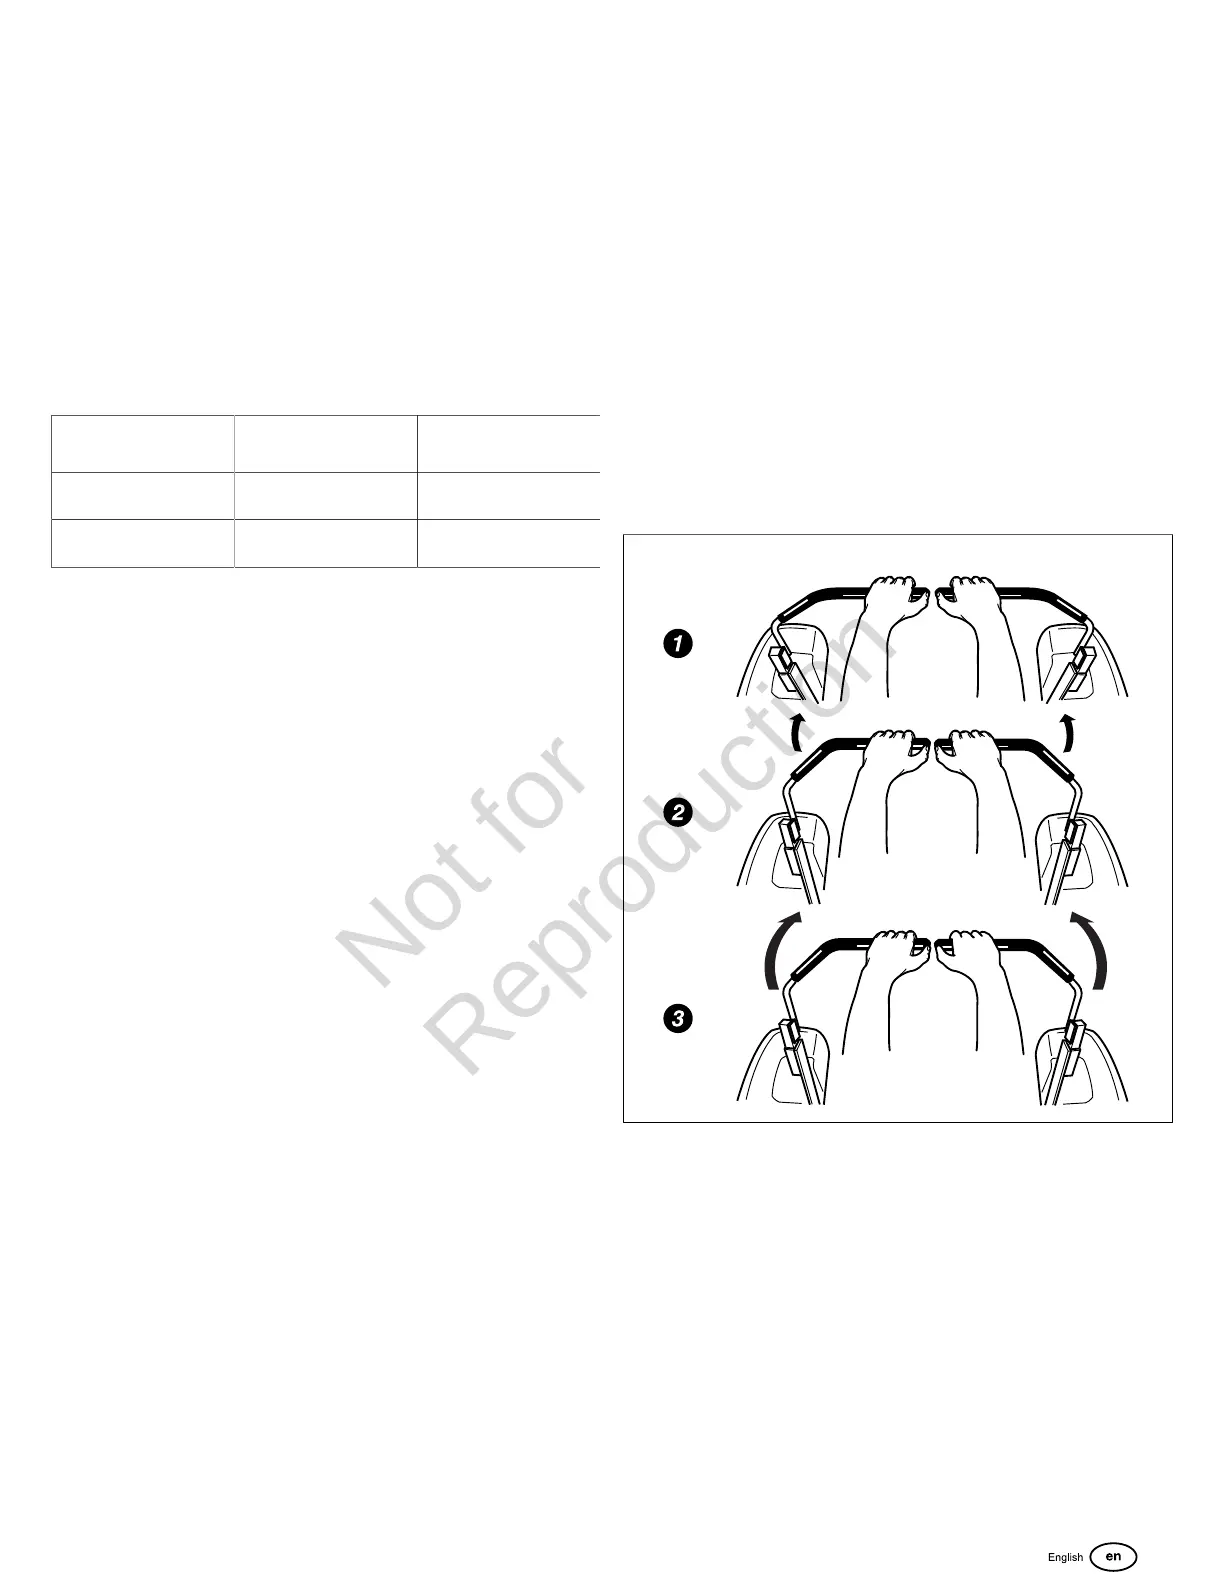
Smooth Travel
The recommended way to operate the ground speed control
levers is as shown in Figure 16.
1. Put your hands on the levers as shown.
2. Gradually move the levers forward.
3. To speed up, move the levers farther forward. (To slow
down, move the levers back toward the Neutral ('N')
position.)
NOTE:The ground speed control levers are spring-loaded,
and will automatically move back to the Neutral ('N') position if
released.
16
Basic Driving Operation
Forward Travel (Figure 17)
Gradually move both ground speed control levers equally
forward from the Neutral ('N') position. Slow down and repeat.
NOTE:If necessary, top forward speed can be adjusted for
straight travel. See Maintenance > Tracking Adjustment.
13