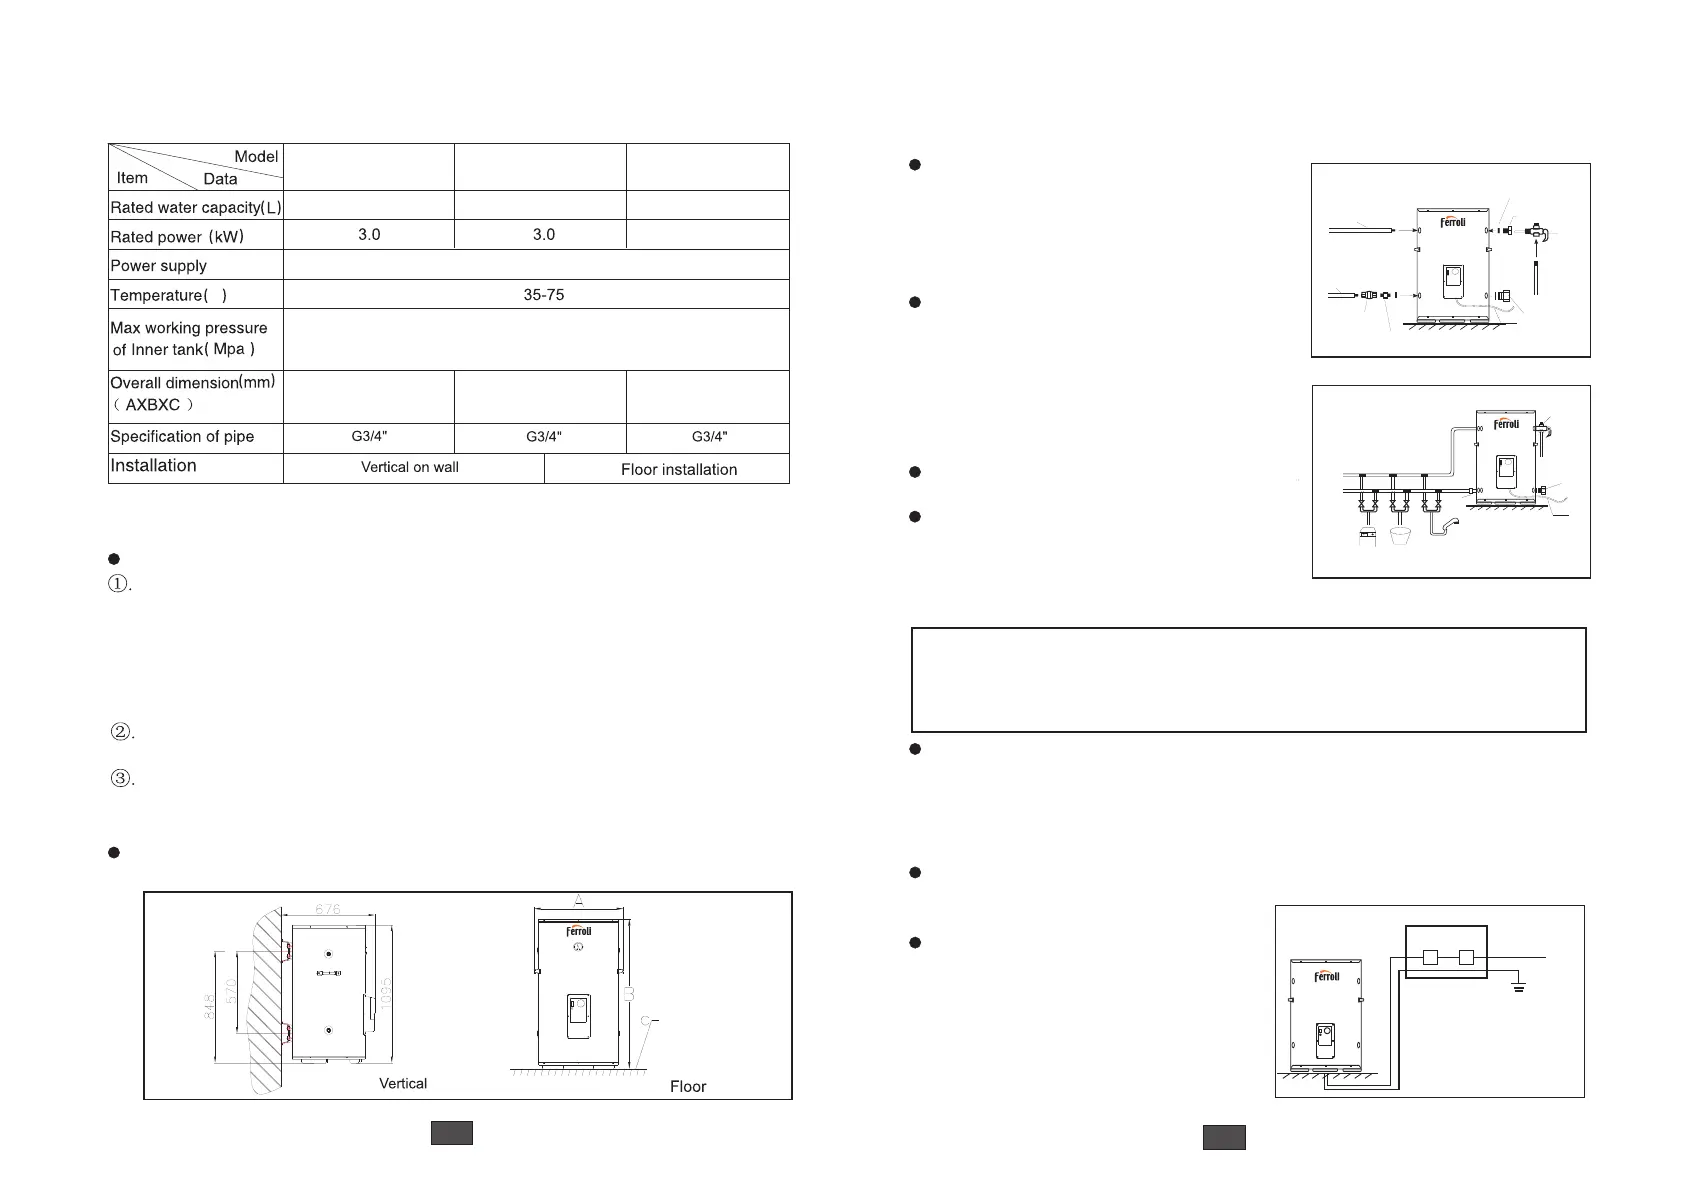
Installation
Step 1:Product fixation
Step 2:Water pipe connection
Select the water inlet and outlet for
supplying hot water,first,install check
valve in the hexagonal joint,then co-
nnect the inlet pipe and outlet pipe
with the and outlet res-
pectively.(See drawing 3)
safety valve
Install TP valve in the pressure
release outlet with internal and ex-
ternal nuts,connect the drainage pipe
For multi-point water supply,
connect water inlet and outlet
pipe to the right reserved places
respectively.
(See drawing 3)
(See drawing 4)
Note:Water inlet and outlet pipe should be made by material
whose pressure resistance should be over 0.8MPa and temp-
erature resistance over 100℃.It is forbidden to use any pipe
with pressure and temperature resistance lower than required.
3
For filling the product,after having completed the water connection,
open any hot water tap then open the general water tap(if using
mixer turn the handle towards hot position up to the maximum).
After few minutes,water will start to run out from the hot water
tap and this means that the tank is filled.Close the hot water tap.
Check every joint in order to make sure no water leakage.
4
Use the stopper to seal the sewage
outlet.
of the valve,the drainage pipe
shall be installed downwards and as-
sure it is ventilated.
safety
Technical data table
To sewer in the pressure release hole
Floor installation,place the water heater vertically on smooth floor,
support it with triple feet on bottom.
Drawing 2
(See drawing 2)
Use electric drill to make two holes in the solid wall.Distance bet-
ween the two holes should be in accordance with the following dr-
awing2.For what concern the height of the holes please take into
consideration the position on wall of hydraulic connections,the type
of hydraulic pipes used and the distance of the brackets from the
bottom of the heater(see drawing2).
Insert expansions bolts into the performed holes and ensure the
hook face upward.
Lift the water heater,hang and fix it onto hook.
Note:It is strongly recommended to install the heater into a place
equipped with a drainage system.
Horizontal and Vertical on wall
Drawing 5
Step 3:Power connection
Please before electrical connecti-
ons check that the net provide a
voltage of 220-240 in AC with a
frequency of 50/60Hz.
℃
HE-150 HE-200
0.8
220-240Va.c. 50/60Hz
HE-300
Hot water outlet
TP
valve
Drainage
pipe
Cold water inlet
Gasket
Internal and
external nut
Check valve
Hexagonal joint
Drawing 3
→
Hot water outlet
TP
valve
To sewer
→
Cold
water
inlet
Drawing 4
Check
valve
Shower
Stopper
Power
cable
Power
cable
Stopper
Electric box
Leakage
switch
Air
switch
Power cable
150 200
300
4.0
Φ581X664X875 Φ581X664X1095 Φ581X664X1525
 Loading...