11
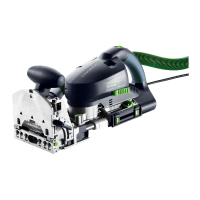
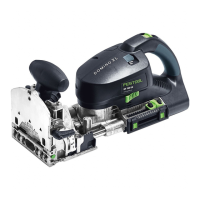
9 Working with the machine
Prior to processing the fi nal workpiece, it is ad-
visable to optimise the dowel-hole depth, width
and diameter using a sample workpiece.
Please observe the following rules
when working:
- Always secure the workpiece in such a manner
that it cannot move while being sawed.
- Always hold the Domino dowel jointer with
both hands at the motor housing and at the
additional handle. This reduces the risk of
injury and is a prerequisite for precise work.
- Close the clamping lever for jointing height
adjustment (2.3) and the clamping lever for
the angle guide (1.5) so that accidental re-
lease during operation is impossible.
- Adapt the feed rate to the jointer bit diame-
ter and material. Work with a constant feed
rate.
- Only lay the Domino dowel jointer aside when
the jointer bit has come to a complete stand-
still.
Procedure
Proceed as follows to create a dowelled joint:
- Select a Domino dowel and insert a matching
jointing bit in the Domino dowel jointer (Chap.
8.1).
- Set the jointing depth (Chap. 8.2). The join-
ting depth must be at least 3 mm smaller than
the workpiece thickness so that the dowelled
joint is supportable.
- Set the jointing height to correspond to the
workpiece thickness (Chap. 8.3).
- Mark the areas on the workpiece that belong
together (10.1) so that you will be able to join
them correctly again once you have cut the
dowel holes.
- Position the two workpieces to be joined
against one another and mark the desired
positions of the dowels with a pencil (10.2).
- Set the desired dowel-hole width (Chap. 8.5).
Our recommendation: Cut the fi rst hole
without play (dowel-hole width = Domino
dowel width), and the remaining dowel holes
to the next largest dowel-hole width (image
10). The fi rst dowel hole therefore serves as a
reference dimension, whereas the remaining
dowel holes have tolerance for manufacturing
inaccuracies.
- Cut the dowel holes:
a) the fi rst dowel hole by placing the stop pin
at the side edge of the workpiece,
b) the following dowel holes according to the
pencil markings made beforehand and the
scale of the viewing window (10.3).
10 Maintenance and care
Always remove the power supply plug
from the socket before carrying out any
work on the machine.
All maintenance and repair work which
requires the motor casing to be opened
may only be carried out by an authori-
sed service centre.
The Domino dowel jointer is to a large extent
maintenance-free. However, we recommend an
annual inspection and/or a check after approx.
100 operating hours at an authorised customer
service workshop. This is for the safety of the
user and the value stability of the Domino do-
wel jointer.
Always keep the machine and the ventilation
slots clean.
Dust deposits must be removed from the guides
(4.3). Oil the guides regularly and lightly with
resin-free oil (e.g. sewing machine oil).
The tool is fi tted with special motor brushes
with an automatic cut-out. When the brushes
become worn the power supply is shut off au-
tomatically and the tool comes to a standstill.
11 Accessories, tools
For your own safety, use only original
Festool accessories and spare parts.
The accessory and tool order number can be
found in the Festool catalogue or on the Internet
under “www.festool.com”.
12 Warranty
Our equipment is under warranty for at least 12
months with regard to material or production
faults in accordance with national legislation.
In the EU countries, the warranty period is 24
months (an invoice or delivery note is required
as proof of purchase).
Damage resulting from, in particular, normal
wear and tear, o-verloading, improper handling,
or caused by the user or other damage caused
by not following the operating instructions, or
any fault acknowledged at the time of purchase,
is not covered by the warranty. Complaints will
only be acknowledged if the equipment has not
been dismantled before being sent back to the
suppliers or to an authorised Festool customer
support workshop.
Store the operating instructions, safety notes,
spare parts list and proof of purchase in a safe
place. In addition, the manufacturer’s current
warranty conditions apply.
Note
We reserve the right to make changes to the
technical data contained in this information as
a result of ongoing research and development
work.

 Loading...