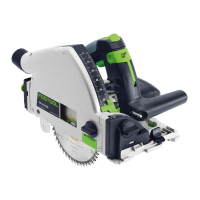
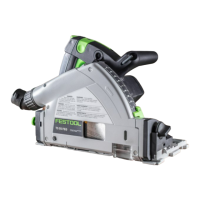
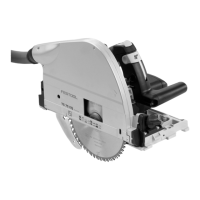
11.5 Guide system
The guide rails, which are available in different
lengths, allow for precise, clean cuts and si
multaneously protect the workpiece surface
against damage. In conjunction with the exten
sive range of accessories, exact angled cuts,
mitre cuts and fitting work can be completed
with the guide system.
The option of securing using G-clamps [17.4]
ensures a firm hold and safe working. The op
tional cord guide [17.2] prevents the power
cord and vacuum hose from catching on the end
of the guide rail.
The guide clearance of the saw table on the
guide rails can be set with the two setting
jaws [17.1].
The guide rails are equipped with a splinter
guard ([17.3], [18.1]), which prevents splinter
ing of the workpiece by holding the top edge of
the workpiece down as the teeth of the saw
blade move upward against it. The spliterguard
has to be cut to size before the first use:
– Set the speed of the machine to level 6,
– Place the machine on the rear end of the
guide rail,
– Switch the machine on, press it down to the
set cutting depth and cut the splinterguard
along the full length without interruption.
The edge of the splinterguard now corre
sponds exactly to the cutting edge.
The splinter guard needs to be replaced if it be
comes damaged or worn:
– Peel the original splinter guard [18.1] away
from the guide rail.
– As needed, clean residual adhesive and de
bris from the guide rail.
– Peel off the plastic backing from the new
splinter guard to expose the adhesive.
– Without stretching the rubber, carefully
place the new splinter guard on the under
side of the guide rail tight to the alignment
rib [18.2].
– Make sure the splinter guard is firmly
pressed down to the guide rail.
– Trim the splinter guard as described be
fore.
11.6 SYSTAINER
Systainer
Many Festool products are shipped in a unique
system container, called "Systainer". This pro
vides protection and storage for the tool and ac
cessories. The Systainers are stackable and
can be interlocked together. They also can be
interlocked atop Festool CT dust extractors.
To open the Systainer
Turn the T-loc [SYS-b-1] to this posi
tion.
To lock the Systainer
Turn the T-loc [SYS-b-1] to this posi
tion.
To connect two Systainers
Place one Systainer on the top of the other
(Fig. [SYS-a]).
English
15