CAUTION: READ AND FOLLOW ALL SAFETY GUIDELINES AND WARNINGS BEFORE HANDLING OR
ATTEMPTING ANY WORK ON YOUR FIELD ONE PAINTBALL MARKER. SHOULD YOU BE UNSURE AT ANY
POINT, STOP AND GET HELP FROM A FIELD ONE PAINTBALL CERTIFIED TECHNICIAN.
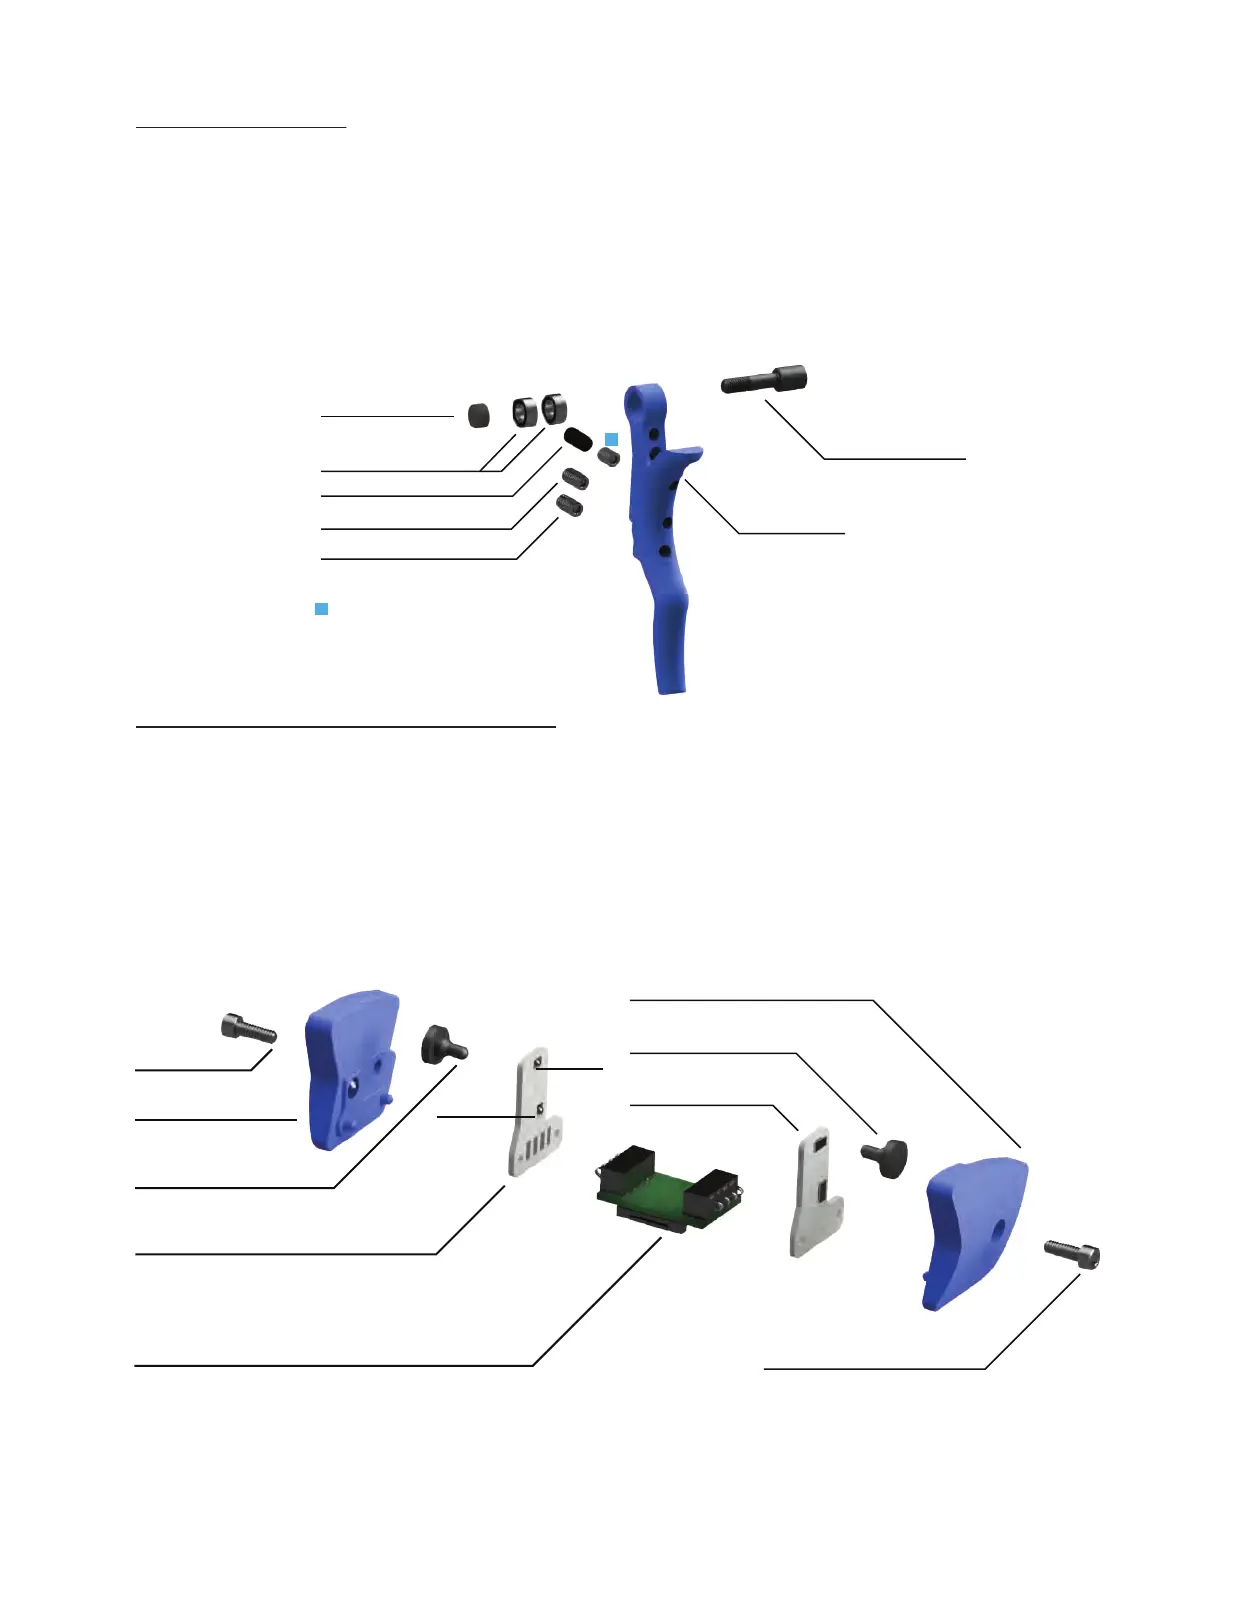
Force KO Trigger Assembly
The Force comes equipped with the KO magnetic trigger and offers a wide range of adjustability by using three different adjustments. To
adjust trigger pull length, use your 1/16th inch allen wrench and insert into the bottom hole in the KO trigger face. Turning the Trigger
Stopper Screw clockwise will shorten the trigger pull length. To adjust the activation point, use the same 1/16th inch allen wrench in the
middle hole in the trigger face. Turning the Trigger Activation Adjustment Screw clockwise will make the trigger activate earlier in the trigger
pull. Turning the screw counter clockwise will make the trigger activate later in the trigger pull. You can also adjust the trigger tension or
magnet tension behind the trigger by using your 1/16th inch allen wrench in the top hole in the KO trigger face and turning the Trigger
Tension Screw clockwise to get more resistance behind the trigger and counter clockwise to get less resistance behind the trigger pull. The
F1 factory trigger setting will keep close to equal trigger travel in front and behind the trigger activation point. This will help to avoid “runaway
trigger” or “trigger bounce.”
4C Illuminate Eye System, Eye Covers and Ball Detents
The eye system in the breech of the Field One Force is called the 4c Illuminate Eye System. This system uses two sets of break beam eyes
to detect whether or not a paintball has settled in the breech and is ready to fire. The upper set of eyes communicates that a ball is moving
into the firing position so there is less delay required when the lower set of eyes reads that the paintball has arrived and allows the firing
sequence to take place. This combination of eyes and technology allows for the fastest read rate and produces incredibly high rates of fire
with the eyes fully functional. If a paintball cracks in the breech or is chopped by the bolt (shooting with eyes OFF) the eyes will need to be
cleaned to ensure that the “break beam” is unimpeded and the eyes are fully functional. To inspect or clean the eyes and ball detents, simply
remove the eye covers with your 5/64 allen wrench and wipe with a soft cloth or cotton swab until the eyes/eye boards/detents are free from
paint or debris. Do not use water to clean the eye boards as this may cause a short or malfunction in the eye board. Carefully place the eye
board back in the recessed area of the body and make sure the rubber ball detents are fully seated in the appropriate hole. When reattaching
the eye cover, make sure to not crush the eye board. The eye cover mounting screw should be snug but not overtightened. The eye cover
should sit flush with the body when properly installed. You can verify proper eye function by turning on the marker and checking the OLED
readout for eye function.
Trigger Mounting Screw
Trigger Spacer
Roller Bearings
Trigger Activation Adjustment Screw
Trigger Stopper Screw
A
A
Trigger Tension Adjustment Screw
Trigger Tension Magnet
KO Trigger
Eye Cover
Mounting Screw
Left Eye Cover
Ball Detent
Left 4-C Eye
Bridge Board
Ball Detent
Right Eye Cover
Eye Cover
Mounting Screw
Right 4-C Eye
Top Eye
Bottom Eye
 Loading...