CAUTION: READ AND FOLLOW ALL SAFETY GUIDELINES AND WARNINGS BEFORE HANDLING OR
ATTEMPTING ANY WORK ON YOUR FIELD ONE PAINTBALL MARKER. SHOULD YOU BE UNSURE AT ANY
POINT, STOP AND GET HELP FROM A FIELD ONE PAINTBALL CERTIFIED TECHNICIAN.
Adjusting your FORCE Software Settings (Force Main Board Version 1.0)
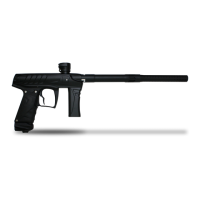
The Field One Force comes equipped with the Force Main Board. The Force Main Board allows the user to manually adjust board settings
with the OLED interface on the Force grip frame.
Y
our Field One Force will come from the Field One Paintball Factory with the latest program code and the optimal board settings (referred to
as “DEFAULT” or “FACTORY DEFAULT”) for the highest marker performance under most conditions. Once board settings have been
changed, board settings can be adjusted back to “FACTORY DEFAULT” at anytime by activating “Factory Reset” in PROGRAMMING
MODE. Depending on local rules and regulations you may need to adjust the RATE OF FIRE setting and/or the FIRING MODE setting for
your Force Marker before playing with your Force Marker. Instructions for adjusting these settings can be found here in the Field One Force
User Manual or the Field One Force Quick Start Guide.
TOURNAMENT/BOARD LOCK
Your Force marker has a lock function that insures that the programmable settings cannot be adjusted without tools when the lock is ON.
When the lock is ON, the lock indicator icon will display if you attempt to enter “settings adjustment mode." To turn the lock OFF, turn on the
marker and use your 5/64 allen wrench to remove the 3 screws that hold the left grip panel to the grip frame. Open the grip panel and press
the button labeled “LOCK” on the main board. To toggle between Lock ON and OFF, repeat these steps. When the marker is on and the
LOCK button is pressed, the OLED screen will display whether the board has been locked or unlocked. Some tournaments will require you
to play with the tournament/board lock ON (settings are locked).
Once the tournament/board lock is off you may adjust the software settings by using the grip frame OLED. The marker will not fire while in
programming mode but we highly suggest you remove the air source and paintballs from the marker before entering PROGRAMMING
MODE and adjusting settings. WARNING: Always keep barrel blocking device in place while adjusting board settings.
Using the OLED to Adjust Settings
To access the settings menu
1 Hold down the trigger while powering the marker ON. The OLED screen will flash with the current software version and then enter
PROGRAMMING MODE.
2 Once in PROGRAMMING MODE, you can cycle through the settings by pulling the trigger until you reach the desired setting. (By
scrolling through the different settings, you will also be able to see the current value for each setting.)
3 To adjust a setting scroll to the desired setting by pulling the trigger then tap the power button to enter ADJUSTMENT MODE for that
particular setting.
4 Use the trigger to adjust the setting to your satisfaction.
5 Tap the power button once more to exit the ADJUSTMENT MODE for that setting. The setting has now been changed.
6 If you wish to return to the factory settings (DEFAULT), enter programming mode, scroll to the FACTORY RESET setting and adjust
to “RESET YES.”
You may adjust more settings while you are in PROGRAMMING MODE by following steps 3 through 5 listed above turn the marker OFF by
pressing and holding the power button for 3 seconds to save your new settings. The gun will retain the new settings until they are changed or
the software is updated. Below is a list of adjustable settings and their functionality.
 Loading...