CAUTION: READ AND FOLLOW ALL SAFETY GUIDELINES AND WARNINGS BEFORE HANDLING OR
ATTEMPTING ANY WORK ON YOUR FIELD ONE PAINTBALL MARKER. SHOULD YOU BE UNSURE AT ANY
POINT, STOP AND GET HELP FROM A FIELD ONE PAINTBALL CERTIFIED TECHNICIAN.
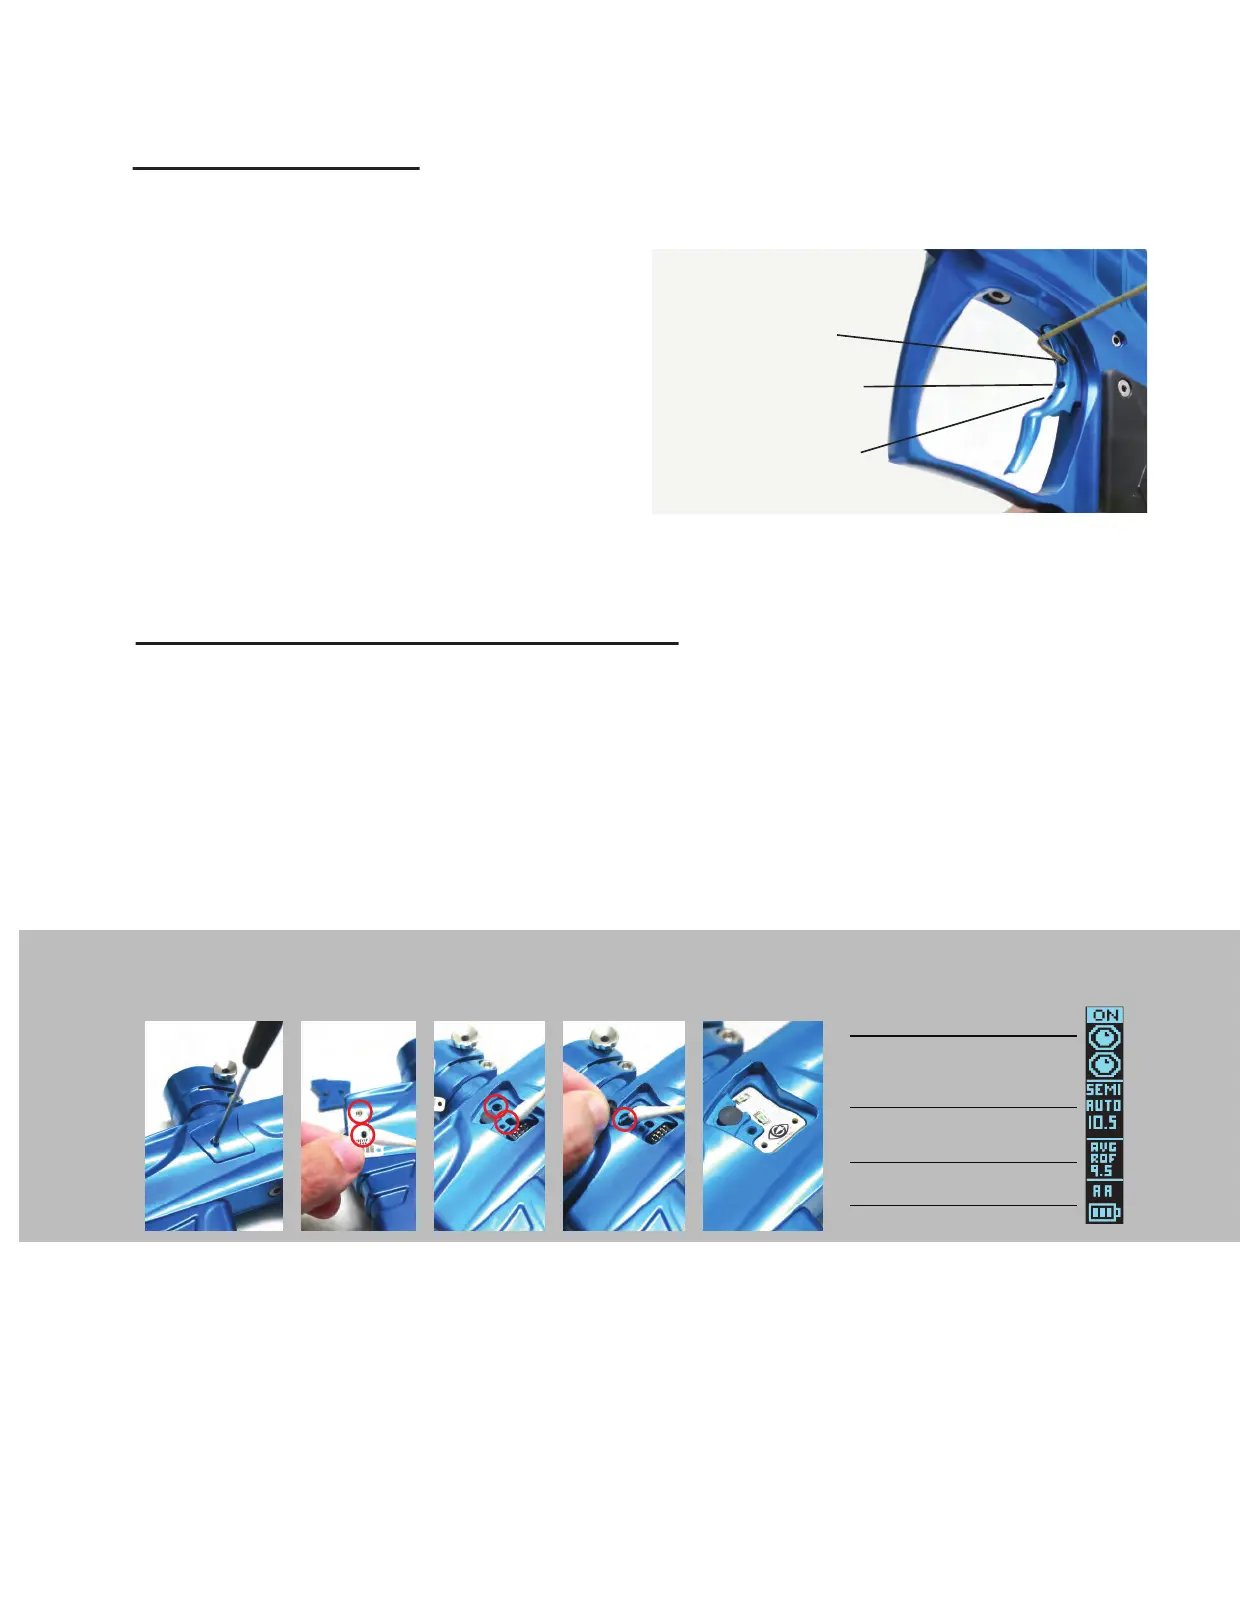
The Force has a magnetic trigger system (fig 1). To Adjust the tension
of the trigger pull use a 1/16 allen wrench to adjust the magnet
tension adjustment screw located in the top hole of the trigger. To
lessen the magnet tension on the trigger (create a lighter trigger pull)
turn the tension adjustment screw counter clockwise. To increase the
magnet tension on the trigger (create a stiffer trigger pull) turn the
tension adjustment screw clockwise.To change the activation point of
the trigger pull (the point in the trigger pull in which the gun fires) use
a 1/16 allen wrench to move the activation adjuster screw located in
the middle hole on the trigger. To have the trigger activate sooner in
the trigger pull turn the activation adjustment screw clockwise. To
have the trigger activate later in the trigger pull adjust the screw
counter clockwise. The Trigger stopper screw is located in the bottom
hole of the trigger. The position of this screw determines the length of
the trigger pull. In order to shorten the trigger pull adjust the trigger
stopper screw clockwise. In order to lengthen the trigger pull adjust
the trigger stopper screw counter clockwise.
Trigger Adjustment
Magnet Tension
Adjustment
1. Trigger Adjustment
Activation Adjustment
T
rigger Stopper
Adjustment
4. Remove and
clean ball detents
and openings.
5. Reinstall eye boards
and ball detents.
Replace eye cover
.
3. Clean out eye
ports located in
body
.
1. Remove eye
covers using
5/64 allen wrench
2. Clean off eyes
with a cloth, towel
or swab.
EYE INDICATOR
FIRE MODE INDICATOR
RATE OF FIRE INDICATOR
BATTERY LEVEL AND
SOURCE INDICATOR
OLED DISPLAY
4C Illuminate Eye System (4C-ES)
Y
our F1 Force is equipped with the Illuminate 4-C Eye System consisting of 2 sets (upper and lower) of break beam eyes, this feature allows
the F1 Force to achieve maximum rates of fire while decreasing the chance of breaking paint in the breech. The eye indicator located on the
upper portion of the OLED screen (fig 6) will display the status of the 4C-ES. When Your F1 Force is powered ON the 4C-ES system is active
by default. When the 4C-ES is active the marker will not shoot unless there is an object present in the breech or if the user holds the trigger
down for one second (force shot). To turn the 4C-ES OFF tap the power button twice within 1 second. You will notice that the OLED display
indicates that the 4C-ES is off. You must turn off the 4C-ES in order to fire your marker without paintballs (dry fire). It is not recommended
that you dry fire your marker excessively. To toggle between “eyes ON” and “eyes OFF,’’ tap the power button twice within 1 second. Playing
with your 4C-ES OFF will greatly increase your chances of breaking paint in the breech. If the 4C-ES display shows a fault the eyes may be
dirty. To clean and inspect the eye system use a 5/64 allen wrench to remove the eye covers (fig 1). Th 4C eye boards are held in place by
the eye covers. Remove the eye boards carefully and clean them off (fig 2). Clean the eye ports in the main-body (fig 3). Remove and clean
ball detents and ball detent openings in body (fig 4). Once they are clean and clear reinstall the eye boards, ball detents (fig 5) and secure
the eye covers in place using the eye cover screw.
 Loading...