WINDOWS 49
TO SET UP IPP PRINTING WITH WINDOWS
1 Windows 2000: Click Start, choose Settings, and then choose Printers.
Windows XP: Click Start and choose Printers and Faxes.
Windows Server 2003: Click Start, choose Control Panel, and then choose Printers and Faxes.
Windows Vista: Click Start, choose Control Panel, and then double-click Printers.
Windows Server 2008: Click Start, choose Control Panel, and then double-click Printers under
Classic View.
Windows 7/Server 2008 R2: Click Start, choose Control Panel, choose Network and Internet,
choose Network and Sharing Center, and then click the View network computers and devices
link.
2 Windows 2000/XP: Double-click the Add Printer icon and click Next.
Windows Server 2003: Double-click the Add a printer icon and click Next.
Windows Vista/Server 2008/Server 2008 R2/Windows 7: Click Add a printer.
3 Windows 2000/XP/Server 2003: Select Network printer and click Next.
Windows Vista: Select Add a network printer.
Windows Server 2008/Server 2008 R2/Windows 7: Select Add a network, wireless, or
Bluetooth printer.
4 Windows 2000/XP/Server 2003/Vista: Select Connect to a printer on the Internet or
your intranet.
Windows Server 2008/Server 2008 R2/Windows 7: If the printer search takes a long time,
click Stop, and then click “The printer that I want isn’t listed.”
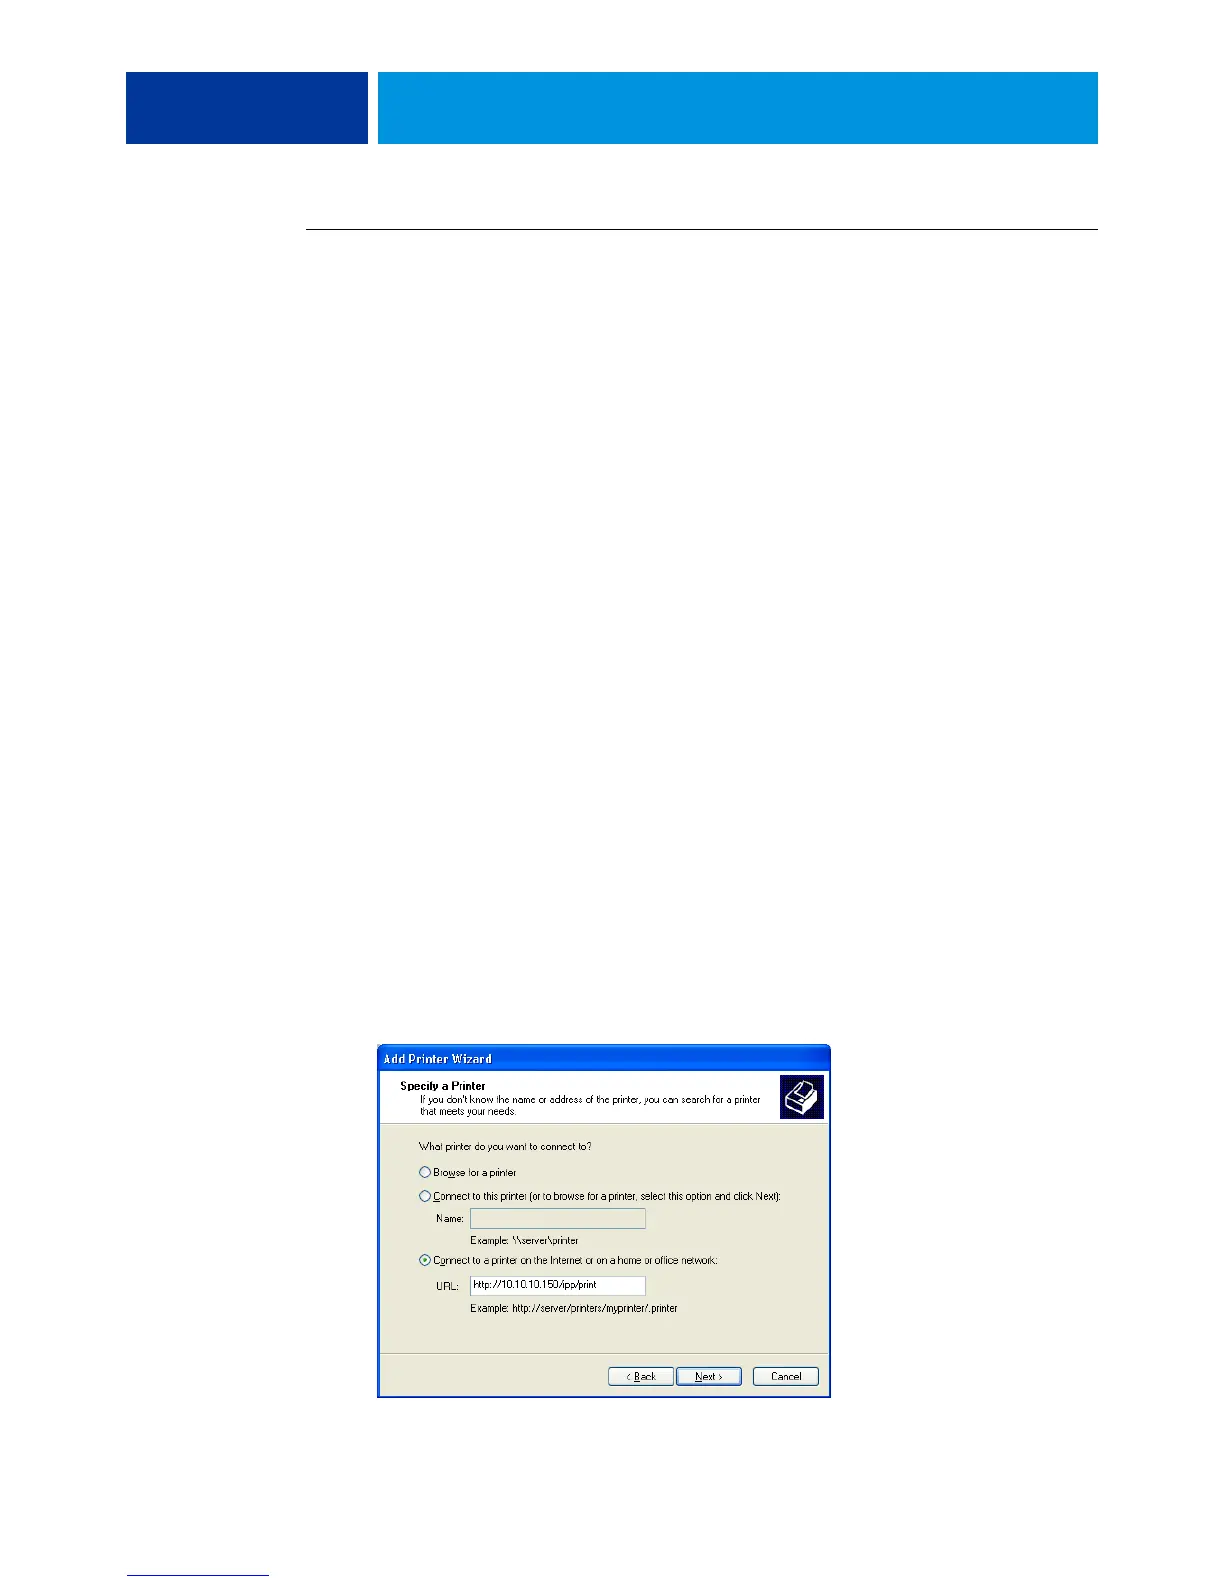
5 Windows 2000/XP/Server 2003/Vista: In the URL field, type the IP address or DNS name of
the E100, followed by “ipp/” and then the name of the connection (hold, direct, print, or
name of virtual printer).
For example, http://10.10.10.150/ipp/print or http://DNS name of the E100/ipp/print sends
the job to the Print queue on the E100.
For IPP over SSL, type
https, instead of http.
NOTE: The ipp/print in the example is case sensitive.


 To Next Page