Do you have a question about the Filtech DP 200 and is the answer not in the manual?
This document is a user and maintenance manual for a reverse osmosis device, specifically for models DP 200, DP 200 T, DP 200 SLIM, DP 200 SLIM LT, DP 400, DP 400 T, DP 500, and DP 500 T. The device is intended for use in a household environment for processing and supplying already drinkable water for human consumption. Any other use is not permitted.
The reverse osmosis device utilizes a natural phenomenon where water passes through a semi-permeable membrane, diluting mineral salts. This process is inverted in the device: by pushing a solution with a high concentration of mineral salts against a special membrane, processed water is obtained. This process effectively removes all impurities and harmful pollutants, including dissolved salts, heavy metals, pollutant elements, bacteria, and viruses, ensuring the water is pure. The DP model is designed for household use and delivery, with an exclusive filtration system forming a safety barrier against different pollutants in groundwater. The system offers automatic osmosis management and water delivery controlled by a maximum pressure switch. When the water demand ceases (e.g., when the tap is closed), the pressure rises, triggering the pressure switch (2.5 bar), and the control unit stops water delivery.
The device also features an emergency bypass function that integrates a system which, if locked, re-routes the entire input water directly to the output by opening a solenoid valve. This is useful if treated water cannot be delivered while waiting for technical support. To activate the bypass, the diverter valve (8) should be brought to the bypass position. The bypass circuit is protected by a fuse, and if the system does not supply water even after the bypass function is enabled, the fuse may need to be replaced. An anti-flooding system is integrated, which detects leaks and immediately stops water delivery. This system prevents and blocks flooding from leaks outside the machine.
Electrical Power Supply: 220VAC - 50Hz Maximum Power Models 400 and 500: 500W Maximum Power Models 200 and SLIM: 250W Fuse Models 400 and 500: 5A T Fuse Models 200 and SLIM: 3.15A T Min/Max Supply Pressure: 1 / 5 bar Pump Maximum Pressure: 9 bar Min/Max Water Temperature: 5 / 35 °C Max Permitted Chlorine: 0.2 PPM Max Permitted Iron: 0.1 PPM Max Permitted Manganese: 0.1 PPM Max Salinity: 1500 µS/Cm Min/Max Ambient Temperature: 5 / 40 °C Max Relative Humidity: 95 %
Nominal Performance (Production at 25°C):
Dimensions (L x H x D [cm] / No Load Weight [Kg]):
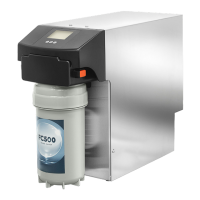
The device is designed for installation in a closed environment, not outdoors, in a hygienically suitable location, protected from frost. It must also be connected to standard electricity mains and drinking water mains, in compliance with technical characteristics. For optimal preservation, membranes are kept in preservative substances. Therefore, the first water produced by a new system, or one in which the osmotic membrane was replaced, should be let flow for 2 cycles of approx. 10 minutes, with 1-minute stop intervals. Always install a sediment pre-filter with an adequate flow rate and characteristics based on the system and input water quality. Installations, repairs, and interventions must be carried out by authorized staff. The SLIM models require non-optional FC500 filtration.
Start-up:
Pump Adjustment: The vessel is equipped with a pressure adjustment system. The pressure testing phase is adjusted to 8 bar. The pressure can vary based on actual conditions at the installation site or system wear. After installation and during maintenance checks, adjust the pressure if necessary. Permitted values are: Minimum 6.5 bar, Optimal 8 bar, Maximum 9 bar.
Mixer Adjustment: The pump is equipped with a bypass system to adjust the fixed residue of the produced water. The bypass is completely tightened in the test phase. After installation and in the maintenance phase, check and adjust the bypass if necessary. The fixed residue can be estimated with a TDS meter or conductivity meter. Use the bypass system knob until the desired value is reached. Fixed residue that is too low could influence the pH. After adjustment, measure the pH, checking that it remains within potability values.
Electronic Management (LCD Control Unit): The control unit provides basic functions such as delivery piloted by a pressure switch, pump protection with minimum pressure switch, flushing after each delivery, anti-residue every 6 hours, filter management based on time and litres delivered, detection of leaks and water flow obstructions, and lock after 15 minutes of continuous delivery. Configuration is done via dip switch. The display board shows filter status, water delivery, and litres until filter change.
RO-Check System: This control unit manages both reverse osmosis machines, HORECA machines, and household appliances. It includes basic functions like delivery piloted by a pressure switch, pump protection with input pressure transducer, pump pressure transducer with alarms, conductivity reader with alarms, permeate flow reader with alarms, flushing after each delivery, anti-residue every 6 hours, filter management based on time and litres delivered, detection of leaks and water flow obstructions, and configuration via the RO-Check app. The RO-Check app allows reading and calibrating sensors, counters, and statistics, setting basic configuration and password, installation and production data, records of errors and intervention records, and support for documentation and troubleshooting.
Regular maintenance is required to guarantee the potability requirements of the treated drinking water and to maintain the improvements declared by the manufacturer. Input water must be drinkable according to Ministerial Decree no. 31 of 2 February 2001.
Summary Table for Time of Use and Maintenance Methods:
Important: After installation, the machine must be powered on for hygiene reasons (flushing) and for correct management of the exhausted filter. Sanitize and replace the pre-filter after periods of disuse longer than 10 days in the absence of electrical power supply.
Procedure for Pre-filter Replacement and Sanitisation:
Procedure to Replace the Membranes:
Procedure for the Flow Restrictor: To replace the flow restrictor, unscrew the screws (3), remove the fitting (2). Remove the restrictor (1) from the fitting and place in the new fitting. Observe the correct direction. Re-assemble the screws, fasten with reversible thread-locker.
Fault Management: The manual provides a detailed table of anomalies and corresponding interventions, covering issues such as input pressure alarm, input flow rate alarm, pump not working, low pump pressure, pump pressure too high, permeate quality alarm, permeate flow rate alarm, exhausted filter, leak alarm, and machine resets. For example, an input pressure alarm is triggered by an input pressure under 0.5 bar when the machine is not in water delivery mode, requiring checking the water supply circuit and possible shut-off taps. A leak alarm is triggered by water on the flooding sensor, requiring disconnection of electrical power, identification and repair of the cause, and ensuring the sensor is dry before restarting.
| Brand | Filtech |
|---|---|
| Model | DP 200 |
| Category | Water Filtration Systems |
| Language | English |