(22) KΩVHz . Displayed when measuring ohms or voltage
or frequency.
(23) PEAK . Displayed when current flow readings are in
halfcycle peak amperes (Crest mode).
(24) RMS . Displayed when current reading is in amperes
rms.
(25) OFF-SCALE ARROW . Displayed when bar graph
pointer is off scale.
(26) DUAL . Displayed when measuring frequency
i
n
digital and amperes in bar graph simultaneously.
(27) A . Displayed when meter is measuring amperes.
(28) DIGITAL DISPLAY . Displays 3999 counts, with two
decimal points relative to the two ranges. But,
displays 9999 counts in frequency mode. Display
i
s
updated 4 times each second.
(29) POINTERS . Displayed to indicate position on bar
graph scale. Positions are updated 20 times each
second.
(30) ANALOG DISPLAY POLARITY . Displays + or -
when the pointers are displayed.
(31) 0 to 400A . (or 0 to 800A.) Numeric reference for the
bar graph.
(32) . Disp
l
ayed when internal battery needs
replacing.
(33) AC . Alternating Current or Voltage.
(34) . Automatically indicate negative d
i
gital
displays.
(35) AUTO . D
i
splayed when autoranging controls bar
graph scale (0 to 40A scale, or 0 to 400A scale) and
controls position of decimal point on digital display.
(36) POWER LOCK .
Displayed when the Auto Power off
mode of the meter has been disabled.
(37) BEEPER . Beeps for pushbutton operation or current
overload.
(38) OFL . Overflow Indication.
76
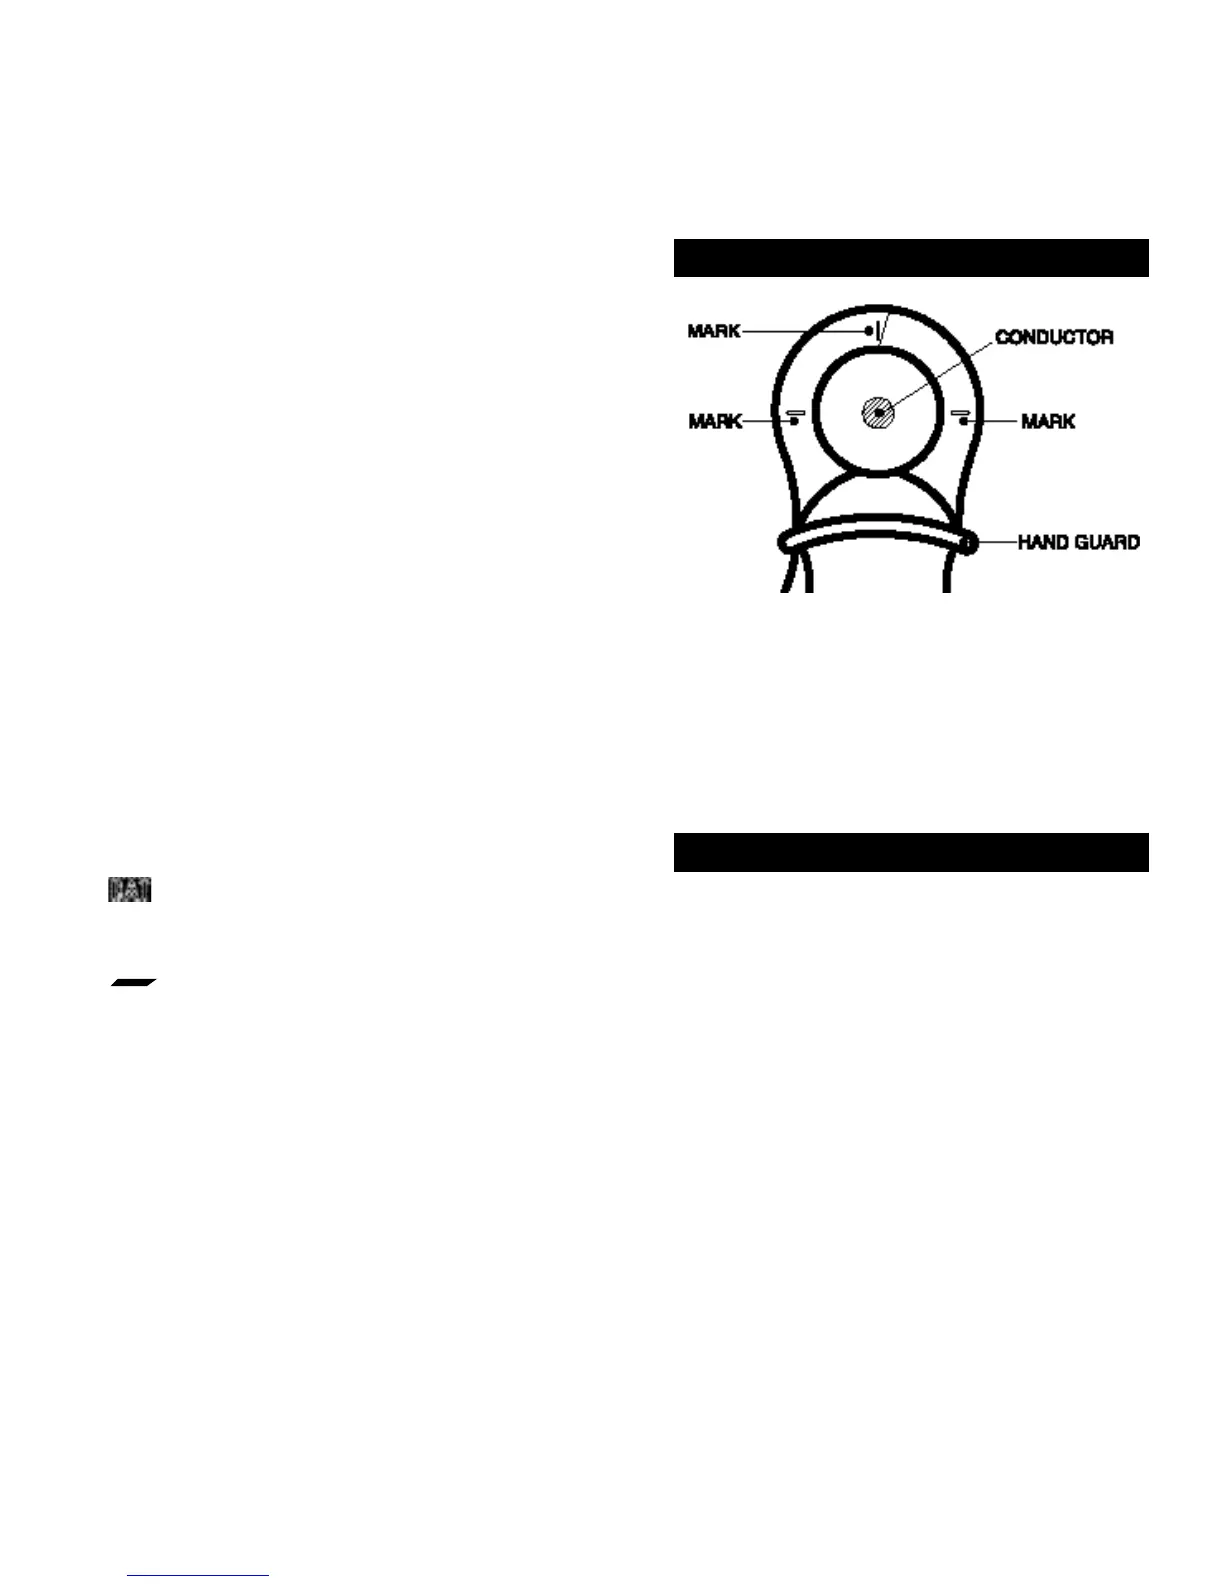
Position the conductor within the jaws at the intersection of
the indicated marks as much as possible (Figure 1) in order
to meet this Meter’s accuracy specifications.
If the conductor is positioned elsewhere within the jaws, the
maximum additional error resulted is 1.5 percent.
4. Alignment Marks
5. How to Use this Meter
5.1 Battery Replacement
This Meter is powered by a single 9V battery (NEDA Type
1604A, 6LF22, or 006p). To guarantee the specified battery
life, alkaline or other long-life batteries are recommended.
If the low-battery indicator on the dig
i
tal display will be
d
i
s
played, replace the battery by using the following
procedure referring to Figure 2.
1. Unclamp this Meter from any conductor, and turn it off by
pressing the ON OFF pushbutton.
2. Place this Meter fa
c
e do
w
n on a non abrasive surface
and completely loosen the three rear panel screws with
a Phillips-head screwdriver.
Figure 1. Alignment Marks
 Loading...