EasyManua.ls Logo

FirePro FP510V - User Manual

Default Icon
6 pages
Print Icon
To Next Page IconTo Next Page
Loading...
Smoke Alarm Device User Manual
Model number: FP510V
Thank you for purchasing our smoke alarm. Please take a few
minutes to read the users manual thoroughly and familiarise
yourself and your family with its operation and save it for
future reference.
Diagram 2 will help you determine the correct location of
safety products that will help make your home a safer place.
Diagram 1
Product Specications:
POWER: built-in DC3V(CR123A) Lithium battery
(battery not replaceable)
OPERATION CURRENT: <8uA (standby), <70mA
(alarm)
ALARM VOLUME: >85dB(A) at 3 meters
ALARM SENSITIVITY: 0.130-0.200dB/m
SILENCE TIME: approx. 10 minutes
SMOKE ALARM DEVICE SOUND PATTERN:
ISO8201(BI 0.5s - pause 0.5s – BI 0.5s – pause 0.5s – BI
0.5s – pause 1.5s, with the red LED ash, repeat this alarm
pattern.)
COMPLY WITH: AS3786:2014
Description:
The unit is a photoelectric smoke alarm device. With the
photoelectric technology, it is more sensitive to detecting
slow smoulder res which generally have thick, black smoke,
a little heat and may smoulder for hours before bursting
into ames. The smoke alarm device does not contain the
radioactive material which is harmless to the environment.
Smoke alarms should be installed in every room and area of
the home (except the bathroom and kitchen), to ensure the
everyone in the home will be able to hear and respond to the
alarm sound. For minimum protection you should t an alarm
in the hallway between the living areas, bedrooms and child
rooms. Each unit shall be placed in the middle of the ceiling
of each room.
Typical single storey dwelling recommended protection:
Install a smoke alarm device on the ceiling or wall inside
each bedroom and in the hallway outside each separate
sleeping area. If a bedroom area hallway is more than 9.1m
long, install a smoke alarm device at each end. If there is
a basement: install a smoke alarm device on the basement
ceiling at the bottom of the stairwell.
Typical multi-storey dwelling recommended protection.
Install a smoke alarm device on the ceiling or wall inside each
bedroom and in the hallway outside each separate sleeping
area. If a bedroom area hallway is more than 9.1m long,
install a smoke alarm device at each end install a smoke alarm
device at the top of a rst – to- second oor stairwell.
Important Safety Information:
1: The test button accurately tests smoke alarm device
functions. Do not use any other test method. Test smoke
alarm device weekly to ensure proper operation.
2: If you’re sure it isn’t a re, open windows or fan the air
around smoke alarm device for silence it
3: Observe and follow all local and national electrical and
building codes for installation.
4: This smoke alarm device is designed to be used inside a
single family residence only. In multi-family buildings,
each individual living unit should have its own smoke
alarm devices. Do not install in non-residential buildings.
This smoke alarm device is not a substitute for a complete
alarm system.
5: Install a smoke alarm device in every room and on every
level of the home. Smoke may not reach the smoke alarm
device for many reasons. For example, if a re starts in a
remote part of the home, on another level, in a chimney,
wall, roof, or on the other side of a closed door, smoke may
not reach the smoke alarm device in time to alert household
members. A smoke alarm device will not promptly detect a
re except in the area or room in which it is installed.
6: Smoke alarm device may not alert every household
member every time. The alarm horn is loud in order to
alert individuals to a potential danger. However, there may
be some circumstances where a household member may
not hear the alarm (i.e. outdoor or indoor noise, sound
sleepers, drug or alcohol usage, the hard of hearing, etc.).
If you suspect that this smoke alarm device may not alert
a household member, install and maintain specialty smoke
alarm devices. Household members must hear the alarm’s
warning sound and quickly respond to it to reduce the risk
of damage, injury, or death that may result from re, If a
- 1 -
AS 3786-2014
Lic.SMK40627
SAI Global
Question and Answer IconNeed help?

Do you have a question about the FirePro FP510V and is the answer not in the manual?

Summary

Product Specifications

Description and Placement

Installation Recommendations

Single Storey Dwelling Protection

Recommendations for protecting single-storey homes.

Multi-Storey Dwelling Protection

Recommendations for protecting multi-storey homes.

Important Safety Information

Test Button Usage

Use the test button to accurately test smoke alarm functions.

Silence Alarm Procedure

How to silence the alarm if it is not a fire.

Installation Codes Compliance

Observe and follow all electrical and building codes for installation.

Residence Type Restrictions

Smoke alarm is for single-family residences only, not multi-family or non-residential.

Fire Detection Limitations

Smoke alarms may not detect fires in remote areas or rooms with closed doors.

Audibility and Response

Ensure all household members can hear and respond to the alarm.

Prohibited Installation Locations

Areas with Combustion

Do not install near appliances with normal combustion like kitchens or furnaces.

High Humidity Areas

Avoid bathrooms or areas near dishwashers; install at least 3m away.

Ventilation Systems

Do not install near air returns or vents; air can blow smoke away.

Extreme Temperatures;Humidity

Avoid rooms below 5°C or above 45°C, or humidity over 85%.

Dusty or Dirty Areas

Do not install in dusty, dirty, or insect-infested areas as particles interfere.

Operation

Testing the Alarm

Test the unit weekly by pressing the test button to ensure proper function.

LED Indicator Meanings

Explains the meaning of different red LED flashing patterns.

Alarm Silence (Hush Mode)

Procedure to temporarily silence the alarm for nuisance alarms like cooking smoke.

Maintenance and Cleaning

Cleaning Procedure

Clean the alarm annually using compressed air or vacuum; do not use wet cloths.

Low Battery Monitor

Explains the low battery chirp and red LED flash indication.

Painting Warning

Do not paint the unit as it interferes with the sensor.

Alarm Replacement and Repair

Recommended Replacement Interval

Replace the alarm every ten years from the date of manufacture.

Battery Replacement Limitation

Battery is sealed and not replaceable; replace the unit when low battery chirp occurs.

Repair and Warranty Claims

Return to place of purchase for repair/replacement if under warranty; replace if out of warranty.

Troubleshooting Common Issues

Alarm Does Not Sound When Tested

Steps to troubleshoot when the alarm fails to sound during testing.

Alarm Chirps Every 40 Seconds (Fault Mode)

Troubleshooting steps for fault mode indication.

Unwanted or Intermittent Alarms

Solutions for nuisance alarms from cooking, showers, etc.

Abnormal Sounding Pattern

Troubleshooting steps for alarms that sound intermittently or differently.

Alarm Deactivation

Fire Safety Practices

Family Escape Plan

Develop and practice family escape plans, including exit determination and meeting points.

Door Safety Check

Teach members to check doors for heat and use alternate exits if hot.

Smoke Inhalation Avoidance

Instruct members to crawl low to avoid smoke, fumes, and gases.

Emergency Fire Response

Immediate Actions

Stay calm, leave building quickly, check doors for heat, and use alternate exits.

Post-Evacuation Steps

Meet at a designated place, call fire department from outside, do not re-enter.

Warranty Information

Optimal Installation Locations

Bedroom Area Placement

Install first alarm near bedrooms and additional alarms in each sleeping area.

Stairway and Floor Coverage

Install alarms on stairways and at least one on every floor.

Room-Specific Installation

Install in bedrooms, rooms with large appliances, or rooms where people sleep with doors closed.

Ceiling Mounting Preference

Ceiling mounting in the center of the room is preferred for optimal detection.

Specific Ceiling Mounting Guidelines

Side Wall Clearance

Mount alarms at least 30 cm (12 in) from the side wall.

Hallway;Large Room Placement

Place alarms at both ends of long hallways or rooms (>9.1m).

Sloped;Peaked Ceiling Placement

Install on sloped ceilings between 500-1500mm from the highest point.

Installation

Alarm Activation

Activate the alarm by pressing the test button until LED lights and it beeps.

Bracket Mounting

Attach the bracket to the wall/ceiling, marking holes and securing with screws.

Alarm Attachment

Fit the alarm onto the bracket and turn clockwise until it matches.

Final Test

Press the button to test the unit; it should sound 3 beeps with pauses.

Installation Warnings

Overview

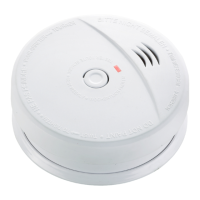
This document describes the FP510V Smoke Alarm Device, a photoelectric smoke alarm designed to enhance home safety by detecting slow smoldering fires.

Function Description

The FP510V Smoke Alarm Device is a photoelectric smoke alarm, which means it is particularly sensitive to detecting slow smoldering fires that typically produce thick, black smoke and little heat, often smoldering for hours before igniting into flames. Unlike some other types of smoke alarms, this device does not contain radioactive material, making it environmentally friendly.

The primary function of the smoke alarm is to provide an audible warning of a developing fire. When smoke or combustion particles are detected in the air, the alarm will sound a loud horn, exceeding 85 dB(A) at 3 meters, to alert household members. The alarm sound pattern follows ISO8201 standards: three 0.5-second beeps separated by 0.5-second pauses, followed by a 1.5-second pause, with a red LED flash accompanying this pattern.

The device is designed for use in single-family residences and should be installed in every room and on every level of the home, excluding bathrooms and kitchens, to ensure comprehensive coverage. For minimum protection, it is recommended to install an alarm in the hallway between living areas, bedrooms, and child rooms. Each unit should be placed in the middle of the ceiling of each room.

In typical single-storey dwellings, recommended protection includes installing a smoke alarm device on the ceiling or wall inside each bedroom and in the hallway outside each separate sleeping area. If a bedroom area hallway is longer than 9.1 meters, a smoke alarm device should be installed at each end. For basements, a smoke alarm device should be installed on the basement ceiling at the bottom of the stairwell.

For multi-storey dwellings, recommended protection involves installing a smoke alarm device on the ceiling or wall inside each bedroom and in the hallway outside each separate sleeping area. If a bedroom area hallway is longer than 9.1 meters, a smoke alarm device should be installed at each end, and another at the top of a first-to-second floor stairwell.

The device is powered by a built-in DC3V (CR123A) Lithium battery, which is not replaceable. This means the entire unit must be replaced when the battery is low or after 10 years from the date of manufacture.

Usage Features

Testing: The FP510V smoke alarm should be tested weekly to ensure proper operation. This is done by pressing the test button. If the electronic circuitry, horn, and battery are working correctly, the alarm will sound. If no alarm sounds, it indicates a defective battery or other failures, and the troubleshooting section should be consulted. It is crucial to stand an arm's length away from the unit during testing due to the loudness of the alarm (85 decibels). Never use an open flame to test the alarm, as this can damage the device or ignite combustible materials.
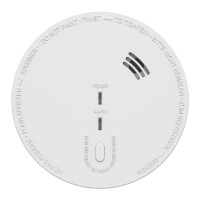
LED Indicators:

  • Red LED - Flashing once every 40 seconds: This indicates that the smoke alarm device is operating properly.
  • Red LED - Flashing once per second: This occurs when the test button is pressed or when the smoke alarm device senses combustion particles and goes into alarm (constant pulsating sound). The flashing LED and pulsating alarm will continue until the air is cleared or the test button is released.
  • Red LED - Flashing once every 8 seconds: This indicates that the smoke alarm device is in alarm silence (Hush) mode.

Alarm Silence (Hush Mode): If the unit is alarming due to a known non-fire condition (e.g., cooking smoke), the test button can be pressed to temporarily pause the alarm for approximately 10 minutes. During this period, the red LED will flash once every 8 seconds, indicating that the smoke alarm device is in silence mode. This feature is particularly useful in kitchen areas or other locations prone to nuisance alarms. It's important to identify the source of the smoke and ensure a safe condition exists before using the alarm silence feature. Dense smoke will override the alarm silencer and cause a continuous alarm to sound again.

Low Battery Indication: An intermittent "chirp" with a red LED flash occurring once every 40 seconds indicates that the smoke alarm device battery is low. The test button can be pressed to silence this warning for 10 hours, but it will reset automatically after 10 hours. When this occurs, the smoke alarm device must be replaced immediately.

Fault Indication: If the alarm chirps every 40 seconds, it indicates a fault. Similar to the low battery warning, pressing the test button can temporarily pause this warning tone for 10 hours. The alarm can still detect smoke during this period, but the nuisance warning tone is removed. If the fault persists, refer to the troubleshooting section or contact the retailer during the warranty period. The unit must be replaced if a fault cannot be resolved.

Deactivation: To deactivate the smoke alarm, press and hold the test button for about 10 seconds until the LED flashes rapidly (5 times per second). Then, rapidly press the test button at least 6 times within 5 seconds (or while the LED flashes rapidly). The unit will generate a "beep" indicating it is in inactivation mode, with no functions in this state. The alarm must be reactivated for use. This feature is useful for disposal or to stop nuisance alarms caused by a function failure.

Fire Safety Practice: In the event of an alarm that is not a test, it signifies a dangerous situation requiring immediate response. It is crucial to have family escape plans, discuss them with all household members, and practice them regularly. Key steps include:

  1. Familiarizing everyone with the sound of the smoke alarm.
  2. Identifying two exits from each room and an escape route to the outside.
  3. Teaching household members to check doors for heat before opening and using alternate exits if hot.
  4. Instructing household members to crawl along the floor to stay below dangerous smoke, fumes, and gases.
  5. Determining a safe meeting place outside the building. In case of fire, remain calm, leave the building quickly, do not stop to collect anything, meet at the pre-arranged location, call the fire department from outside, and do not re-enter the burning building.

Maintenance Features

Cleaning: The smoke alarm should be cleaned at least once a year to ensure optimal performance. To clean, remove the alarm from its bracket. Use compressed air or a vacuum cleaner hose with a soft brush attachment to blow or vacuum around the perimeter of the alarm, removing dust, dirt, and debris. The outside of the alarm can be wiped with a damp cloth, but avoid using a wet cloth that could allow water to enter the inner workings of the alarm. After cleaning, reinstall the alarm and test it by pressing the test button. If cleaning does not restore the alarm to proper operation, it should be replaced.

Do Not Paint: Painting the unit is strictly prohibited as paint will seal the vents and interfere with the sensor's ability to detect smoke, compromising its effectiveness.

Replacing the Alarm: This alarm has a lifespan of 10 years from the date of manufacture, which is indicated on the product label on the back of the alarm. It is recommended to replace the alarm after this period, or immediately if a low battery chirp occurs or if a fault cannot be resolved through troubleshooting. The battery is sealed and not replaceable, so the entire unit must be replaced when the battery is depleted.

Repair: Do not attempt to repair the alarm yourself, as this will affect the warranty. If the alarm is not operating properly and is still under warranty, return it to the original place of purchase in a well-padded carton with details explaining the problem. If the alarm is no longer under warranty, it should be replaced immediately with a comparable alarm.

Installation Process:

  1. Activation: Press and hold the test button for about 3 seconds until the LED lights, then release it within 2 seconds. The unit will beep, indicating it is activated and in working status. This step is crucial, as the unit will have no function otherwise.
  2. Bracket Removal: Turn the alarm body counterclockwise to detach it from the bracket.
  3. Marking and Drilling: Place the bracket in the desired installation position, mark the installation holes with a pencil, and then drill two 5mm diameter holes.
  4. Plastic Plugs: Insert the two plastic plugs into the drilled holes using a hammer.
  5. Fixing Plug (if necessary): If present, remove the fixing plug from the bracket using a screwdriver.
  6. Attach Bracket: Attach the bracket to the plastic plugs and securely fix the screws.
  7. Mount Alarm: Fit the alarm onto the bracket and turn the alarm body clockwise until it matches well with the bracket.
  8. Secure Alarm (Optional): Insert the fixing plug into the gap between the bracket and bottom cover to further secure the alarm.
  9. Final Test: Press the button to test the unit. The alarm should sound three beeps with a 1.5-second pause, repeating until the button is released. If no sound occurs, the alarm is defective and should be addressed via troubleshooting or warranty claim.

Important Installation Notes:

  • Install the first alarm in the immediate bedroom area and additional alarms along exit paths.
  • Install additional alarms to monitor stairways, as they act as chimneys for smoke and heat.
  • Install at least one alarm on every floor level.
  • Install an alarm in every bedroom and in any room where large electrical appliances (e.g., portable heaters) are operated.
  • Install an alarm in any room where someone sleeps with the door closed, as a closed door can prevent an alarm outside from waking the sleeper.
  • Mount the smoke alarm on the ceiling in the center of the room for optimal smoke and heat detection.
  • When mounting on the ceiling, locate it at a minimum of 30 cm (12 inches) from the side wall.
  • For long hallways or rooms (over 9.1 meters), place smoke alarms at both ends.
  • On sloped, peaked, or cathedral ceilings, install smoke alarms between 500 mm and 1500 mm from the highest point of the ceiling. In rooms with ceiling slopes greater than 1 meter in 8 meters horizontally, alarms should be located on the high side of the room.

The FP510V Smoke Alarm Device is designed to be a reliable component of a comprehensive home safety plan, providing early warning of fires and contributing to the safety of occupants. Regular testing and maintenance are essential to ensure its continued effectiveness.

FirePro FP510V Specifications

General IconGeneral
TypePhotoelectric
Alarm Sound Level85 dB at 10 feet
Power Source9V Battery
Interconnect CapabilityYes
Operating Temperature40°F to 100°F (4.4°C to 37.8°C)
ComplianceUL 217

Related product manuals