12
GB
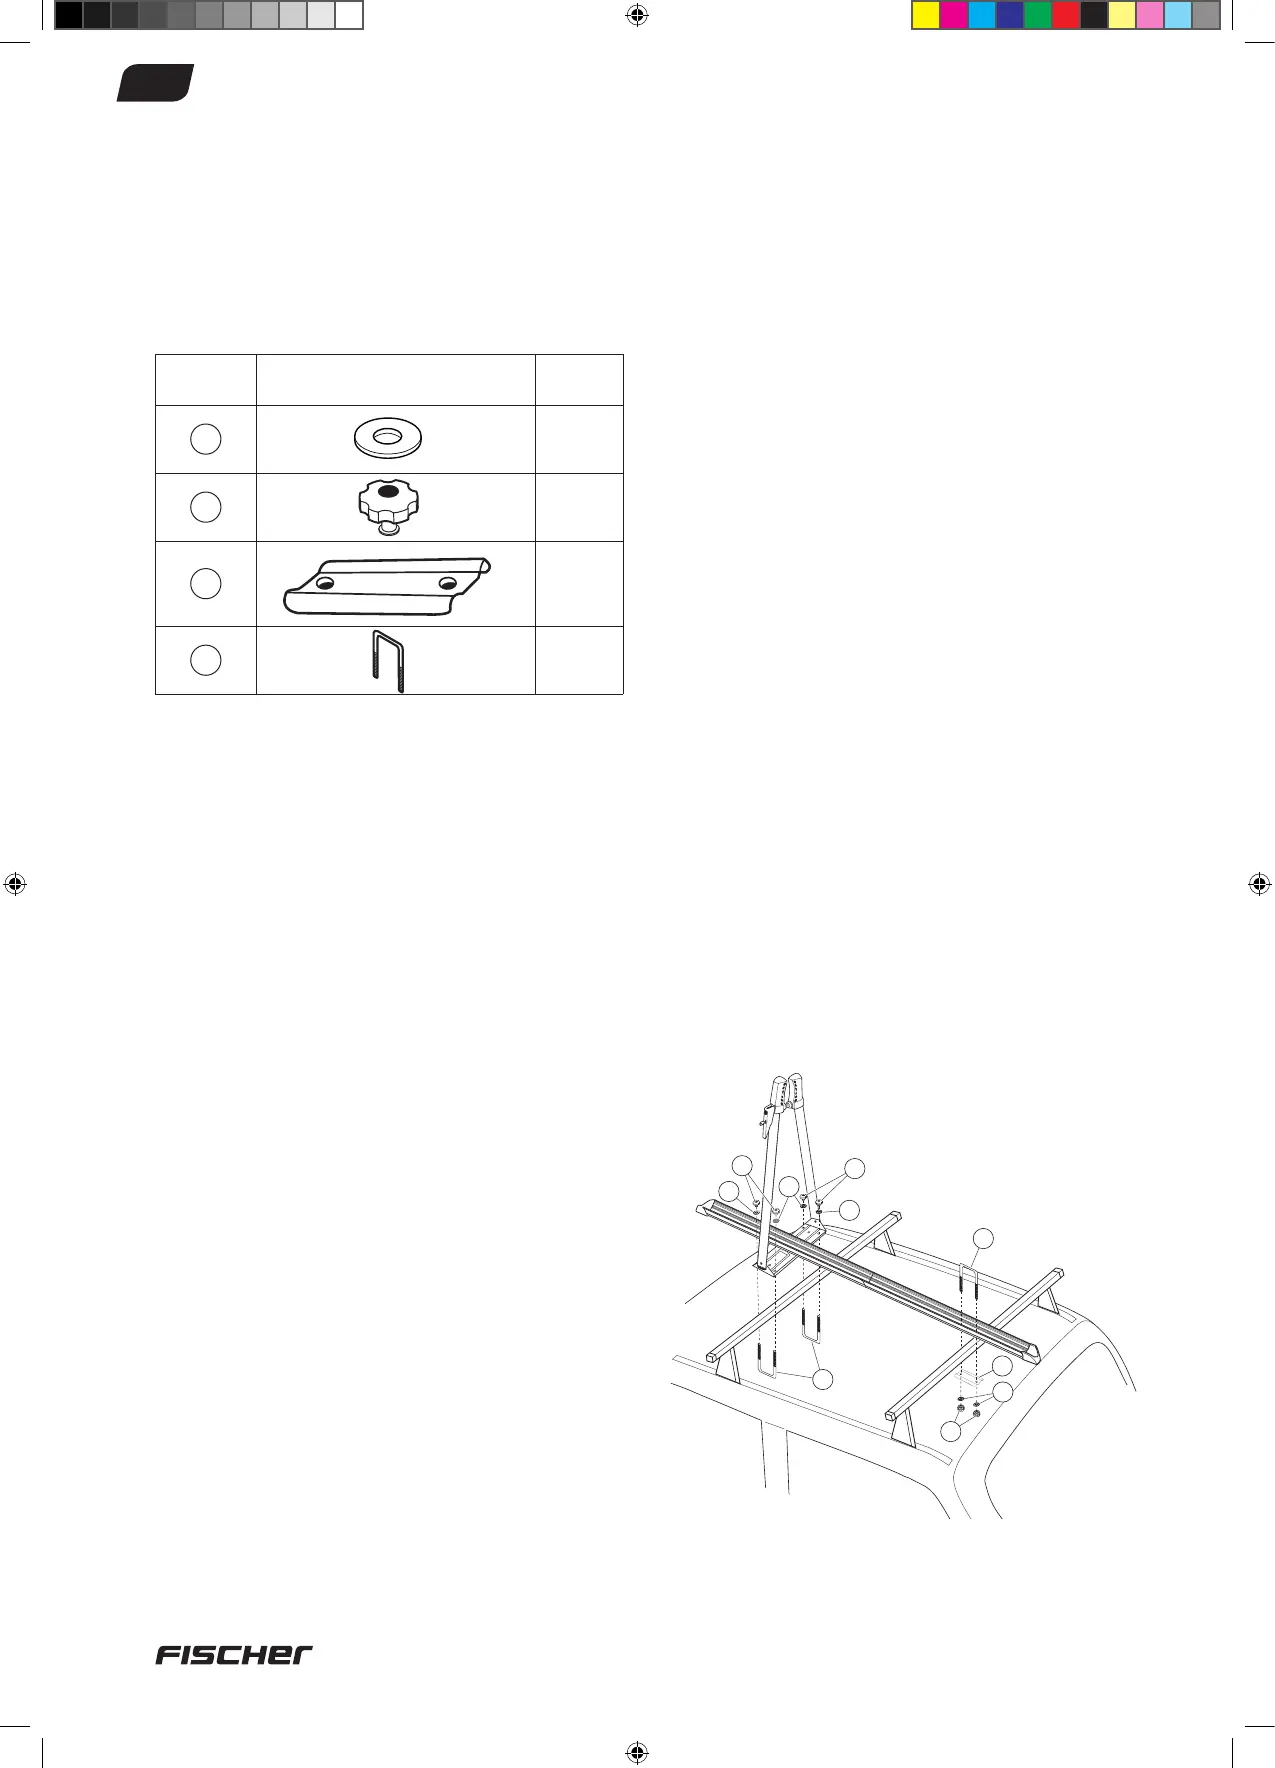
The following parts are required for this
assemblystep.
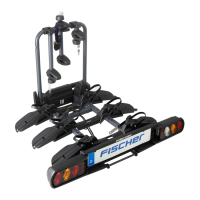
Position the entire preassembled bike rack in
the middle of the base support as depicted in
Ill.3,ifyouwishtotransportonebikeonly.
Ifyouwishtomount2or3bikeracks,position
themsothattheyaredistancedequallyonthe
base support.
Firstverifythatthebasesupportissuitedto
support the load. To fasten the bike rack, hold
fasteningbolt(partsno.9)beneaththebase
support and insert from below into the holes
on the plate.
Then place the washers with a diameter of 6
(partsno.4)ontheboltandfastensecurely
using the turning handles (parts no. 7). Repeat
these steps on the other side.
Now fasten the bike rack to the back base
supportbyinsertingthebolt(partsno.9)with
the downward facing thread into the holes on
theproledwheelguide(seeIll.3).Thenplace
the support plate (parts no. 8) on the bolt
andfastensecurelyusingtheturninghandles
(parts no. 7).
Step 3
Mounting the bike rack to a base support whose arms are premounted to
your vehicle‘s roof about 70 cm apart.
7
4
9
7
4
8
9
7
4
4
Parts No. Image Number
4
Ø 6 x 14
6
7
6
8
1
9
3
Afterthesesteps,makesurethatallscrews,
washers and turning handles are tightened
securelyandthatthebikerack,basesupport
andvehiclearesecurelyattachedtoone
another.
Ill. 3
18093_Betriebsanleitung.indd 12 13.02.15 11:24