10
8
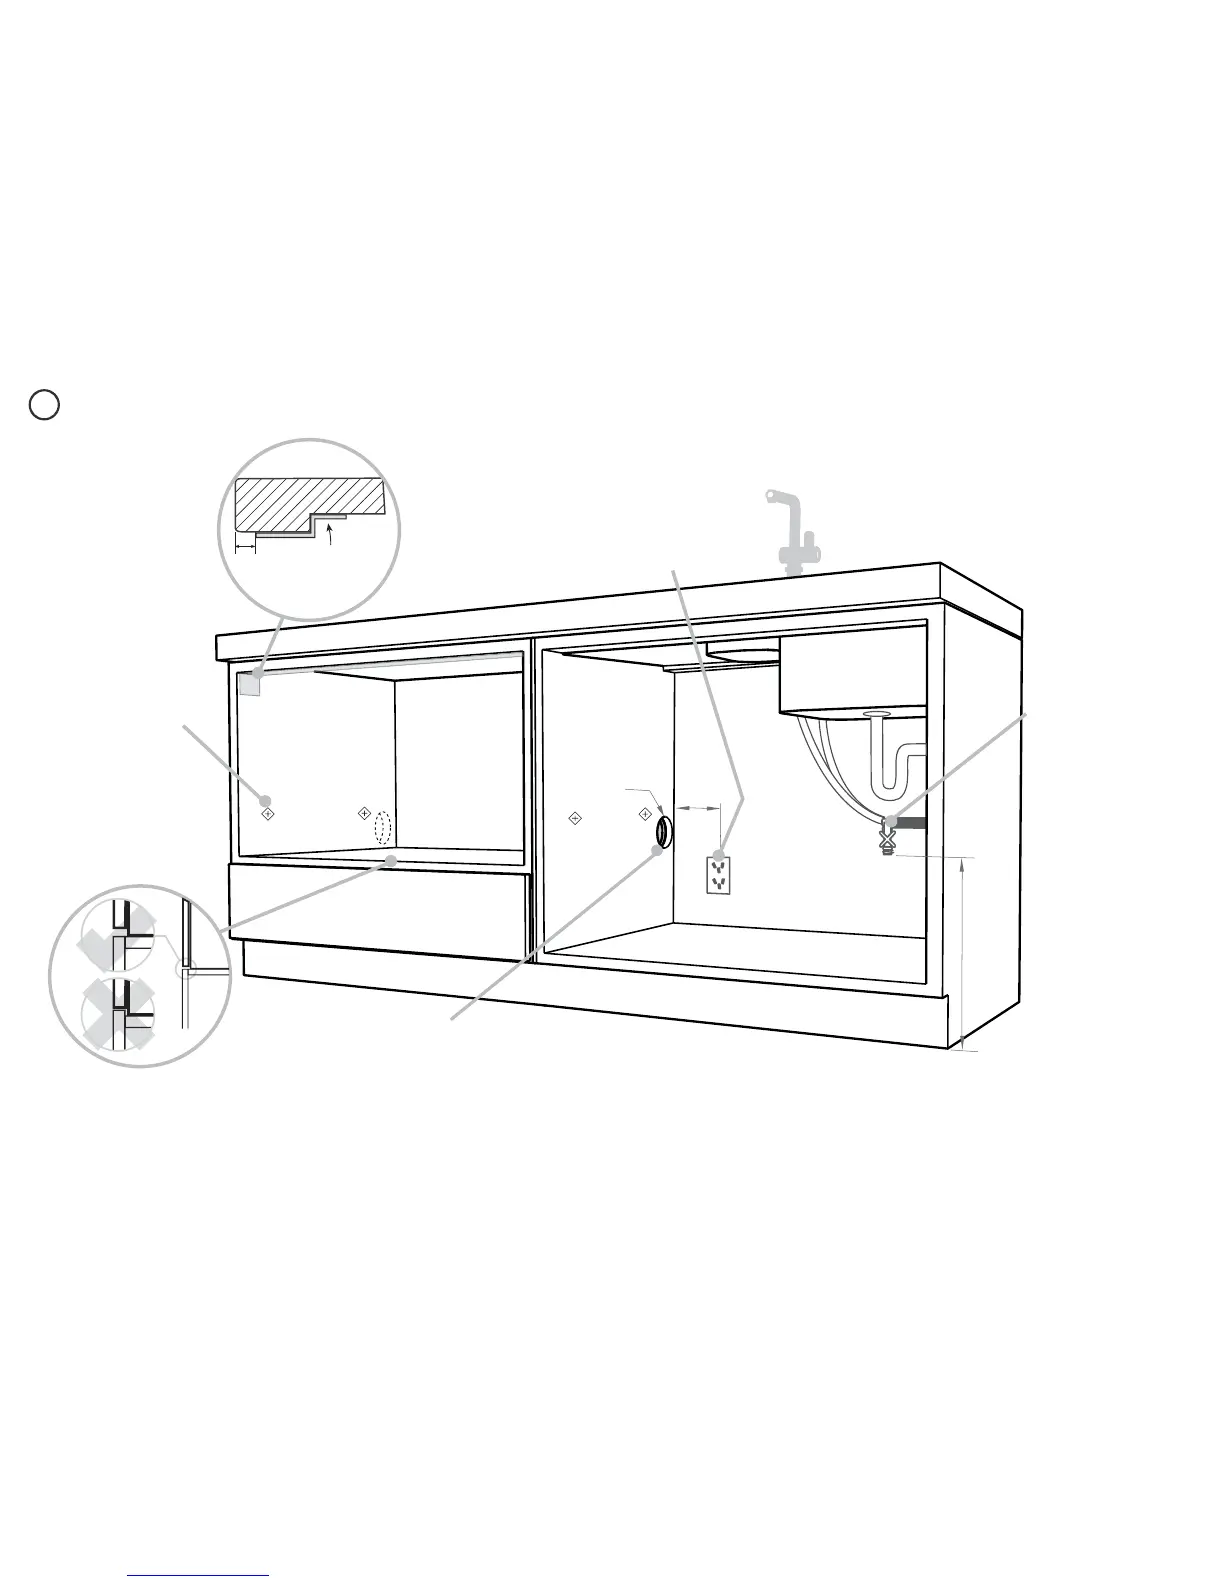
CAVITY PREPARATION
Important!
Adjacent cabinetry
must not extend
above cavity base
Moisture
protection
tape must
be applied.
Services can be
located either side
of the dishwasher.
These marks indicate
formed bracket screw
locations, if securing
by drawer removal.
If there is no side
partition, you can
construct timber
bracing as something
to secure into.
COUNTERTOP
Water Connection
Recommended HOT
(Maximum 140°F/60°C).
Supplied hose to
suit ⁄” (9 mm) male
compression fitting.
Water Pressure
Water softener models
Max. 1 MPa (145 psi)
Min. 0.1 MPa (14.5 psi)
Models without
water softener
Max. 1 MPa (145 psi)
Min. 0.03 MPa (4.3 psi)
Important!
The power outlet must be
located in a cabinet adjacent
to the dishwasher cavity.
110-120 VAC max. 15 A
min. 7 ⁄” (200 mm)
⁄” (10mm)
max. 17 ⁄”
(450 mm)
ø
max. 1½ ” (38 mm)
Services hole
Can be located either side of dishwasher, preferably
at the bottom of the cavity, as shown. If adequate
clearance, services hole can be made higher to clear
toekick space. If hole is higher, ensure drain hose(s)
are routed straight into the waste connection.
- If the hole is through wood, make sure its edges
are smooth and rounded.
- If the hole is through metal, ensure you t the
supplied Edge Protector to prevent damage to the
power cord.
 Loading...