2
NN
$-&"3"/$&
NN
$-&"3"/$&
ANTI TIP BRACKET
WARNING!
Tipping Hazard
All ranges can tip. Keep children away
and take care.
The anti-tip brackets supplied must be
installed.
Failure to follow these instructions could
result in injury.
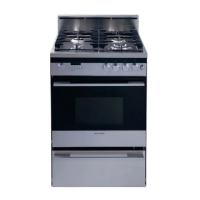
Installation instructions
Installing your range
Connection of this range to fixed or flexible
wiring must be made by a suitably registered
person. Connection by an unregistered person
can cause a safety hazard.
We recommend that the range circuit is
protected by a suitably rated circuit breaker but
not connected to a Residual Current Device
(R.C.D.) or an Earth Leakage Circuit Breaker
(E.L.C.B.)
This range is designed for a 230/240V AC single
or two phase connection.
This range must be connected with an
appropriately rated cord and plug that is
compatible with the socket-outlet fitted to the
final subcircuit in the fixed wiring that is intended to supply this cooking range. For single
phase connection, the supply cord should be at least equivalent to an ordinary PVC sheathed
and insulated, 4 mm
2
, three core (twin and earth), flexible cord. For two phase connection, the
supply cord should be at least equivalent to an ordinary PVC sheathed and insulated, 2.5 mm
2
,
four core, flexible cord.
This appliance must be connected to a circuit which incorporates an isolating switch providing
full disconnection from the power supply.
Cabinet clearances are as in the diagram on the right.
The clock display will flash 0.00 alternately with AUTO when it is turned on at the wall. If an
excessive voltage is detected, HELP will show in the clock display, the range will beep for two
minutes and the clock will automatically enter safety mode, preventing the range from being
turned on. Turn the range off at the wall, check that the cord is properly connected to the
terminals, correct and turn the range back on to reset the clock module.
If you raise the range to align it with the bench, make sure the base of the range cannot slip.
Anti-tip brackets
Two anti-tip brackets are supplied with the accessories so that the range can be secured to the
wall to prevent it from tipping over. Use the two screws on the back panel of the range, shown
below.
 Loading...