133 Series
9
18
20
13
61
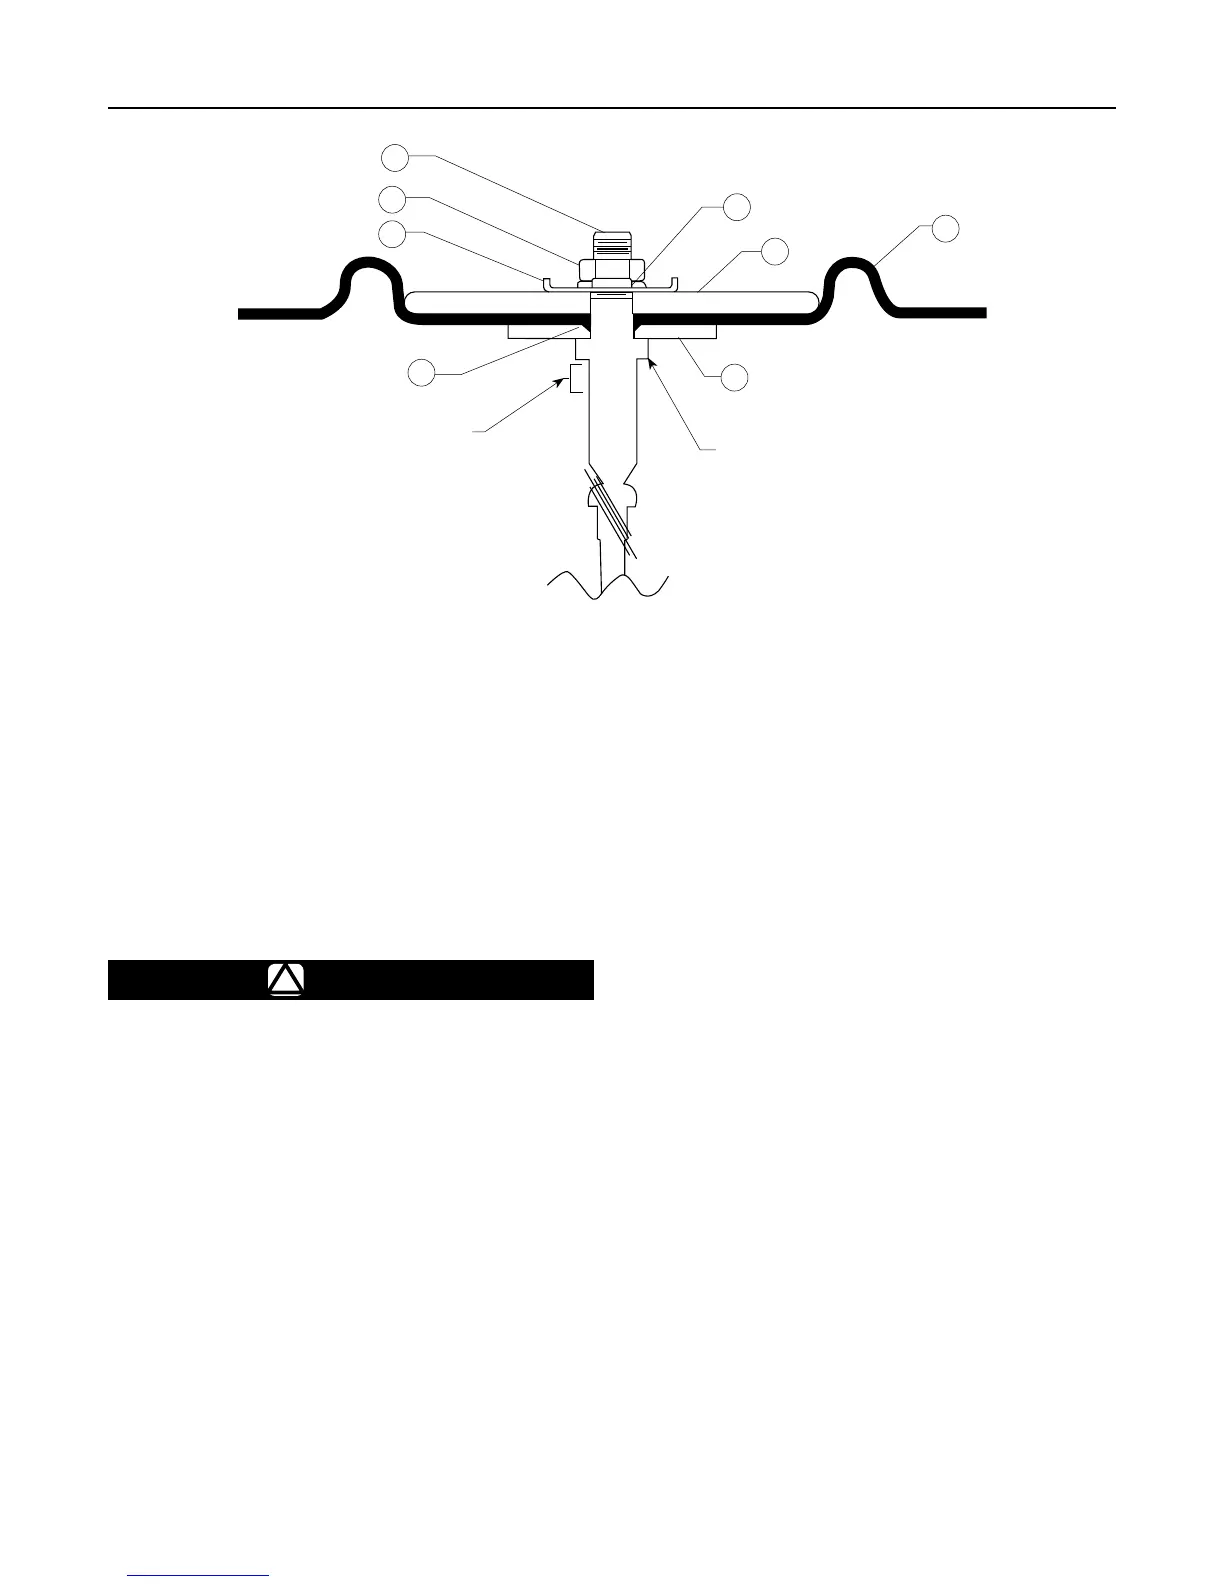
PROTECT THE
O-RING
SURFACE
FROM DAMAGE
3/4 in. / 19 mm
STEM HEX
16
58
14
15
A7007
Figure 7. Stem and Diaphragm Assembly
the stem (key 18). Lift off the orice (key 2) and
replace the valve disk and orice if necessary.
5. Loosen the set screws (key 39) in the cage (key 5)
and remove the roll pin (key 27) from the stem
(key 18). Remove the cage and stem sleeve
(key 25), the sealing washer (key 17) under
the balancing diaphragm (key 22), at washers
(key 23), balancing diaphragm and balancing
diaphragm plate (key 21). Replace the sealing
washer and balancing diaphragm if necessary.
!
WARNING
• To avoid personal injury due to the
sudden uncontrolled movement of
parts, do not loosen the diaphragm
casing cap screws (keys 35 and 36)
when the control spring (key 12) has
spring force applied to it.
• Release the spring compression as
described in step 6 below.
6. To inspect or replace the upper stem seal O-ring
(key 19) or main diaphragm (key 15), remove the
closing cap (key 9) and inspect the closing cap
gasket (key 10). Release the spring compression
completely by loosening the hex nut (key 59) and
turning the adjusting screw (key 11) counterclockwise.
7. Remove the six cap screws (key 62) from the
spring case (key 8). Lift off the spring case, upper
spring seat (key 41) and spring (key 12). Remove
the diaphragm casing cap screws and hex nuts
(keys 35 and 36) and lift off the upper diaphragm
casing (key 52). Remove the cap screws (key 55)
and mounting bracket (key 56). Inspect the two
mounting bracket gaskets (key 57) and replace
if necessary.
8. Remove the hex nut (key 20), lock washer (key 58)
and spring seat (key 13) from the stem (key 18).
9. Remove the diaphragm plate (key 14), diaphragm
(key 15), diaphragm washer O-ring (key 61)
and sealing diaphragm plate (key 16). Replace
the diaphragm and diaphragm washer O-ring
if necessary.
10. Remove the cap screws (key 53) and lift the
lower diaphragm casing (key 7) off the casing
adaptor (key 60). If necessary, replace the
bearing (key 6) and upper stem seal O-ring
(key 19). Before reassembling, coat the O-ring
with a O-ring sealant and lubricant.
Reassembly
When reassembling, observe the following steps
and cautions. During reassembly, check all O-rings
to be certain they are in good condition and replace
if necessary. Coat O-rings (keys 4, 19 and 32) with
Multi-Purpose Polytetrauoroethylene (PTFE) lubricant
or an equivalent elastomer sealant and lubricant.
All key numbers refer to Figures 7, 8, 9 and 14, except
where indicated.