31
6
SEARCH TECHNIQUES
Target Verification
After detecting a target, do the
following:
1. Walk around the target in a
circle.
2. While circling the target,
continue sweeping the
searchcoil across the target.
3. Sweep once every 30° or 40° of
the circle.
If the tone does not change
and the target ID value is
consistent as you circle the
target, you can be highly
confident of the target’s
identification.
If the tone or target ID
changes as you circle the
target, you may have multiple
targets or an irregularly shaped
object.
If the tone completely
disappears at different angles, the target may be trash or a low-
value metal.
If you are new to the hobby, dig all targets. With practice in the
field, you will soon be able to correlate audible and visual target
feedback with certain types of metal objects.
Pinpointing in Discrimination mode:
1. Sweep over target in narrowing side-to-side pattern.
2. Take visual note of spot on ground where “beep” occurs.
3. Step 90° to the side of the target.
4. Sweep searchcoil over same area, at 90° to 1st sweep pattern.
5. This pinpoints the target location with an “X.”
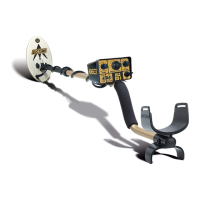
SEARCHCOIL MOVEMENT
When swinging the searchcoil,
be careful to keep it level with
the ground about 1/2 inch from
the surface. Never swing the
searchcoil like a pendulum.
WRONG
CORRECT
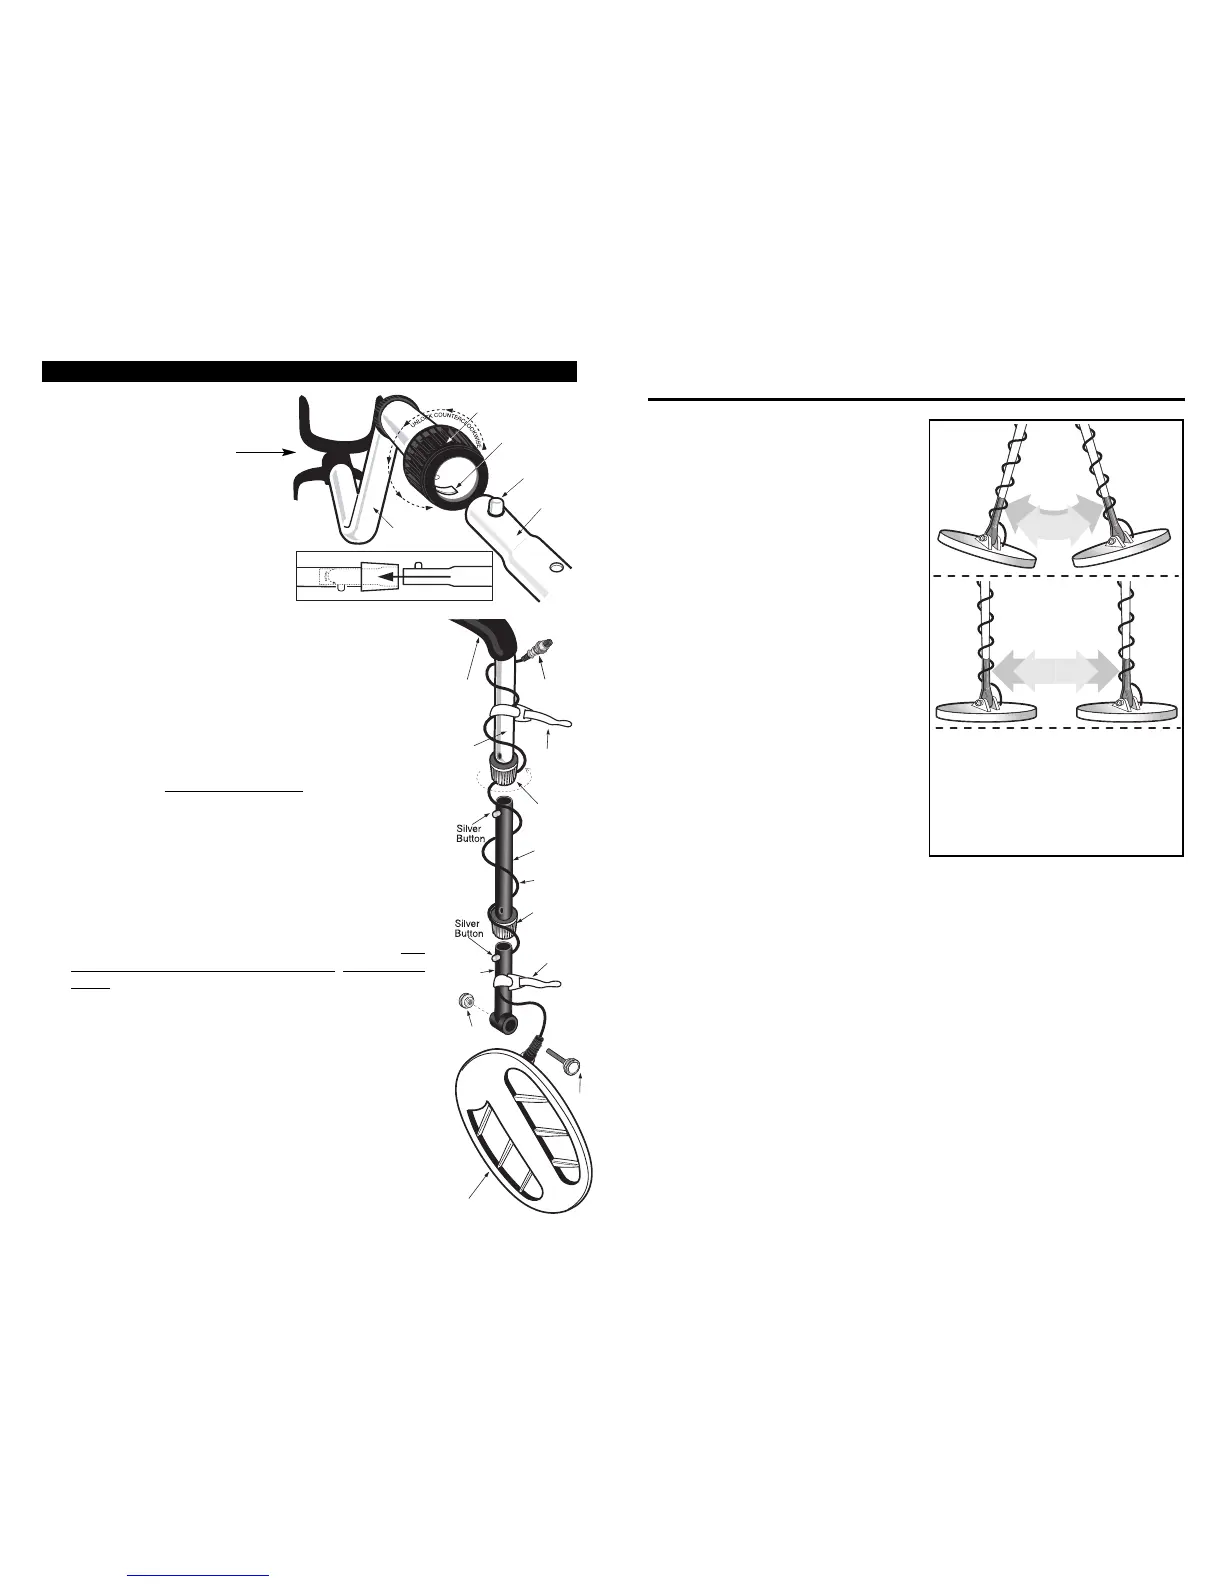
ASSEMBLY
Assembly is easy and
requires no tools.
●
1
Position detector upright.
●
2
Rotate the LOCKING COLLAR fully
counterclockwise.
●
3
Insert your finger inside the tube
and make sure the INTERNAL
CAM LOCK is flush with the inside
of the tube.
●
4
Insert the MIDDLE STEM into the
S-ROD.
●
5
Rotate the MIDDLE STEM until the SILVER BUTTON
locates in the hole.
●
6
Twist the LOCKING COLLAR fully in the clockwise
direction until it locks.
●
7
If your detector has 3 tubes and 2 Locking Collars,
repeat this process on the Lower Stem.
●
8
Position the Lower Stem with the Silver Button toward the back.
Using the Bolt, Single Rubber Washer, and Knurled Knob,
attach the Searchcoil to the Lower Stem.
●
9
Adjust the Lower Stem to a length that lets you maintain a
comfortable upright posture, with your arm relaxed at your
side, and the Searchcoil parallel to the ground in front of you.
●
10
Wind the Cable securely around the Stems.
A loose or moving Cable can cause false signals.
●
11
Connect Cable Plug to housing.
Do not twist the Cable or Plug. Turn Locking Ring only. Use
minimal finger pressure to start the threads. Do not cross-
thread. When the Locking Ring is fully engaged over the
threaded connector, give it a firm turn to make sure that it
is very tight. When the Locking Ring is fully engaged over
the threaded connector, it may not cover all of the threads.
●
12
Tighten both Locking Collars.
●
13
Secure the Cable with the 2 Velcro Straps provided, one on
the Lower Stem close to the Searchcoil, and one on the
Upper Stem, close to the housing. Leave just enough slack
in the Cable, at the Searchcoil end, to be able to rotate the
Searchcoil a small amount about the Bolt. After full assembly
and upon first use in the field, check this adjustment. It is very
important to keep the Cable secure against the Stem,
especially at high Gain, as movement in the Cable may
cause false signals.