25
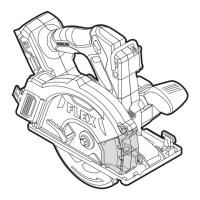
CSM 57 18-EC
After completing a cut and releasing the
trigger, be aware of the necessary time it
takes for the blade to come to a complete
stop during coast down. Do not allow the saw
to brush against your leg or side; since the
lower guard is retractable, it could catch on
your clothing and expose the blade. Be aware
of the necessary blade exposures that exist in
both the upper and lower guard areas.
CAUTION!
Always clamp the workpiece securely
on a bench. Ensure that the clamps do not
interfere with the free movement of the saw.
Draw a cutting line. Place the front of
the base plate (6) on the edge of the
workpiece without making blade contact.
Hold the saw by the main handle (1) with
one hand and the auxiliary handle (19)
with the other. Maintain a firm grip with
both hands on the saw and position your
arms to resist kickback forces.
Line up the sight line with your cutting line.
Position your body to either side of the
blade, but not in line with the blade.
Start the saw and beginning cut.
While cutting, keep the base plate (6) flat
against the workpiece and maintain a firm
grip. Do not force the saw through the
workpiece.
If the saw binds and stalls, maintain a firm
grip and release the trigger switch (2)
immediately. Hold the saw motionless in
the workpiece until the blade comes to a
complete stop.
After finishing a cut, be sure the lower
guard (9) closes and the blade comes to
a complete stop before setting the saw
down.
NOTE
In order to prevent metal chip from flying out
of the hollow profile, it is recommended to
stick tape on the side of the profile (see figure
N).
Cutting large sheets
(see figure O)
Large sheets sag or bend if they are not
correctly supported. If you attempt to cut
without leveling and properly supporting
the workpiece, the blade will tend to bind,
causing KICKBACK and extra load on the
motor.
Support large sheets. Be sure to set the
depth of the cut so that you cut through the
workpiece, not through the supports.
Using the track (not supplied)
(see figure P1-P2)
This saw is designed specifically for precision
straight cutting while using a track for
guidance.
Trim the rubber strip
First install the track adaptor (22) on the
base plate of the metal circular saw.
Place the track on the scrap material and
use the track clamp to secure the track and
scrap material to the support.
Put the saw onto the track with the narrow
groove (P-1) on the track adaptor (22)
fitting over the raised rib (P-3) on the track.
Make sure the saw blade is close to the
rubber strip (P-4).
Note: There are two grooves on the track
adaptor (22), one wide and one narrow. The
narrow groove (P-1) is suitable for FLEX track,
and the wide groove (P-2) can be adapted to
other tracks.
Check the front and back of the saw and
ensure the saw glides along the track
smoothly.
Start the saw and guide the saw in a
forward direction along the track to trim
the rubber strip. After the rubber strip
is trimmed, it can be used to accurately
indicate the blade cut line.
Release the trigger switch and allow the
blade to come to a complete stop.
Cut with track
Secure workpiece to a workbench.
Place the track on the workpiece and
position the rubber strip along your
desired line of cut.
Secure the track to the workpiece using
the clamp.
Place the saw on the track and make
adjustments if needed.
After finishing cut, release the trigger
switch and allow the blade to come to a
complete stop before putting down.
 Loading...