10/29/2020 REV. 003 18
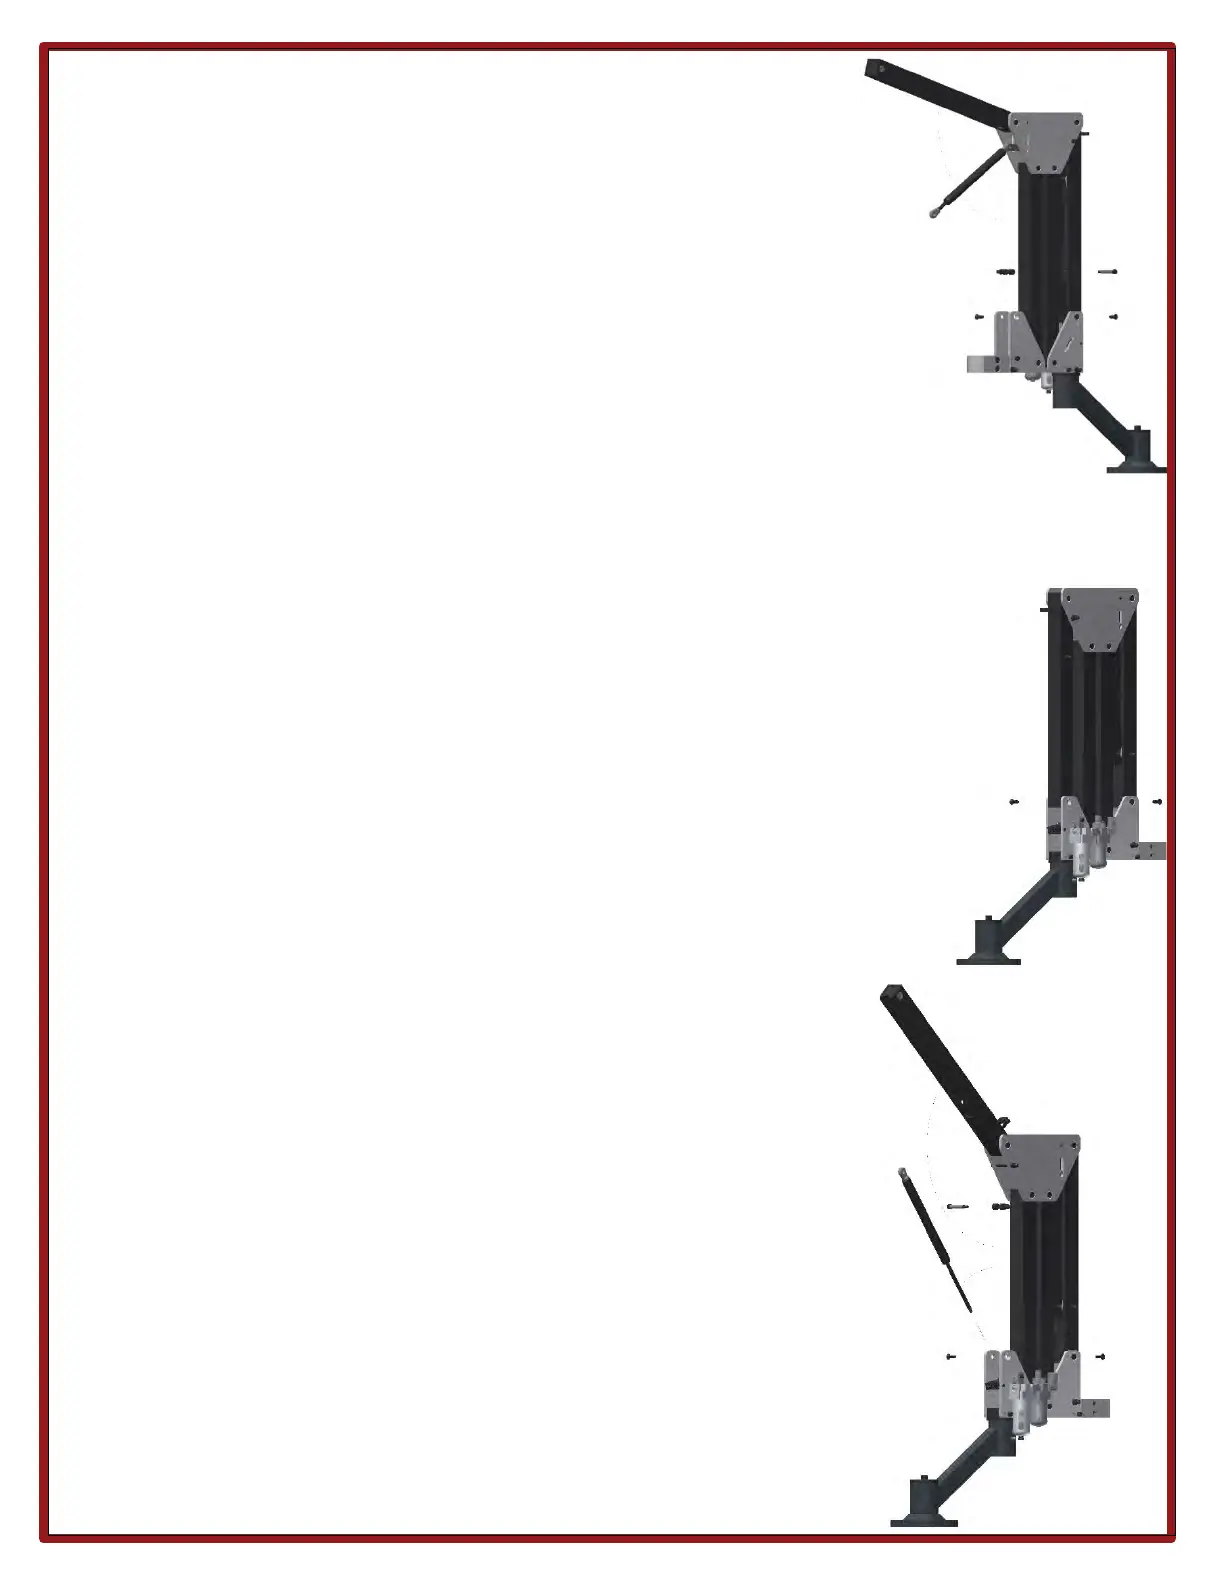
7. Using both hands; screw the tube end of the new cylinder into the end
fitting attached to the adjuster (see figure 13). It is only necessary to get
the cylinder hand tight – do not over tighten.
8. Replace the shoulder bolt attaching the cylinder to the front arm.
9. Reassemble the front arm to the front side plates with the front arm
screws removed in step 2. Use Loctite 242 when reassembling these
screws.
Rear Cylinder Change
1. Adjust the rear cylinder by turning (counter clockwise) the hex on the rear adjuster.
Turn the hex with a 3/16 all wrench until the pin of the adjuster reaches the lowest
position in the slot of the side plates.
2. Raise the two front arms to the fully extended position.
3. Hold the rear arm securely. Once the screws in this step are removed, the rear
arm will want to extend up! While supporting the front arms, remove the rear arm
screws on the rear side plates (see Figure 14) so that the rear arm is free and access
to the rear cylinder can be made. Carefully lower and place the front portion of the
FlexArm on the work surface after the rear arm screws have been removed. Care
must be exercised when taking the arm apart!
4. Remove the shoulder bolt attaching the rear cylinder to the rear arm. Note
that there are two spacers on either side of the cylinder clevis to hold the
cylinder centered in the arm. Do not lose these.
5. Unscrew the rod end of the cylinder, by hand, from the end fitting attached
to the adjuster (see Figure 15). You may need to wrap a towel or rubber
matting around the cylinder rod to remove it and to tighten the new
cylinder. Dents or scratches on the cylinder rod will cause the gas to leak
from the cylinder resulting in the need for another replacement cylinder and
voiding any warranty.