10/29/2020 REV. 003 9
OPERATING INSTRUCTIONS:
1. Ensure the part to be tapped is secured and sitting flat
on the same flat surface as the tapping arm is mounted.
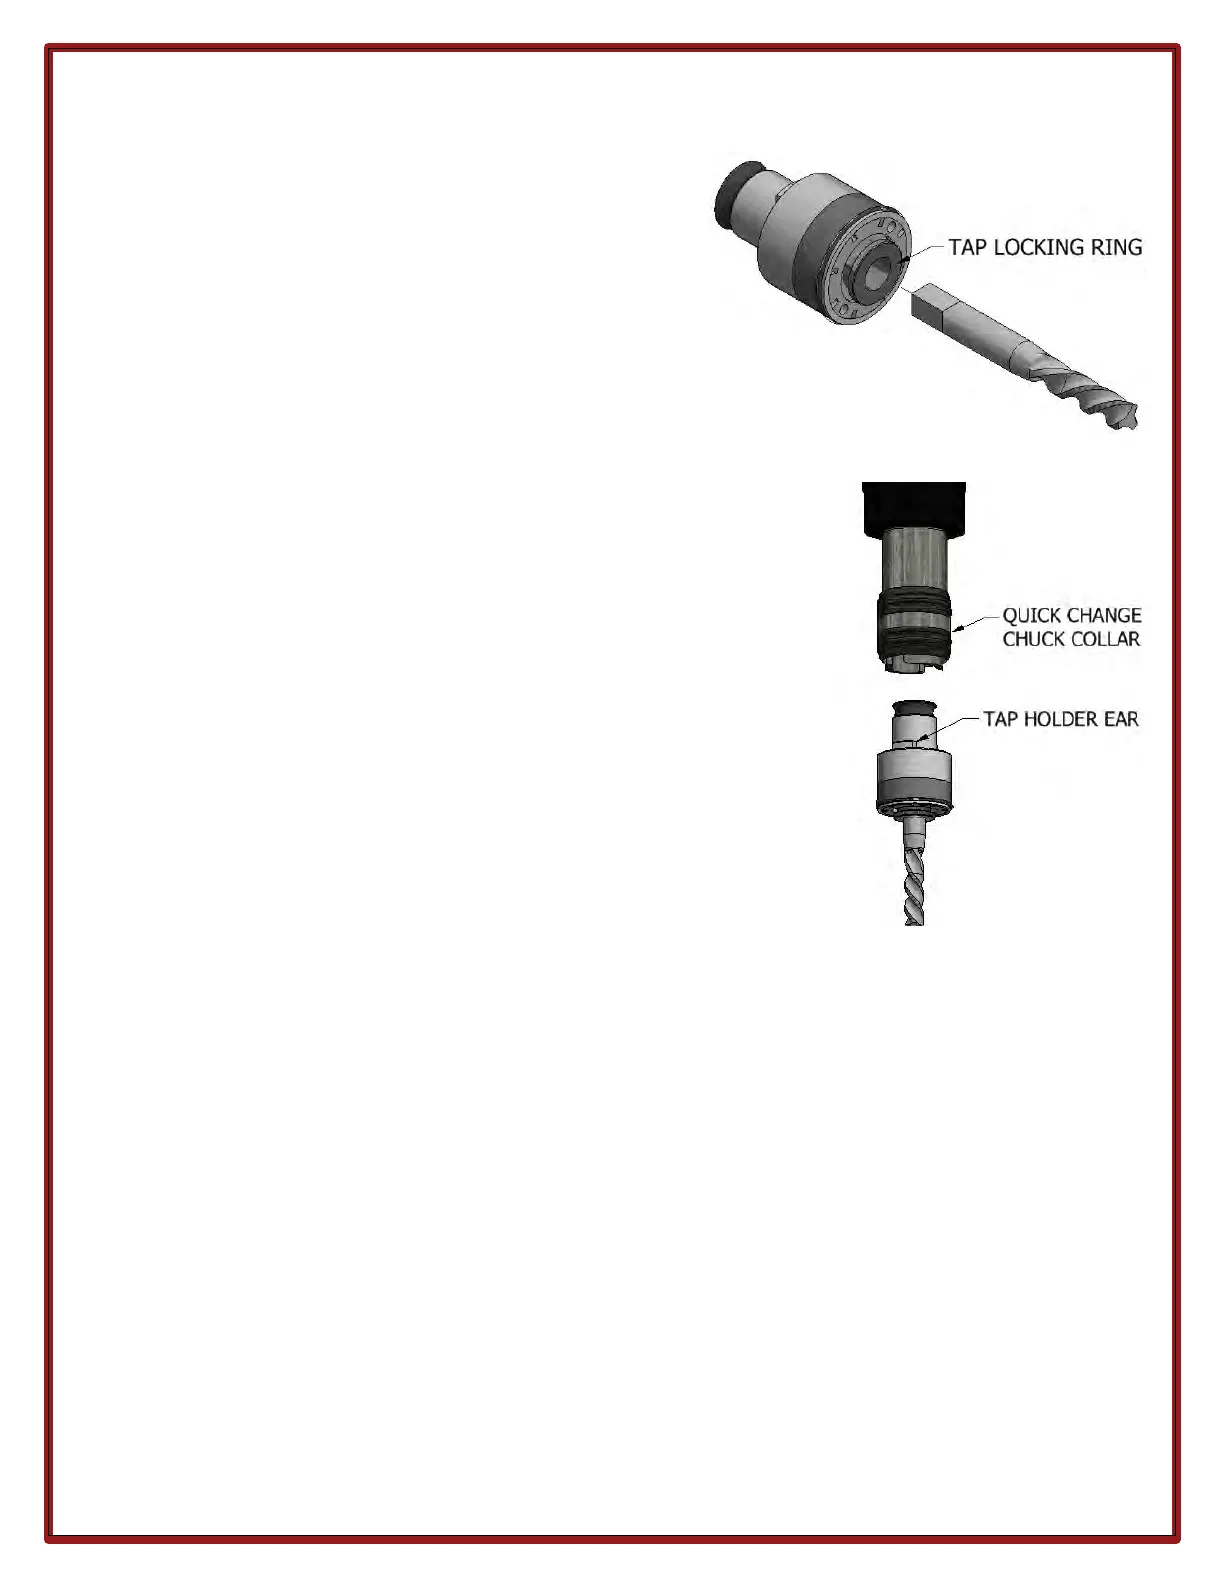
2. Select the correct tap holder for the tap size required.
Insert the tap into the holder by depressing the locking
ring. Seat the tap square into the tap holder. Release
the locking ring (see Figure 7).
3. Push up the quick-change chuck’s collar to insert the tap holder.
When inserting the tap holder in the quick-change chuck, turn the
holder to align the ears of the holder to the drive slots in the quick-
change chuck. Push up to lock the holder in the chuck (see Figure 8).
4. Position the tap over the hole to be tapped.
5. When tapping through holes, remember that the tap will protrude
through the bottom side of the work piece. Ensure there is sufficient
clearance below the workpiece to allow the tap to extend below the
bottom surface of the part and not hit the work surface.
6. Use a torque style tap holder when tapping blind or bottom holes. The built in safety clutch on the
torque holders will rachet and stop the tap from turning when the tap reaches the bottom of the hole.
7. Actuate the motor by depressing the throttle lever and gently guide the tap into the hole. Exert only
enough downward pressure to start the tap in the hole. Once started, the tap pull itself through the
hole.
Do not push or pull on the motor when the tap is engaged in the hole and completing the tapping
process. This will result in poor thread quality, oversized threads, and broken taps.