6 Opening and installation
The FLIR Cx5 is delivered with the camera installed in the case. Should you for
some reason need to remove the camera from the case, follow the instructions in
this chapter to open the case and then reinstall the camera.
WARNING
The FLIR Cx5 certification is void if the unit is tampered with or if the FLIR C5
is not correctly installed in the FLIR Cx5 case.
WARNING
Do not exert excessive pressure onto the window in the FLIR Cx5 case.
To open the case and install the camera, the following minimum tools are
required;
• H1.5 Hex bit screwdriver
• H2.0 Hex bit screwdriver
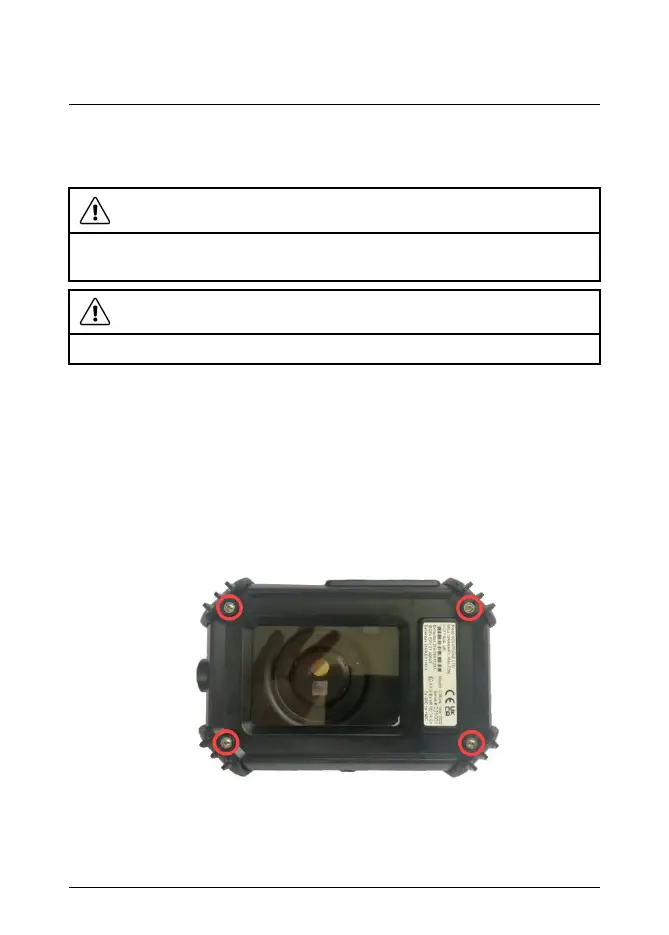
6.1 Opening the FLIR Cx5 case
1. Place the FLIR Cx5 case, lens face down onto a clean, flat surface.
2. Using the H1.5 hex screwdriver, remove the four (4) bolts securing the corner
shock absorbers as shown in Figure 6.1.
Figure 6.1 FLIR Cx5 shock absorber bolts.
#T810609; r. AB/88437/88437; en-US 8

 Loading...