6 Opening and installation
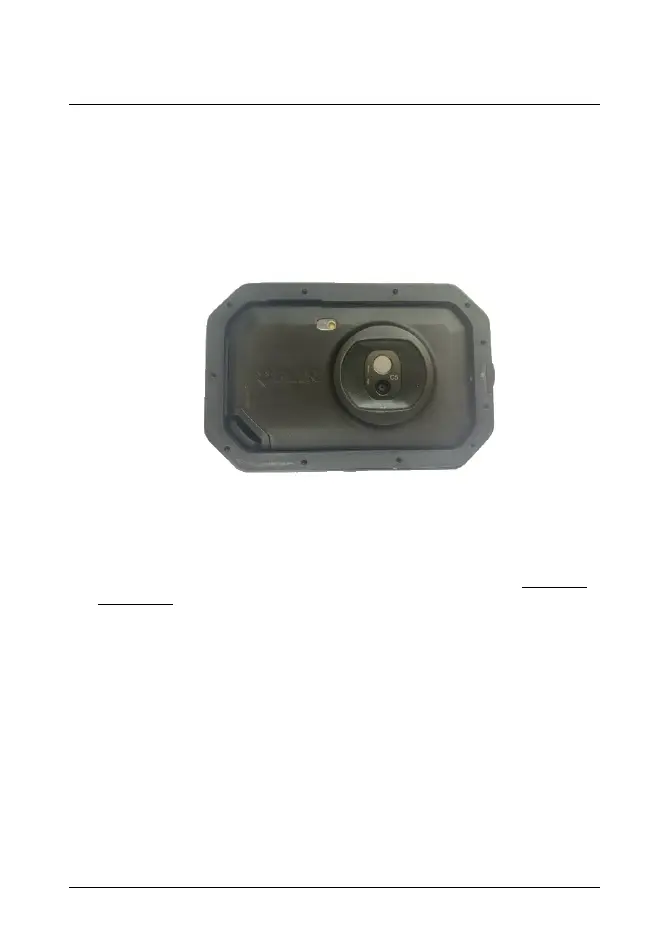
6.2 Installing the FLIR C5 camera
Prior to installation, ensure that the touchscreen, lens, and window of the FLIR
C5 camera are clean and free from dust and dirt, as it will not be possible to clean
them once installed into the case.
1. Place the FLIR C5 camera into the case rear section with the touchscreen
against the inner face of the case glass.
Figure 6.3 FLIR Cx5 case with FLIR C5 camera inserted.
2. Spread the shock absorbers and place the FLIR Cx5 case front back into po-
sition, then allow the shock absorbers to re-seat.
3. Using the H2.0 hex screwdriver, install all eleven (11) fixing bolts but do not
tighten fully.
4. Once all fixing bolts are in place, complete the case closure by tightening the
bolts in a diametrically opposed manner until finger tight.
5. Turn the FLIR Cx5 case so that the lenses face down, and then complete the
installation of the four (4) shock absorber bolts using the H1.5 hex
screwdriver.
#T810609; r. AB/88437/88437; en-US 10
 Loading...