427-0073-12-12 Version 120 May 2015 2-9
2
Basic Operation and Configuration
Click on the center bar “>” to move the camera over to the list of Active Servers.
The name of the camera should appear in the Sensors Panel, with a green joystick
icon. By default, the FSM software will automatically discover sensors in the
network, connect to the first camera it finds, take control of the camera, and
display the video from the camera in Video Wall 0.
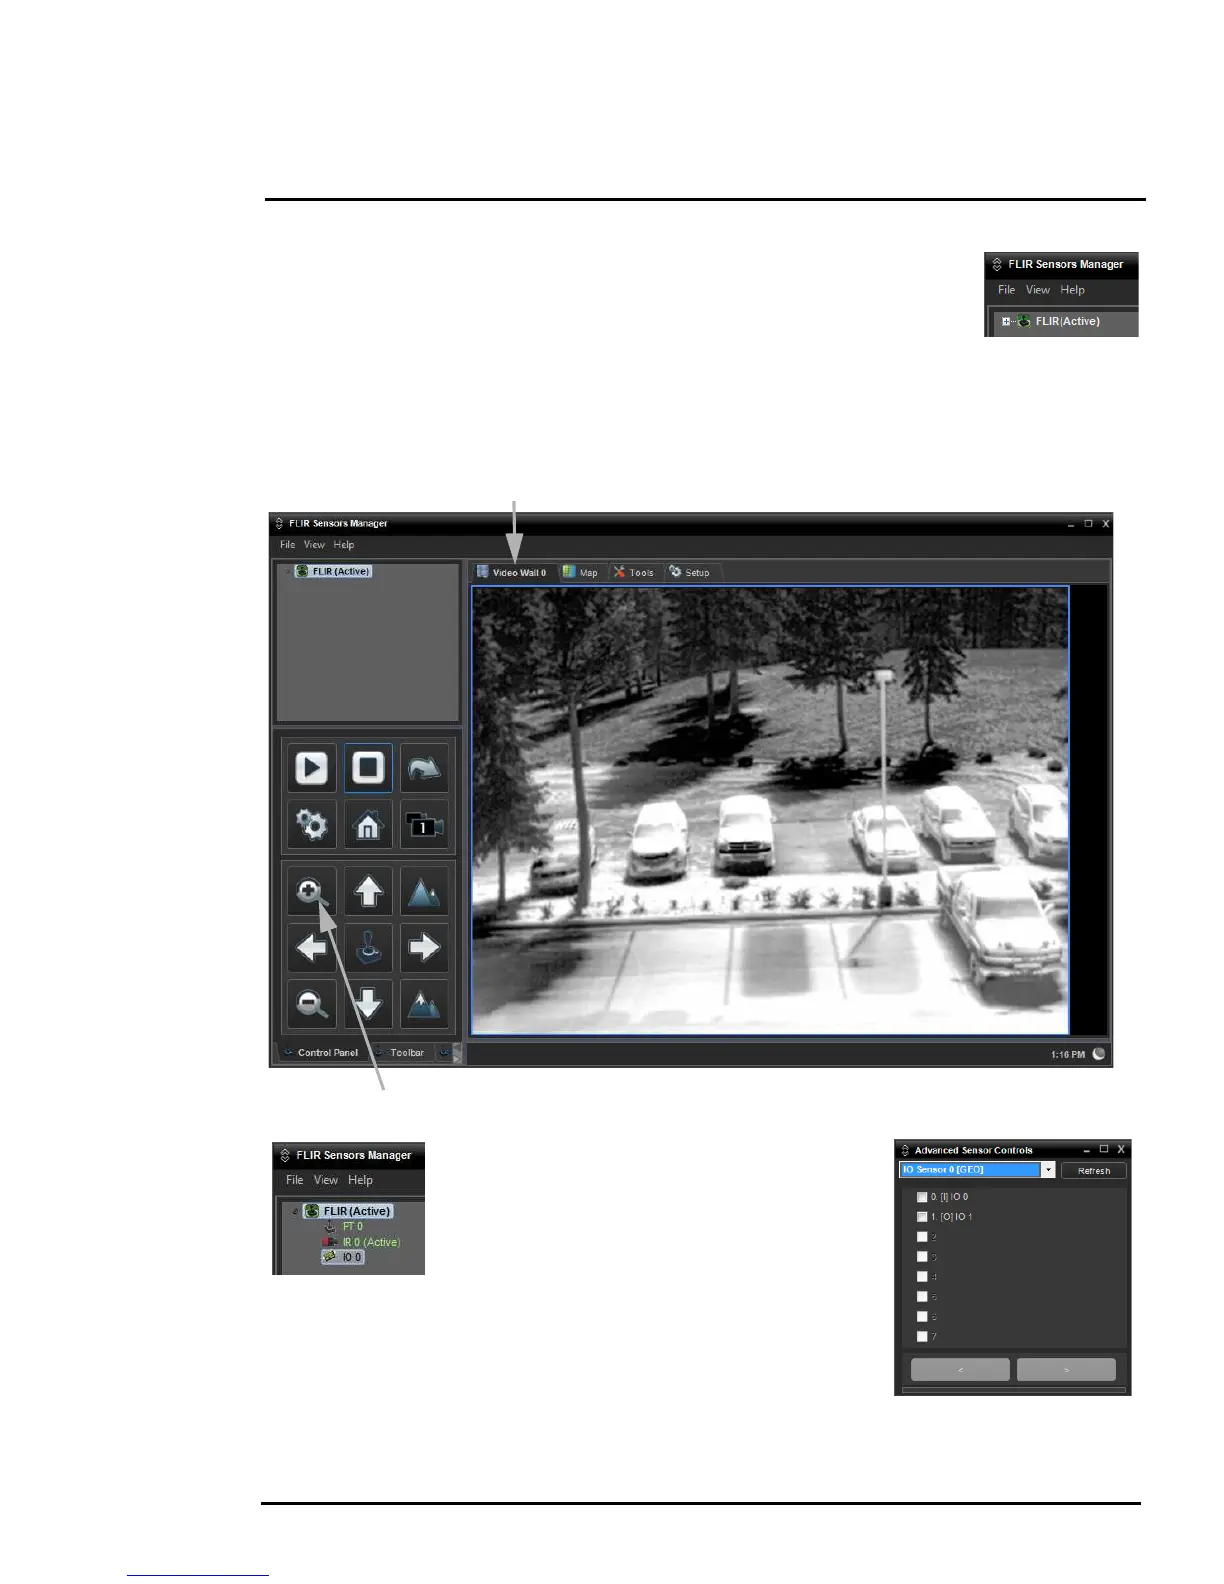
Click on Video Wall 0 and confirm that video is streamed to the monitor and it is possible to control
the camera using the zoom controls in the Control Panel. For example, click on the zoom button
(magnifying glass with +), and the video will zoom in.
To test the GPIO input and output connectors,
click on the triangle to the left of the sensor
name to expand the sensor and display the
devices. Then double-click on the IO 0 device to
open up the Advanced Sensor Controls panel.
The IO 0 Advanced Sensor Panel can be used
to manually turn on or off the GPIO output, and it
can be used to display if a GPIO input is received. To turn on or off the
output, check the checkbox next to “1. [O] IO 1”. Similarly, an input
would be indicated with a check next to “0. [I] IO 0”.
More information about configuring and using the GPIO alarm
capabilities is describe in section 3.2.1 “Sensor Menu” on page 3-14.
 Loading...