12
FLIR
THERMOSIGHT PRO
USER MANUAL - Rev 1
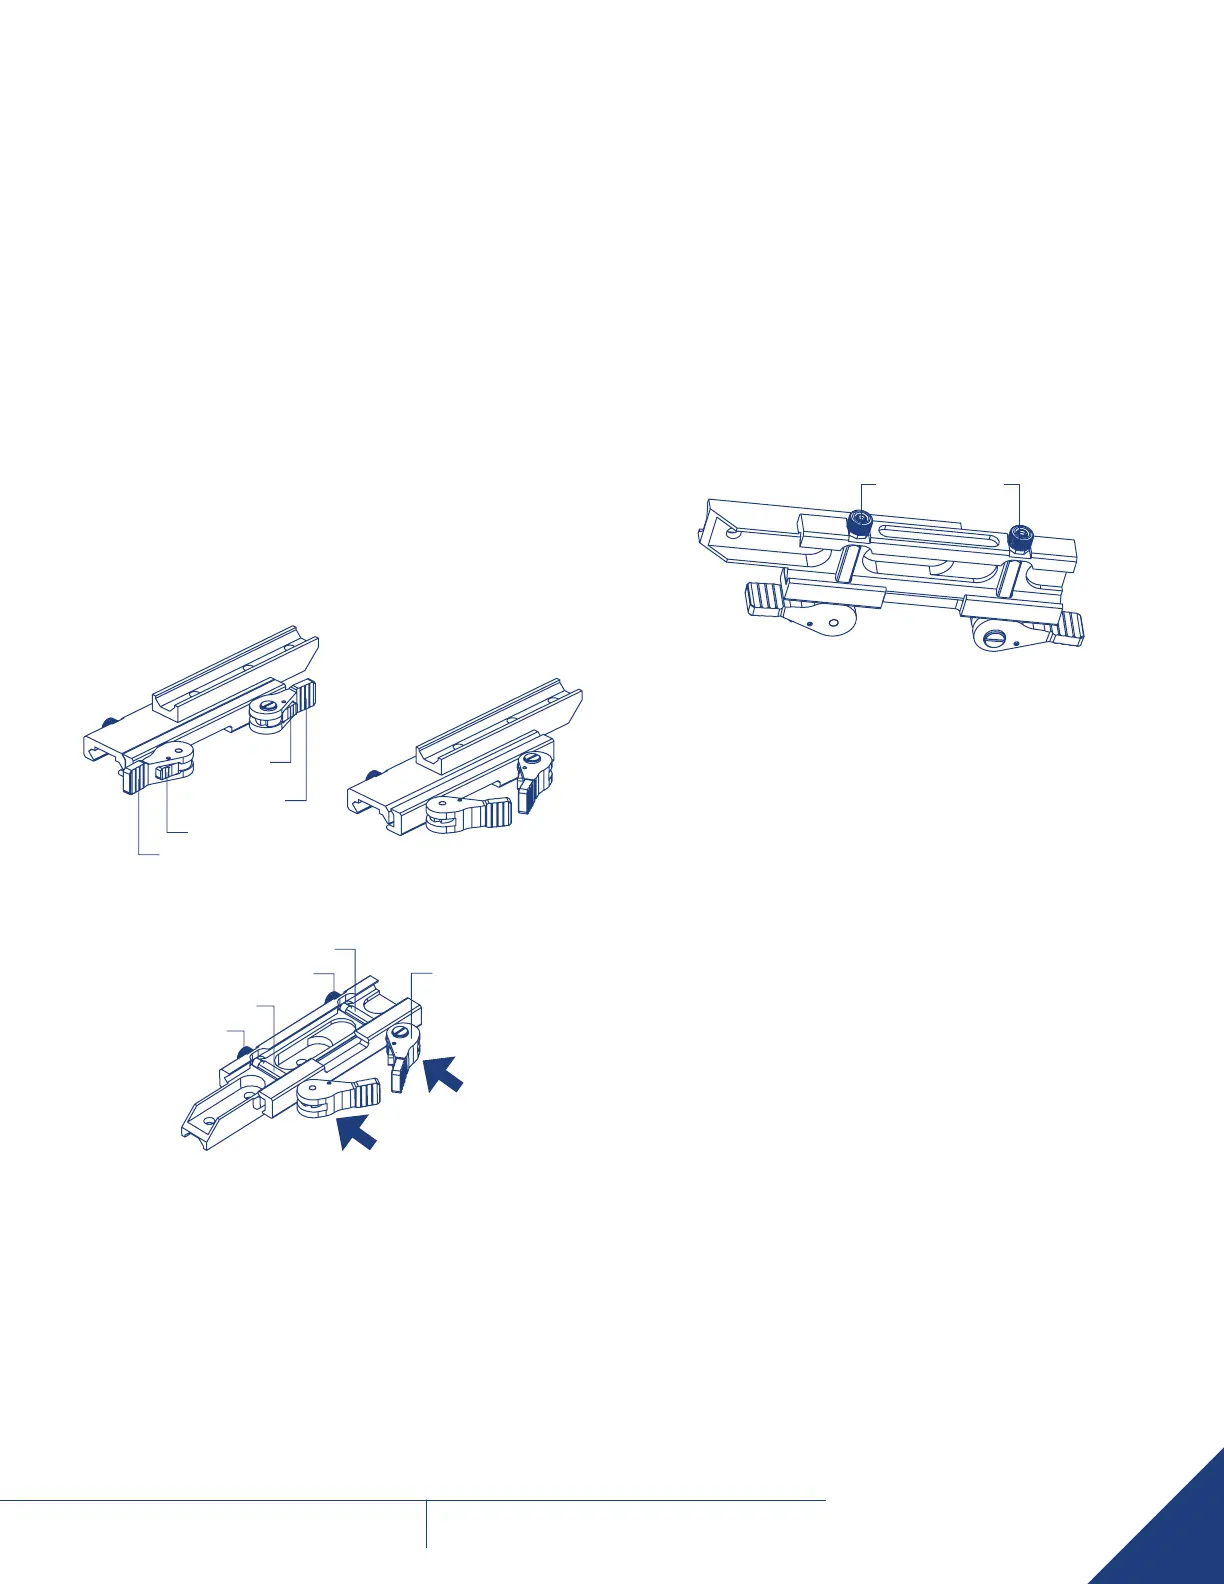
To change the position of ThermoSight Pro mount, please follow the
instructions below:
1. Remove the two screws that attach the mount to the seating rail.
2. Remove the mount.
3. Change the position of the mount.
4. Install the two screws into the mount and tighten the screws.
To install the ThermoSight Pro on a Picatinny/ Weaver rail, perform the
following:
1. Unlock the clamping device of the scope mount by pushing down on
the lever holders and unlocking the levers.
2. Install the scope on the Picatinny/ Weaver rail so that the stops slide
into the transverse slots on the rail.
3. Affix the scope to the rail by locking the levers.
4. Verify that the clamping device is firmly holding the ThermoSight Pro.
If necessary, adjust the clamping device’s lever-cam locks as detailed in
Part 3.3 (Clamping Device Adjustment).
LOCKED MOUNT
Lever
Holder
Lever Holder
Lever
Lever
UNLOCKED MOUNT
Nut
Nut
Stop
Stop
Cam
MOUNT. UNDERSIDE VIEW
3.3 CLAMPING DEVICE ADJUSTMENT
To adjust the mount’s clamping device, do the following:
1. Remove the ThermoSight Pro from the weapon.
2. With the clamping device unlocked, push the cam towards the arrow,
which will cause the nut to slide out of its hole.
3. Turn the nut CW/ CCW respectively, in one-two increments (see note
below). Much like when the cam is released, backward-moving springs
will cause the nut to slide back into its hole.
NOTE: The eight-sided nuts of the mount lever-cam locks will only
fit into their holes if turned in one of the discrete positions, using
increments equal to 360°/8.
Eight-sided Nuts
4. Verify that the adjusted lever-cam lock securely holds the weapon
mounting rail.
5. Repeat the procedure to adjust the clamping device’s second lever-
cam lock.
3.4 BORE SIGHTING
Once the camera has been mounted, it is necessary to adjust the reticle
so that the point of aim coincides with the desired Point of Impact (POI).
NOTE: The ThermoSight Pro must be zeroed each time it is mounted to
a new weapon.
Since this unit is a thermal camera, it will be necessary to adjust the
zero while observing a target with some level of thermal contrast.
To create a target with thermal contrast, it may be useful to tape one or
more disposable hand warmers to the target to get some temperature
difference. For longer distances, it may be necessary to use the larger
heating pads.
The rifle should be secured or held in a steady position.
Take aim by centering the reticle on the target and fire a series of shots
(3-4). Find the point of impact and measure its vertical and horizontal
deviations from the center of the target. Work out the values of
boresight correction required to compensate for the measured deviation
of the point of impact from the center of the target.
To access the boresight function, push and hold down the central ●
button on the control panel and then select BORESIGHT menu.


 To Next Page