7
FLIR
THERMOSIGHT PRO
USER MANUAL - Rev 1
SECTION 2. GETTING STARTED
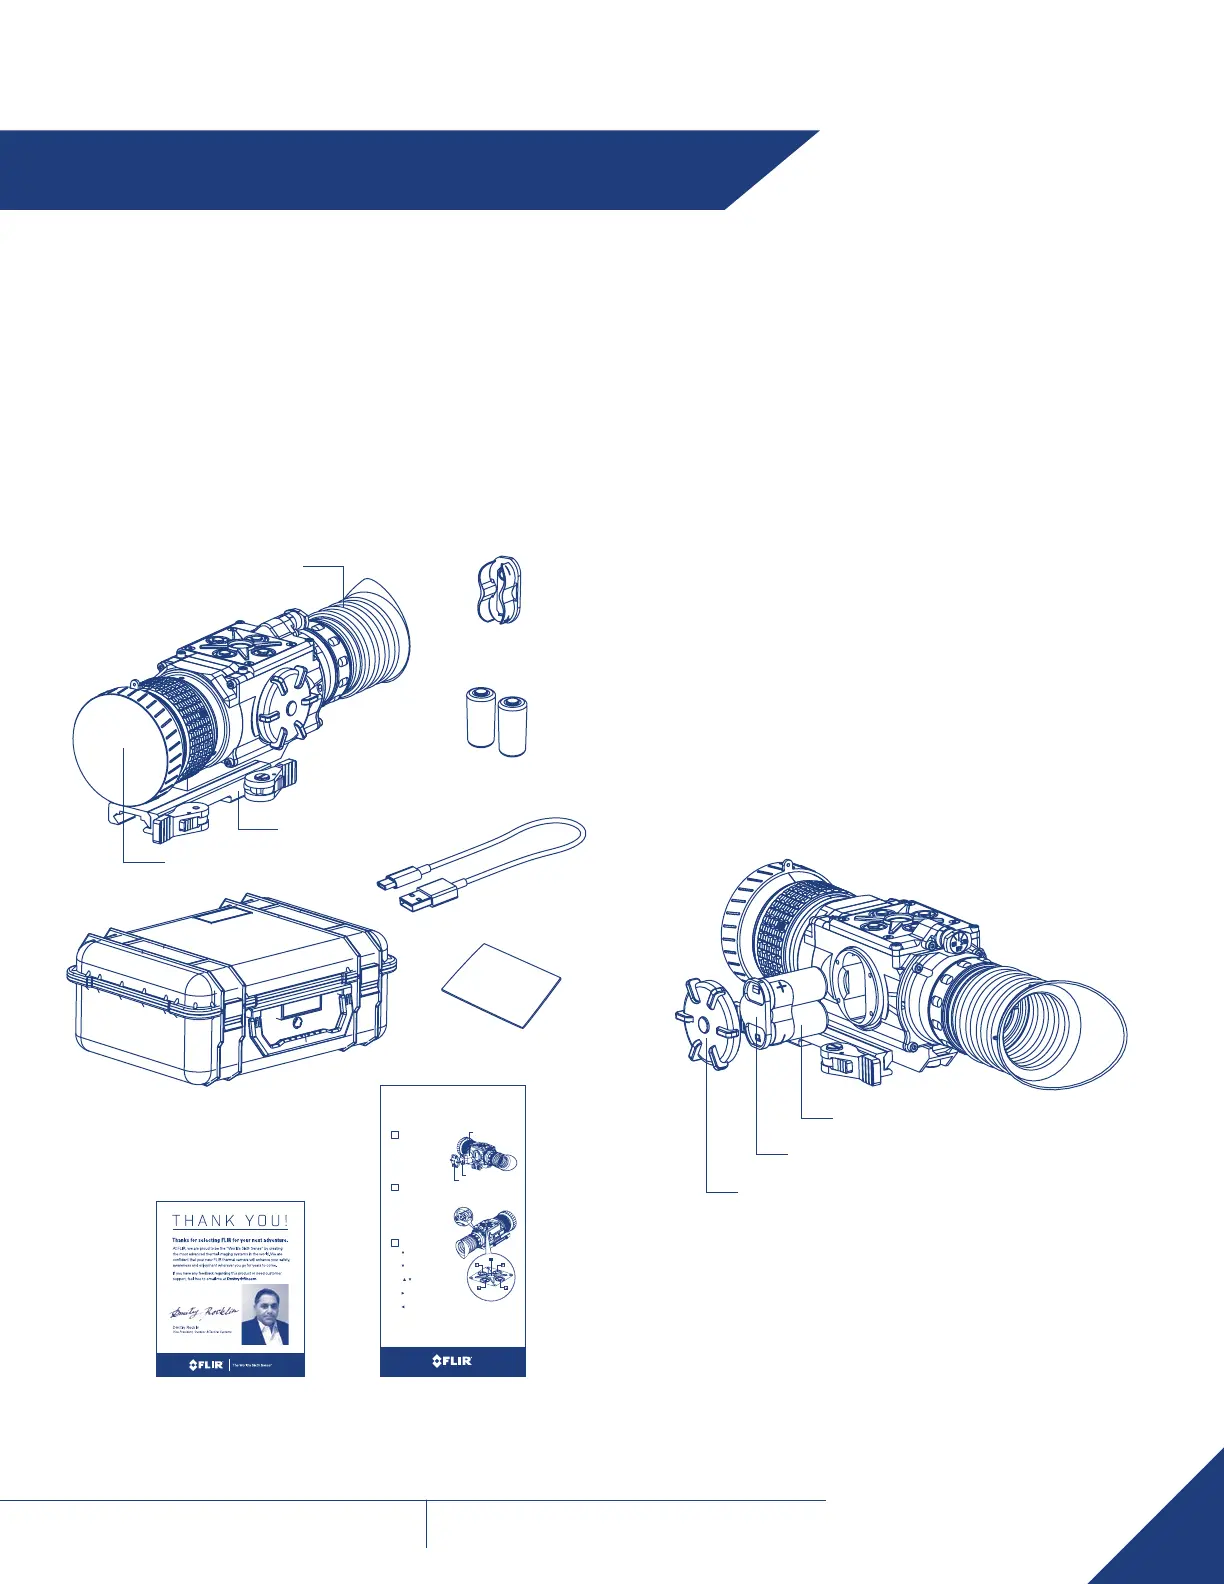
2.1 UNPACKING AND INSPECTING
The FLIR ThermoSight Pro scope is available with the features, options,
and accessories described in this manual. Refer to the packing list
enclosed with your product to determine the actual contents of your
product package.
In addition to the product, the following items are included in the
product package:
• FCC Declaration of Conformity
• CE Declaration of Conformity
Two Battery
Cassettes
Quick Start GuideThank You Card
Two CR123A
Lithium Batteries
Lens Cap
Eyecup
Quick Release
Mount
2.2 BATTERY
The FLIR ThermoSight Pro scope is equipped with a sophisticated
power system that uses two standard CR123A Lithium batteries or two
CR123 type rechargeable batteries with voltage from 3.0V to 3.7V.
BATTERY STATUS INDICATOR
While the scope is ON, a battery status indicator is always shown in
the corner of the display image. This indicator provides an estimation of
the remaining battery charge.
BATTERY INSTALLATION
Verify that the equipment is off before installing batteries.
Install batteries as follows:
1. Unscrew the battery cap.
2. Remove the battery cassette.
3. Insert the batteries into cassette. Align the polarity symbols on the
batteries with the polarity symbols on the cassette.
4. Insert the cassette with installed batteries to place.
5. Replace the battery cap.
Battery Cap
Battery Cassette
Battery
USB Cable
Hard Carrying Case
THERMOSIGHT PRO
Quick Start Guide
Button
• Short press – DISPLAY BRIGHTNESS UP
• Long press – co LoR PALETTE coNTRoL (FWD)
Button
• Short press – DISPLAY BRIGHTNESS DoWN
• Long press – co LoR PALETTE coNTRoL (BWD)
Buttons
+
• Simultaneously hold the two b uttons –
TRIGGERS UcMNUc/FFc* MANUALLY
Button
• Short press – DIGITAL Zoo M coNTRoL
• Long press – RETIcLE oN/ oFF
Button
• Short press – RETIcLE coLo R coNTRoL
• Long press – RETIcLE PATTERN coNTRo L
Button A
• Short press – SINGLE IMAGE SNAPSHo T / SELEcTIo N (in menu)
• Long press – MAIN MENU
• Double click – REco RD VIDEo / SToP S REcoRDING
* UCMNUC/FFC - User Controlled Manual Non Uniformity Correction/ Flat-Field Correction
Install two cR123A batteries as follows:
1. Unscrew the battery cap.
2. Remove the battery cassette.
3. Insert the batteries into cassette. A lign the
polarity symbols on the batteries with the
polarity symbols on the cassette.
4. Insert the cassette with installed
batteries to place.
5. Replace the battery cap.
• Activates the FLIR Thermosight Pro when
turned to oN.
NOTE: You must pull the knob before
turning in order to use either the ON or STB.
• Activates Standby Mode when turned to
STB. In Standby Mode the Thermosight Pro
can be activated/deactivated by a wireless
remote control.
• Deactivates the FLIR Thermosight Pro
when turned to oFF.
1
BATTERY INSTALLATION
2
TURN-PULL SWITCH
3
CONTROL PANEL BUTTONS
Battery Cassette
Battery Cap
Battery
Turn-Pull Switch
Control Panel
Buttons
A
Lens Cloth