8
FLIR
THERMOSIGHT PRO
USER MANUAL - Rev 1
SECTION 3. OPERATING THE SYSTEM
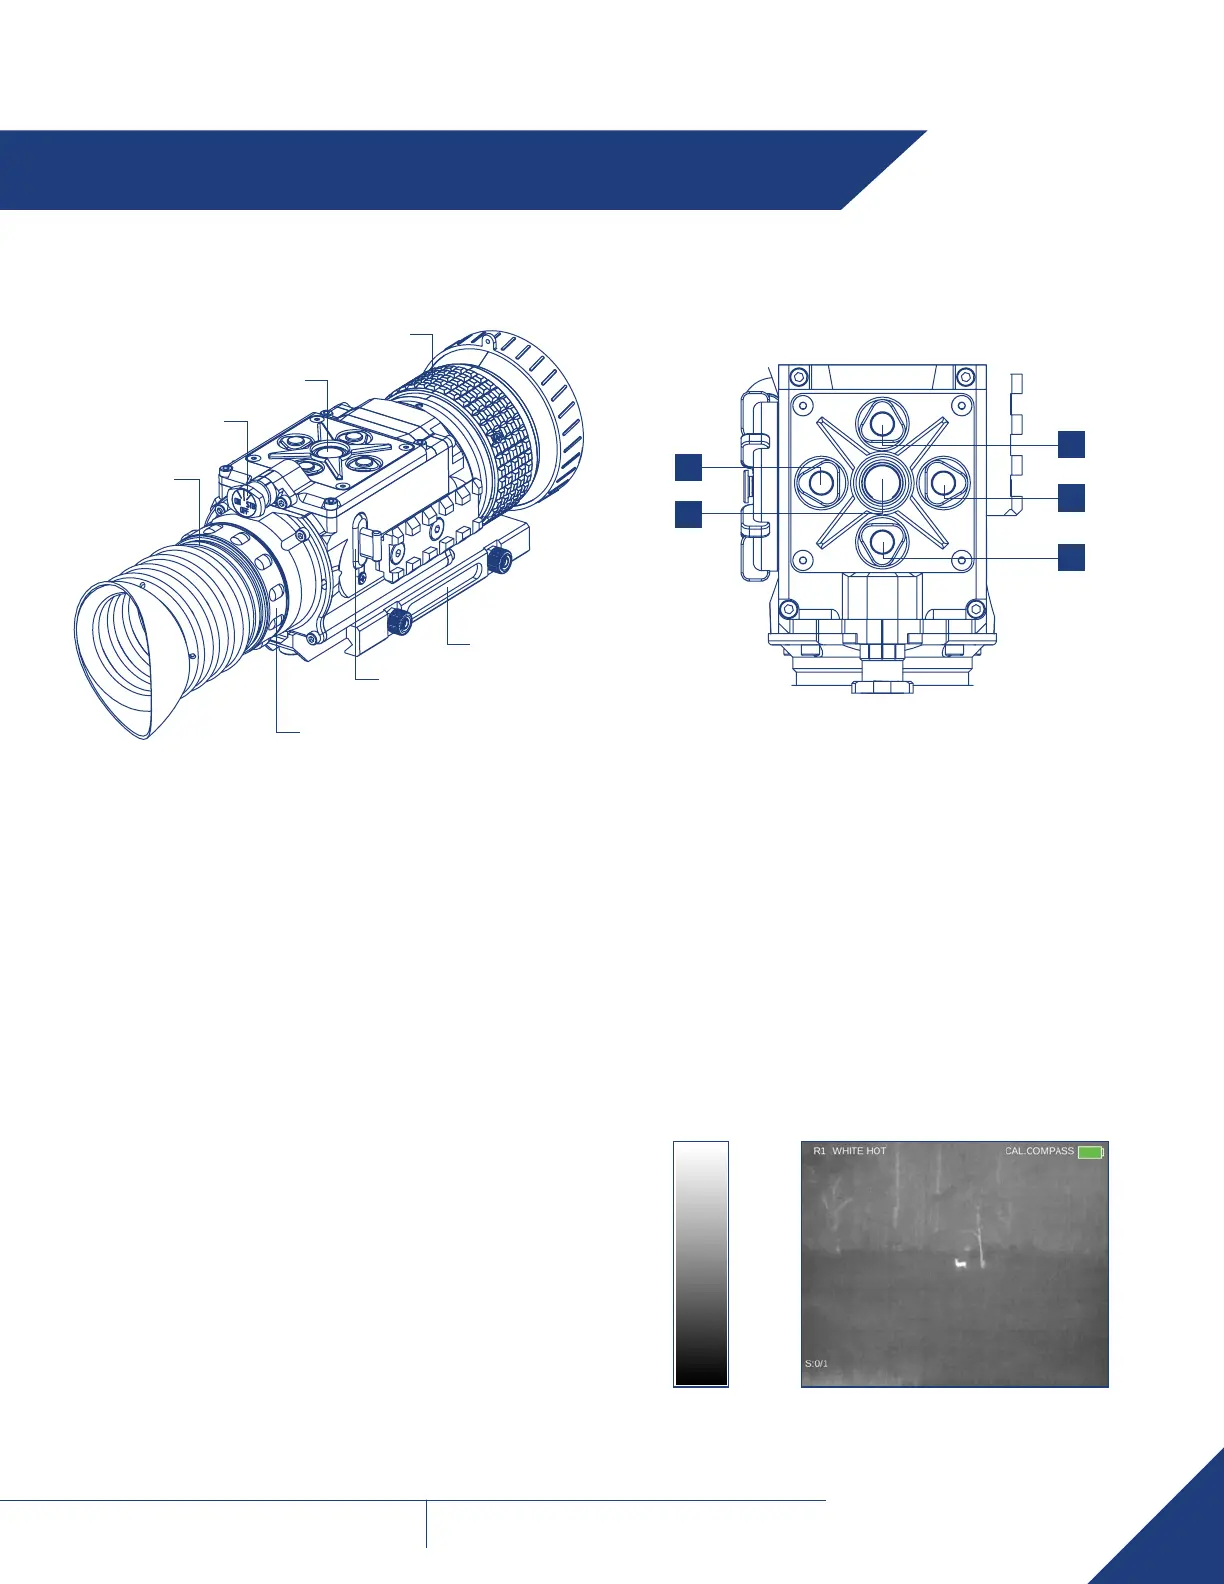
Turn-Pull Switch
Control Panel
Focus Ring
Eyepiece
Mount
Diopter Adjustment Ring
USB-C Connector
(closed with a cap)
3.1 SYSTEM CONTROLS 3.1.4 CONTROL PANEL BUTTONS
The control panel buttons configures operational settings.
●
◄
►
▲
▼
3.1.4.1 DISPLAY BRIGHTNESS CONTROL
Push the ▲button to increase the screen brightness or push the
▼ button to decrease the screen brightness.
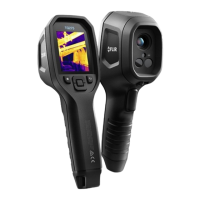
3.1.4.2 IMAGE PALETTE CONTROL
To scroll up through the available palettes push and hold ▲ or ▼
button to scroll down or up respectively. There are 7 palettes available.
Please see the following images for examples of ThermoSight Pro’s
color palettes.
WHITE HOT
Most commonly used palette. Hot objects appear white. Good for
scenes with either high or low contrast.
3.1.1 DIOPTER ADJUSTMENT
The diopter adjustment allows a user to alter the viewfinder to
accommodate that individual’s eyesight for optimum image sharpness.
While looking through the eyepiece, rotate the diopter adjustment ring
to optimize the sharpness of the image in the viewfinder.
3.1.2 FOCUS ADJUSTMENT
Bring the object into focus by turning the objective focus ring (CW for
far focus, CCW for near focus). Rotate the focus ring until the subject
looks sharp in the viewfinder.
NOTE: The focusing ring is not available on the ThermoSight Pro
PTS233 model.
3.1.3 TURN-PULL SWITCH
The Turn-Pull Switch performs the following functions:
• Activates the ThermoSight Pro when turned to ON.
NOTE: You must pull the knob before turning in order to use either the
ON or STB.
• Activates standby mode when turned to STB (see note above).
• Deactivates the ThermoSight Pro when turned to OFF.