Fluke 433, 434, 435
Service Manual
5-4
5.2.3 Replacing the Side-Strap, Changing the Side-Strap Position
The side-strap (figure 5-6, item 16) can be attached at the right or left side of the
Analyzer. Use the following procedure to replace the strap, or to change the strap
position.
1. To remove the strap, unfold the strap ends (provided with Velcro tape), and pull the
ends out of the strap holders (item 17).
2. To change the strap position open the Analyzer (see Section 5.2.4), remove the strap
with the strap holders, attach them to the other side, and reassemble the Analyzer.
5.2.4 Opening the Analyzer, Removing the Battery
Use the following procedure to open the Analyzer, and to remove the battery:
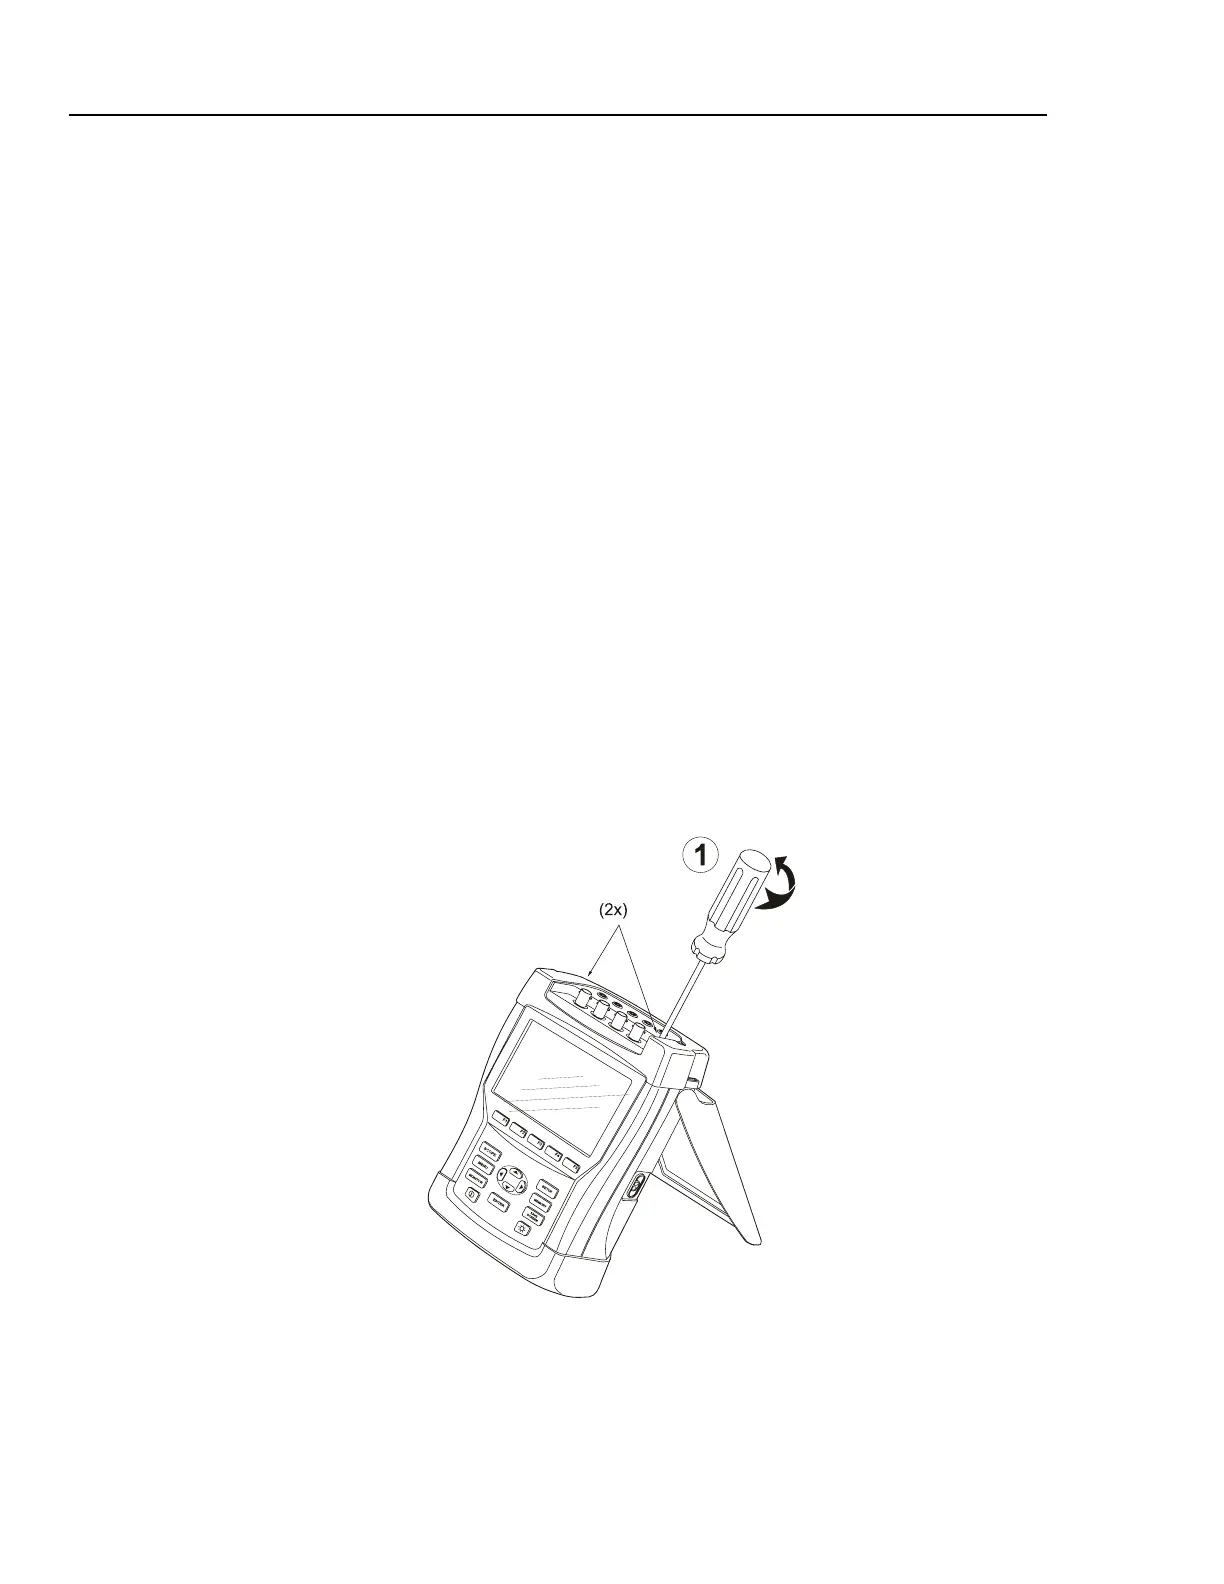
1. Loosen the two M3 Torx screws that secure the input cover (Figure 5-2).
Note: fix the screws firmly when installing the input cover again. This assures that
the housing is closed sufficiently.
2. Loosen the two M3 Torx screws that secure the bottom holster (Figure 5-3).
3. Pull off the input cover and the bottom holster (Figure 5-4).
4. Unscrew the two screws that lock the bottom case.
5. Lift the bottom case at the lower side to remove it.
6. Unplug and lift out the battery pack (Figure 5-5).
7. Unplug the cable leading to the Main PCA (pull the cable gently backwards).
Figure 5-2. Loosen 2 Input Cover Screws