79/26
Calibration Information
8
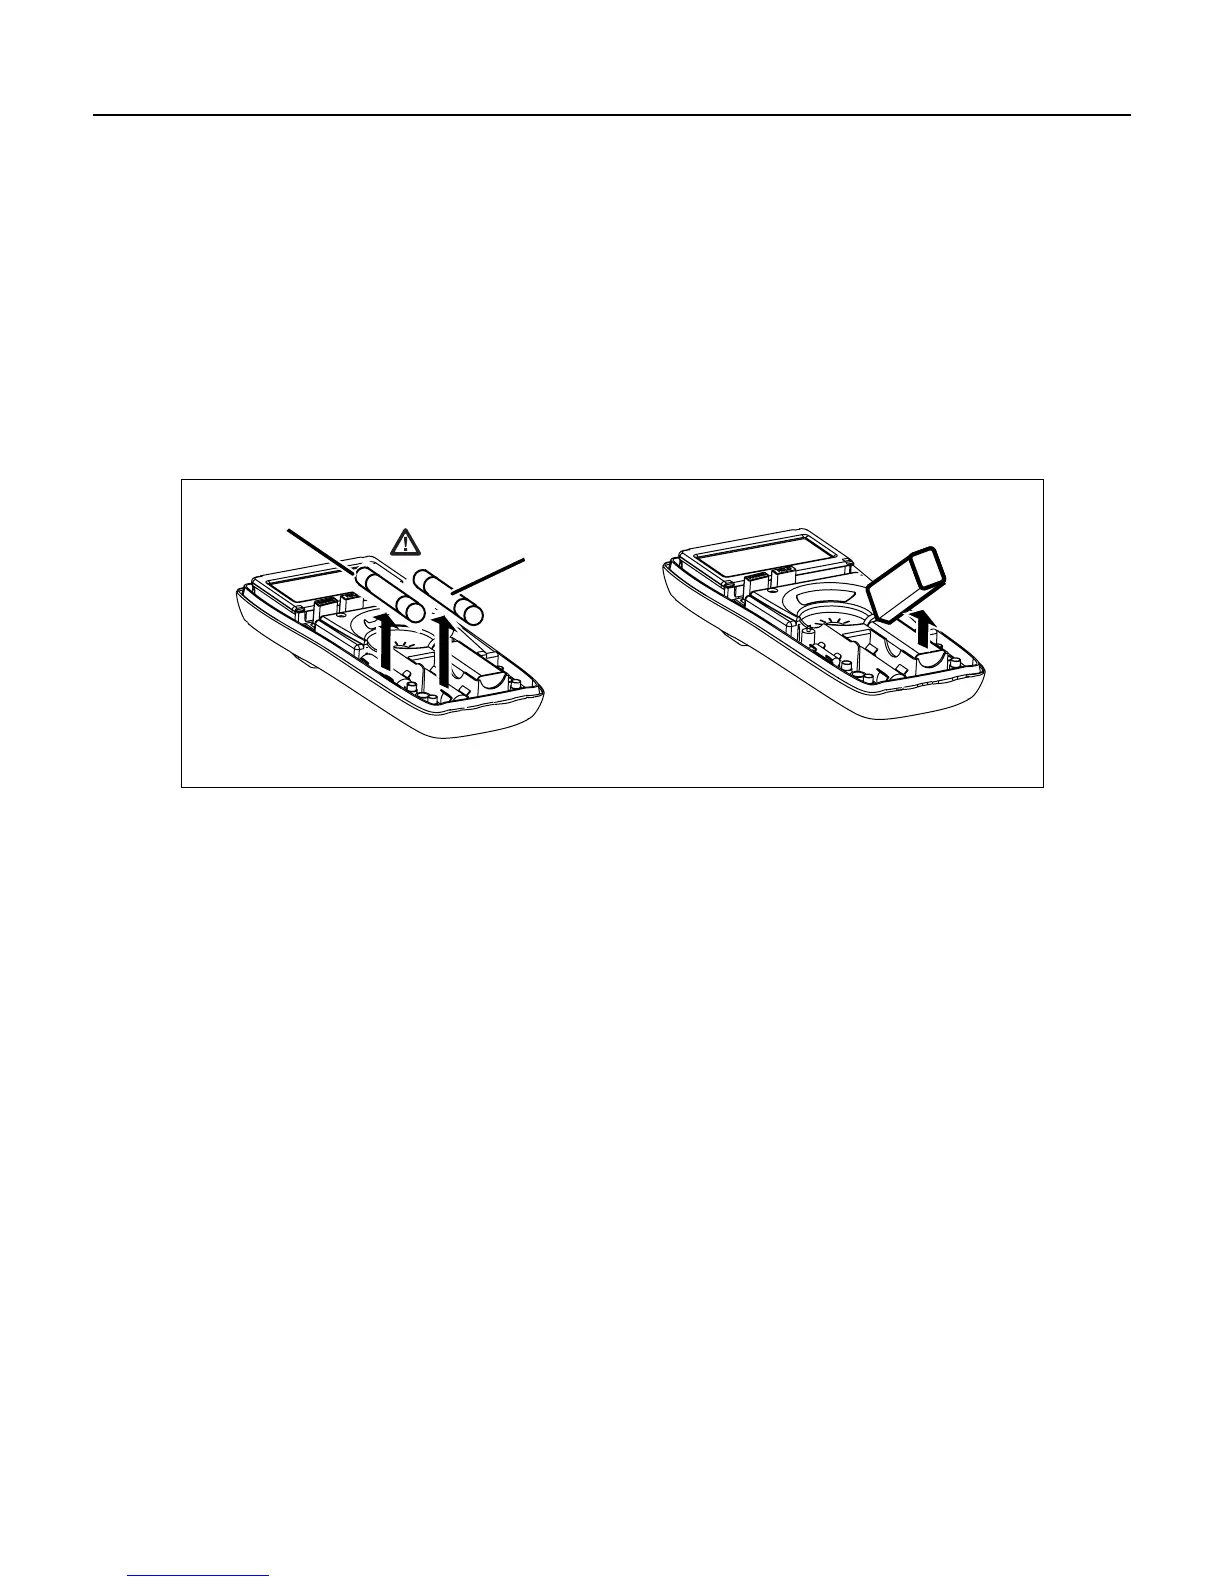
Replacing the Battery
W Warning
To avoid false readings, which could lead to possible electric shock or personal
injury, replace the battery as soon as the battery indicator M appears.
The meter is powered by a single 9 V battery (NEDA 1604A/IEC 6LR61).
Refer to Figure 2, and use the following procedure to replace the battery:
1. Remove the top case as described under “Opening the Meter Case.”
2. Lift the battery from the bottom case and install the new battery.
3. Reinstall the top case as described below in “Reassembling the Meter Case.”
F2
F1
pd002f.eps
Figure 2. Replacing the Fuses and Battery
Reassembling the Meter Case
1. Verify that the rotary switch is in the OFF position.
2. Place the top case on the bottom case and snap them together.
3. Reinstall the four Phillips screws into the bottom case.
Go to “Performance Tests” later in this document, and perform the procedures described.