Series III Multimeter
Basic Maintenance
11
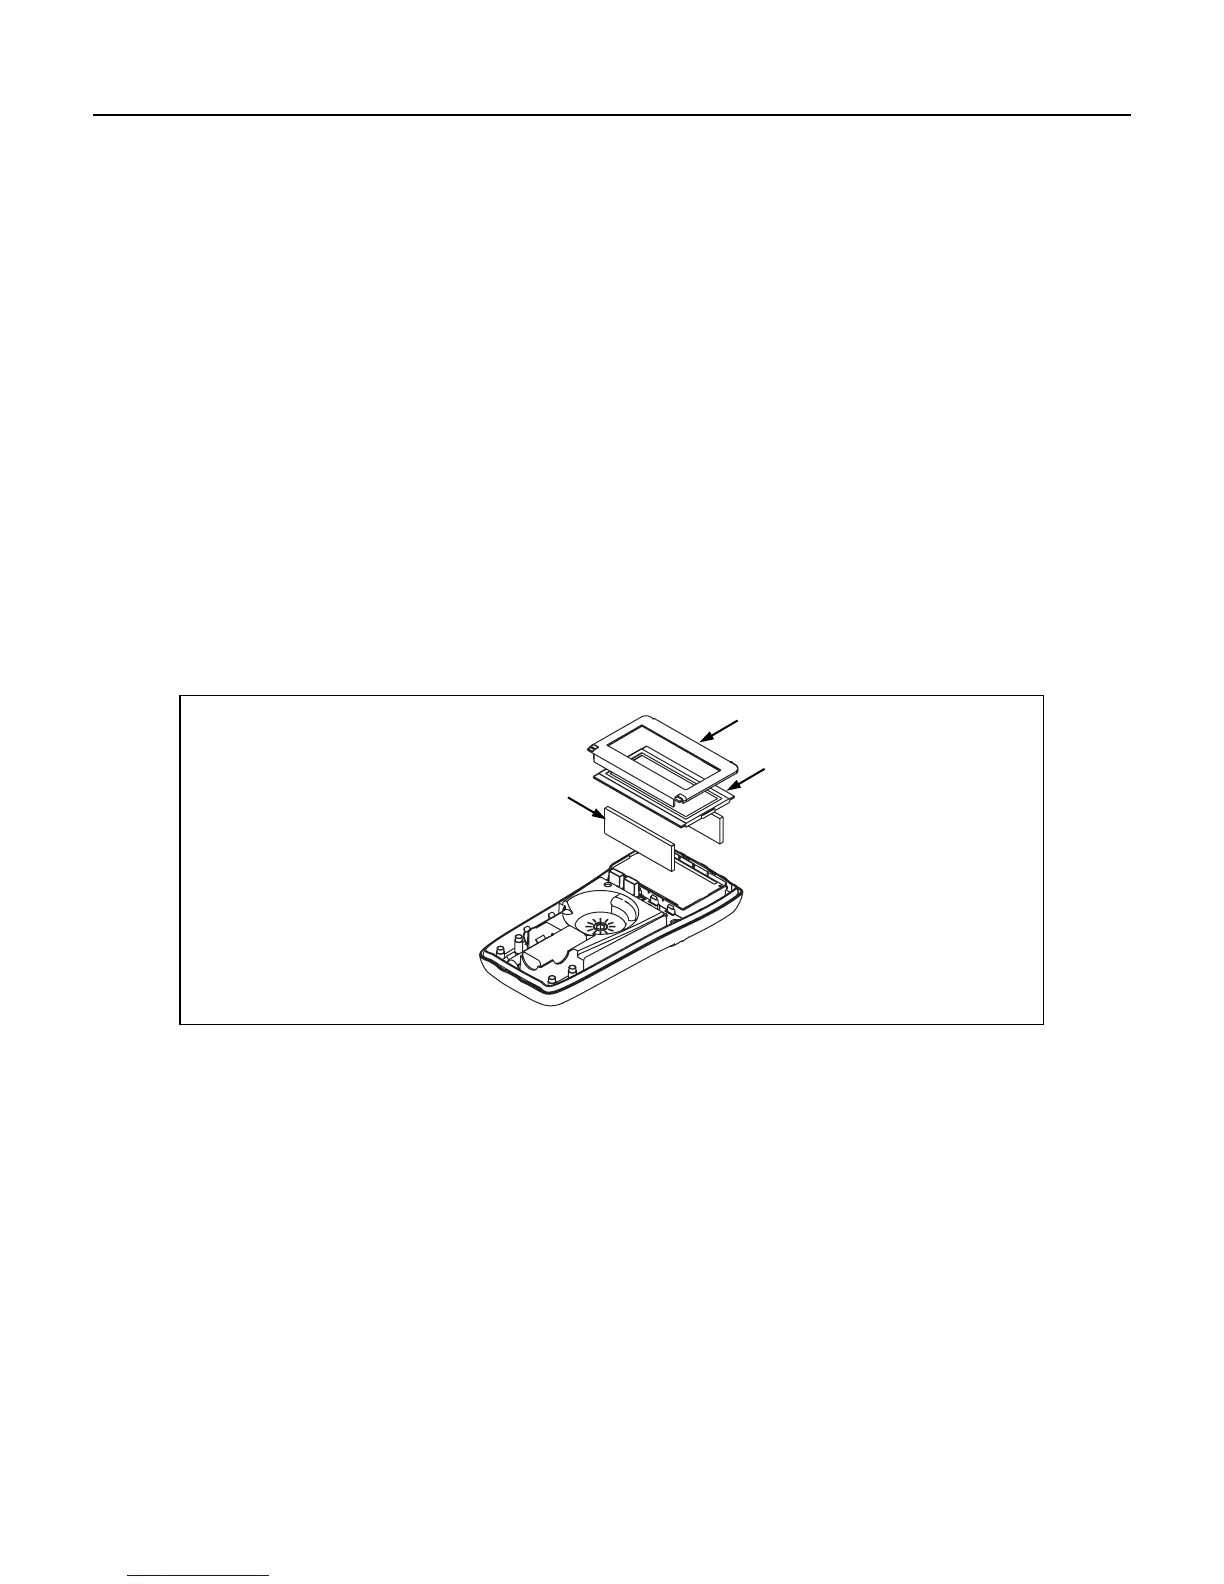
Replacing the LCD
Caution
To prevent contamination, do not handle the conductive edges of the LCD or
LCD interconnects. If they are contaminated, clean them with alcohol. Allow the
alcohol to dry before reassembling.
Refer to Figure 5, and use the following procedure to remove and replace the LCD:
1. Remove the top case as described under “Opening the Meter Case.”
2. Remove the F2 fuse as described in “Replacing Fuses” and remove the single Phillips screw underneath
the fuse. Lift out the LCD subassembly from the bottom case.
3. Remove the mask by inserting a small screwdriver under the edges, and gently pry the mask from the
snaps. Lift out the LCD.
4. Before installing a new LCD, make sure that all connector contact points are clean. Refer to “Cleaning”
for more information.
5. The LCD has a “bump” on the right edge. When replacing the LCD, make sure that the “bump” points
to the right.
6. Reassemble the LCD assembly and attach it to the pca with the four screws.
7. Reinstall the top case as described in “Reassembling the Meter Case.”
Mask
LCD
Elastomeric
Strips
pd007f.eps
Figure 5. Removing and Replacing the LCD