3
OPERATION
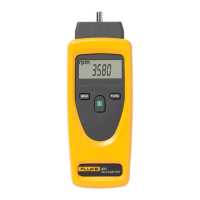
Press O to power up the Tachometer. The display test illuminates all
LCD segments for 1 second and then shows the configured surface speed
selection.
The last selected mode appears at when the Tachometer is turned ON.•
The Tachometer automatically turns OFF after 30 seconds of inactivity. •
CONFIGURATION
To configure the Tachometer for the correct contact wheel used for surface
speed measurements:
Turn the Tachometer ON.1.
Press 2. M and F release.
Use 3. F to select 0.1 (0.1 m circumference small wheel) or 6” (6 inch
circumference large wheel). A 12” wheel is not available.
OPTICAL (NON-CONTACT)
To measure RPM using the non-contact infrared beam, remove the
mechanical adapter from the top of Tachometer. Pull the adapter straight out
to remove. See Figure 2.
Stop the rotating device to measure. 1.
Clean a spot for the reflective strip.2.
Place reflective strip on rotating device.3.
Turn the Tachometer ON and use 4. F to select RPM.
Aim Tachometer at rotating reflective strip keeping within 500 mm 5.
(20 inches).
Press 6.
O to enable the infrared beam.
When the Tachometer is triggered by the reflective strip, the trigger 7.
symbol on the display flashes and RPM will be displayed.
CONTACT
To use the Tachometer for contact measurement, insert the mechanical
adapter into top of the Tachometer, see Figure 1:
To measure, connect the cone or internal cone shaft contact to the end of 1.
the shaft.
Turn the Tachometer ON and use 2. F to select RPM C.
Press 3.
O to take measurements.
When the Tachometer is triggered, the trigger symbol flashes and the 4.
RPM is displayed.

 Loading...