43
Security
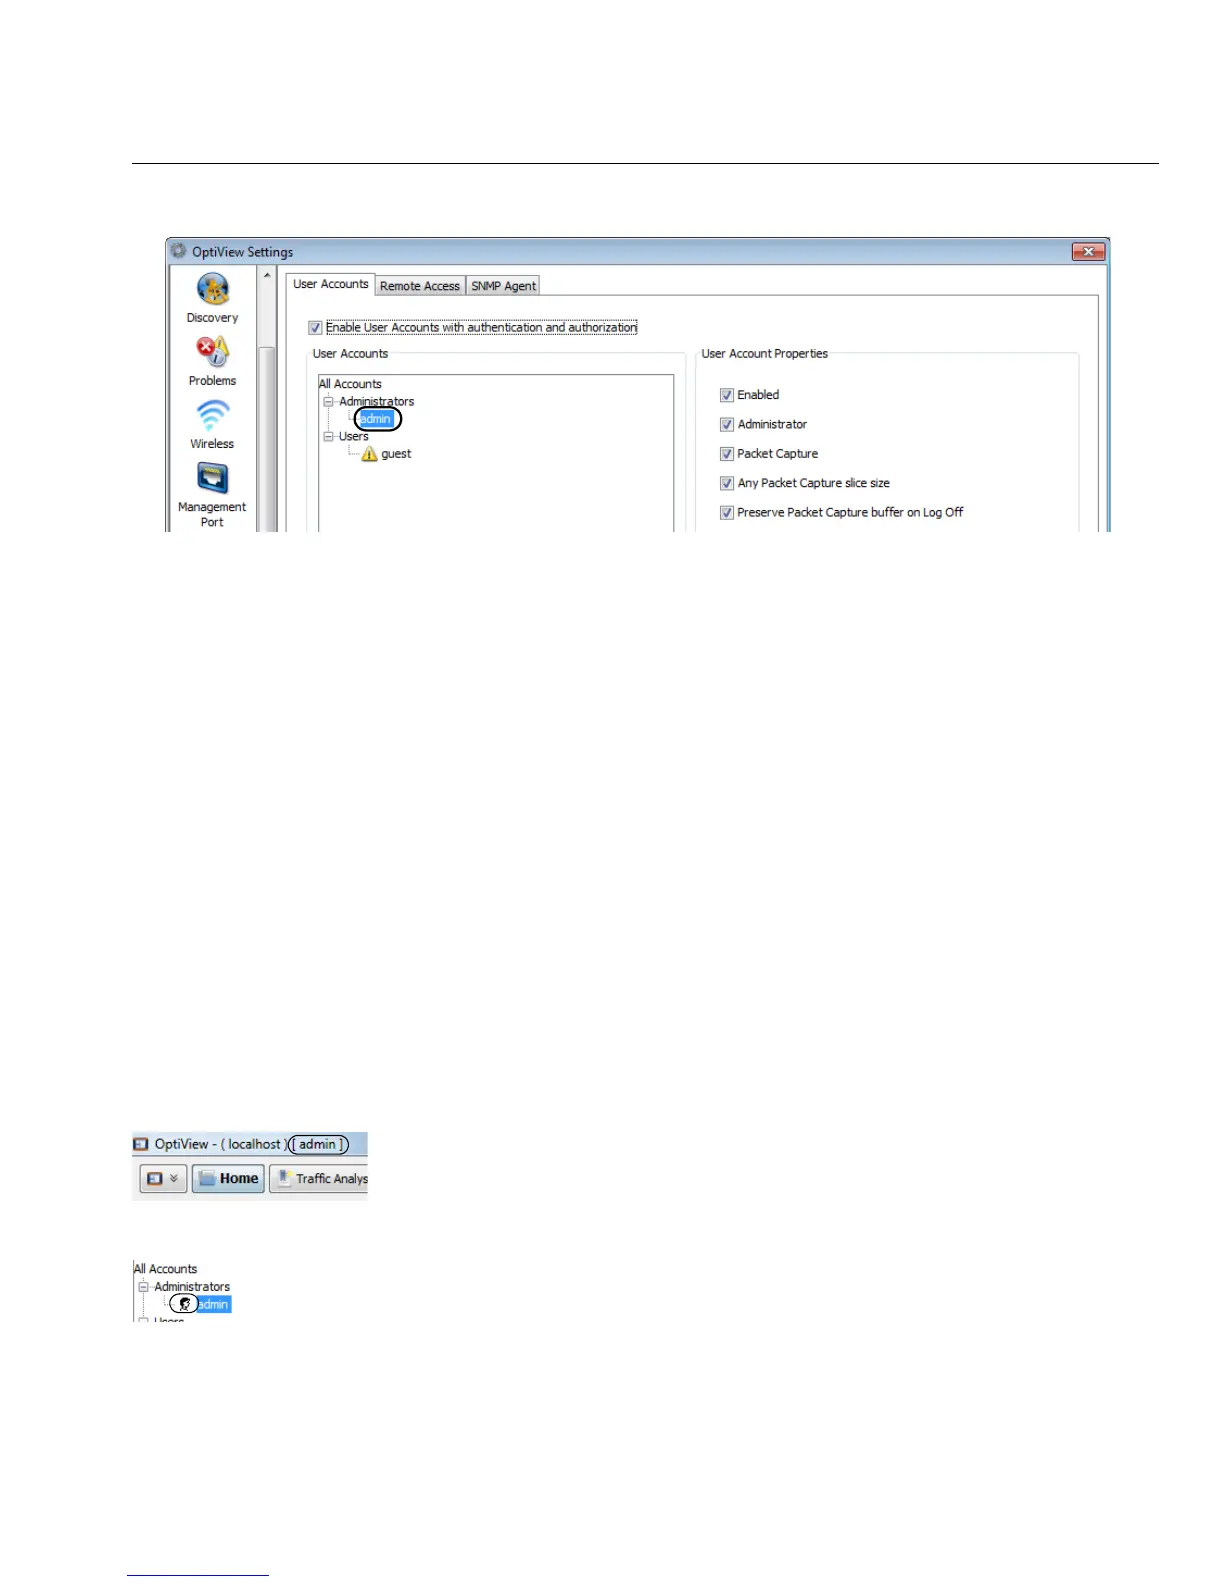
4. Expand the Administrators tree and select the admin account.
5. Select the Create Password button and enter a password. The password field can be up to 40
characters in length. All characters (including spaces) are allowed for the password field.
6. Select the Enabled check box under User Account Properties.
Choose options under User Account Properties by checking the check boxes. Normally, all of the
boxes are selected for the administrator account. See the OptiView XG online help for
descriptions of the User Account check boxes.
7. Select the Apply button.
8. Be sure to select the Enable User Accounts with authentication and authorization check box!
When this box is not selected, all user accounts are disabled.
• You may now create additional user accounts if desired. Select the guest account if you’d like
to use it, or select the Add button to create new accounts. The Account name and password
fields can be up to 40 characters in length. All characters (including spaces) are allowed for
both the Account and password fields.
9. Select the OK button.
The user name (“admin” in this case) is displayed in the OptiView title bar.
An icon is displayed to the left of an account name to indicate that the user is logged-in.
 Loading...