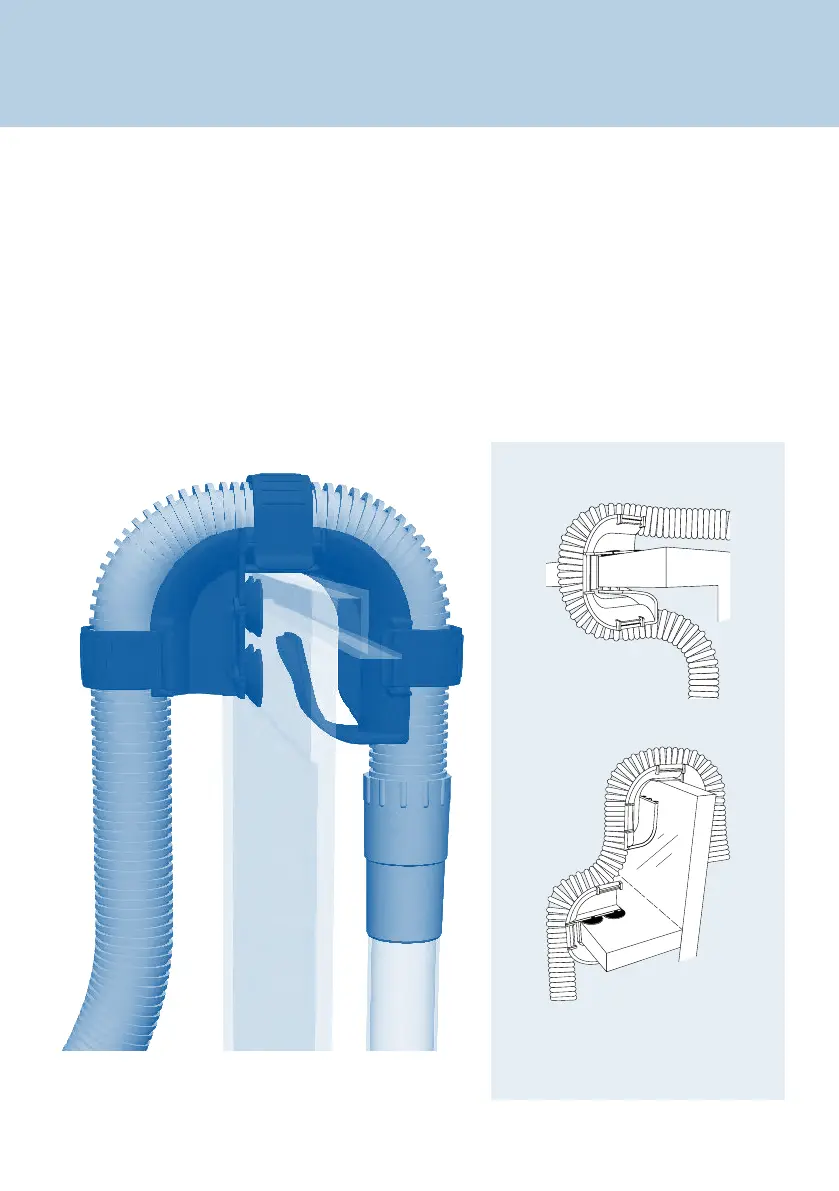
2. Place the two rim connectors over the back top edge of the aquarium. Place one just above
the spot where you want to place the intake tube; place the other just over the spot where you
want to position the output nozzle. Be sure that the long end of the bracket is on the inside of the
aquarium.
The rubber rings on the connectors are designed to help them adhere to tank glass better.
If the aquarium walls are thinner than 5/8” (1.58 cm) replace the rubber ring with the four smaller
suction cups provided.
Important: Be sure to position the intake tube away from any air source—an air stone, an
aeration device, protein skimmer or the output valve. Air entering the intake strainer will diminish
filter efficiency.
INSTALLATION AND USE
Alternate Configurations
Note: A dropped ledge rim requires
purchase of an extra rim connector.
(See “Replacement Parts” for ordering
information.)
EN-8