BLADE 2.0 | USER MANUAL | 7
Please follow the instructions for assembly in the following
pages carefully and properly. If you dont feel 100%
condent assembling the bike, please take it to a bike shop
for assistance.
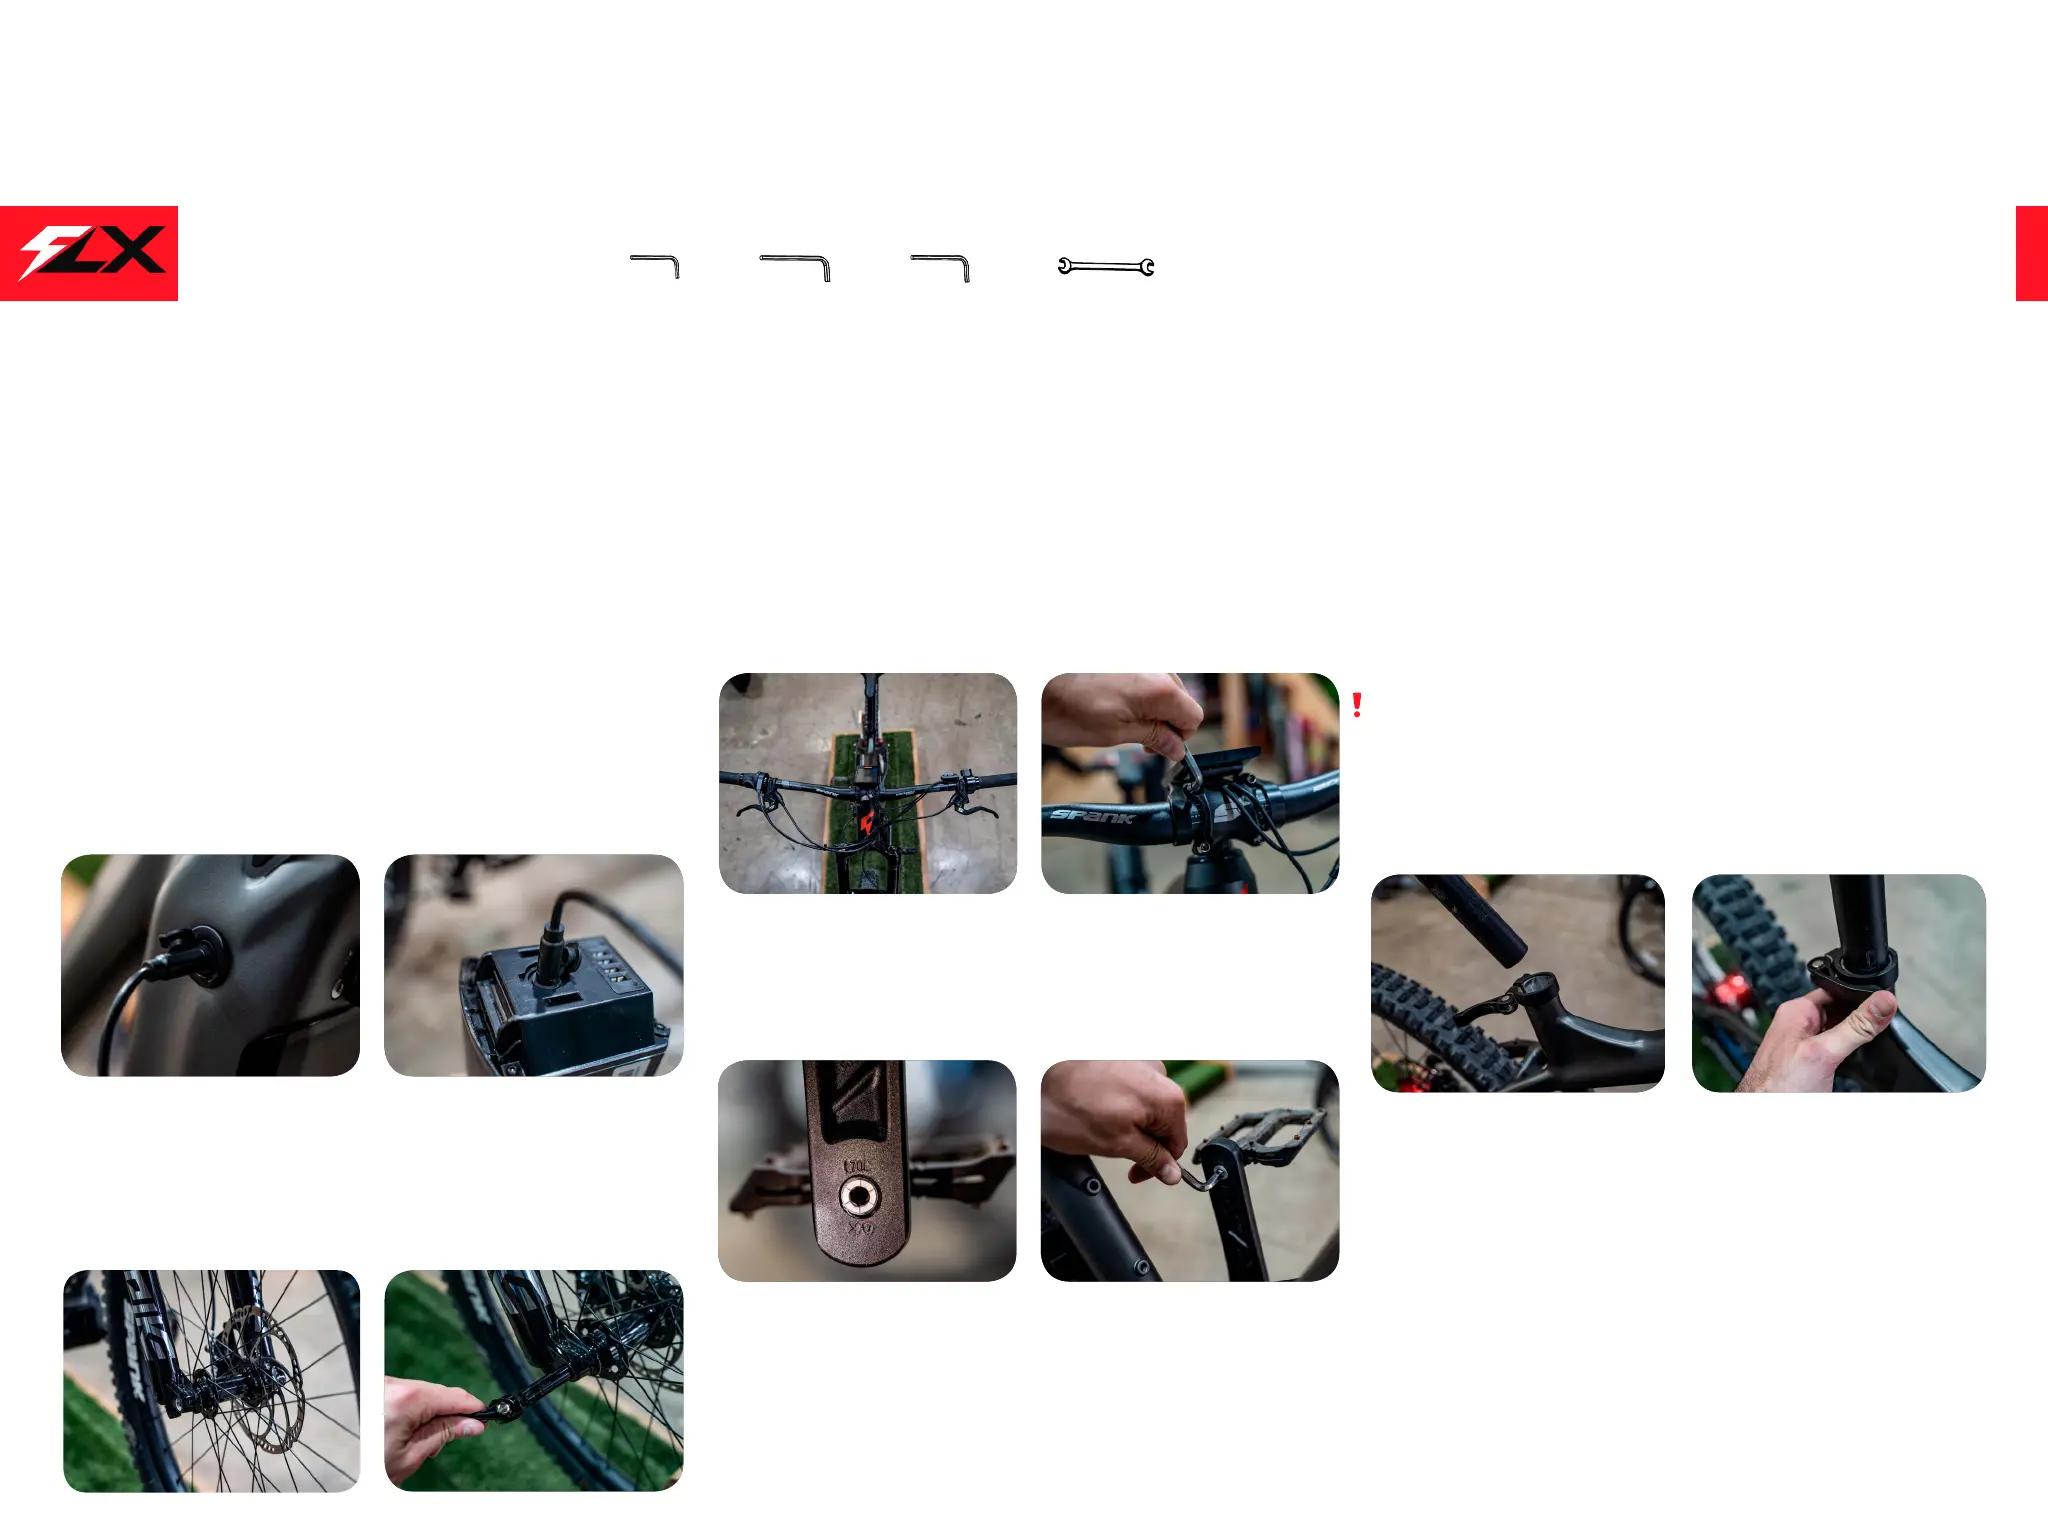
01. CHARGE THE BATTERY BEFORE FIRST USE
Insert the charging plug into the charging port on the
battery. The light on the battery will turn red while the
battery is charging. This indicator light will turn green
when the battery is fully charged. A full charge will take
3.5 hours depending on battery type.
ASSEMBLY INSTRUCTIONS
Charge on Bike Charge off Bike
Position the Wheel Insert the Thru Axle
Position the Handlebar Tighten the Screws
INCLUDED TOOLS FOR ASSEMBLY:
M2.5 Hex Key M4 Hex Key T25 Torx Key 15mm Flat Wrench
Tighten the Right Pedal
Insert the Seatpost Tighten the QR
02. MOUNT THE FRONT WHEEL
Insert front wheel in the fork and make sure the rotor
(disc) is positioned properly between the front brake pads.
Insert the Thru Axle through the fork and hub and tighten
it using the quick release lever.
03. INSTALL THE HANDLEBARS
Remove stem plate. Locate the handlebar against the
stem. Insert and screw the bolts into the stem plate to
assemble the handlebar. Tighten the screws clockwise
with the M4 Hex key.
04. ATTACH THE PEDALS
Use the 15mm at wrench to attach the pedal by hand in
the directions shown. ATTENTION: The left pedal has a
reverse thread. To tighten, please turn counter-clockwise.
05. INSERT THE SEATPOST
Insert the seatpost into the seat tube and make sure your
seat is in at least to the minimum insertion depth which
is marked by the vertical lines. Use the seatclamp’s quick
release to tighten the seatpost.
WARNING: INSERT YOUR SEATPOST PROPERLY
Failure to insert the seat post to the proper depth could
overstress the seat tube, which could cause the frame to
break and lead to a serious accident. If the seat post is
not tall enough for you, please use an extra long seat post
that can acommodate your height.
Tighten the Left Pedal