9
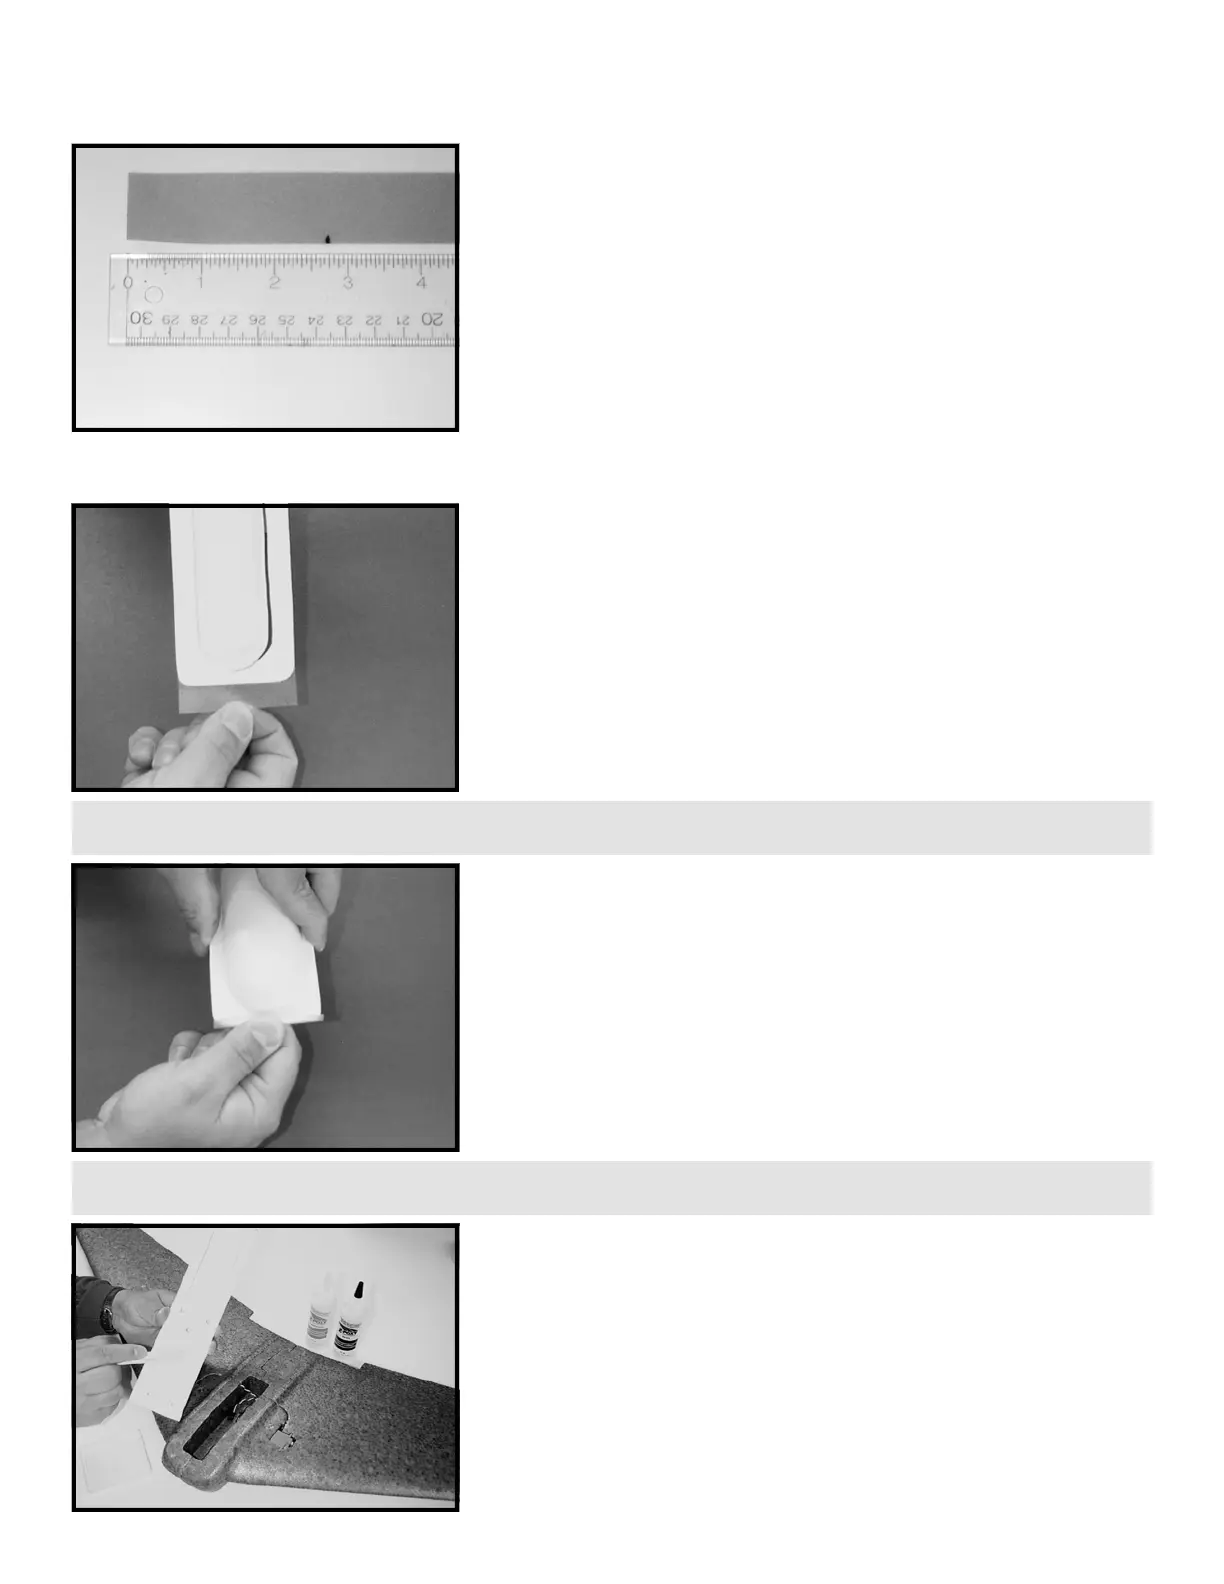
STEP 19: Remove the adhesive backing from the tape hinge prepared
in STEP 18. Hold the equipment tray right-side-up in one hand. With
the other hand, install the tape to the bottom front of the equipment
tray. Allow about 1/2 the width of the tape to protrude from the front
edge of the tray, sticky side up.
STEP 18: Locate one of the two pieces of 0.005” (thin) LEXAN
(TM)
tape. Mark the tape at 2 3/4”. This small piece of tape will be used to
hinge the canopy to the equipment tray for easy access to flight pack
and propulsion equipment. Cut the tape straight across.
STEP 20: Place the canopy on the equipment tray. Hold the assembly
right-side-up and carefully wrap the tape hinge over the top of the
canopy as in the illustration. The thin tape easily conforms to the
shape of the canopy so there is no need for cutting the tape around
the “bubble” of the canopy. Turn the tray/canopy assembly up-side-
down and trim away the excess tape that extends under the battery
hatch.
STEP 21: Sand the bottom of the equipment tray/canopy assembly
so that the adhesive bond will be strong. Mix a modest amount of 5
minute epoxy and apply a thin layer to the underside of the
equipment tray in the places where the tray will touch the fuselage.
Avoid getting adhesive on the servo wires. Mount the tray to the
fuselage and hold or tape in place until the adhesive cures.
TIP: As an alternative to using the LEXAN™ as a hinge, you may also attach the canopy at the front using hook and loop fastener.
TIP: Some customers have expressed having problems routing the nylon motor tie (shown in STEP 25) into the tray after the tray is installed. To
make it easier, you may wish to consider feeding the tie through the holes before gluing down the tray in STEP 21 below.
 Loading...