Page 2 of 15
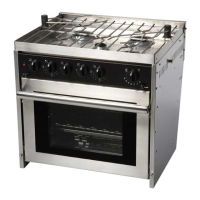
GAS PRESSURE
Your Force 10 Galley Ranges (unless otherwise specified) is designed to operate from
low pressure Propane gas.
Gas Pressure
Orifice Size (mm) / By Pass (mm)
mbar psi Auxiliary
Burner
Rapid
Burners
Broiler Thermostatic
Oven Burner
Propane 30 0.44 0.45/ 0.30 0.78/ 0.47 0.68/ NA 0.74/ 0.37
INSTALLATION
Unpacking
1. Remove all plastic coating before use.
2. Please copy the model and serial number of your unit into your manual. This is
located both on the shipping box and the right stove side of the Range.
MODEL #_________________ SERIAL #___________________
Packing List
Owners Manual Gimbal Wall Brackets (2)
Pot Holders (2 sets) Built-in Trim kit
Gimbal Wall Brackets (2) LPG warning plates (3)
Gas connection
Note: This appliance is designed to operate from low pressure (30mbar) Propane.
Exposure to high pressure can damage the unit
Connect your Galley Range to a properly installed low pressure Propane System. Force
10 Manufacturing recommends that your Propane system meet the regulations specified
in the American Boat and Yacht Council Standard A-1. (Marine Liquefied Petroleum Gas
(LPG) Systems)
The gas fitting on this range is a 3/8” SAE 45 Male flare fitting, located in the back on
the lower left as you are facing the front of the unit.
For gimbaled installation there must be a minimum of 24” (600mm) of flexible hose to
allow the unit to gimbal freely.
Test all fuel lines and connection points for leaks with a soapy water before use. Do not
attempt to locate leaks by using an open flame.
An optional 8mm Nozzle adaptor fitting is also available (Part # 87155)