Page 5 of 15
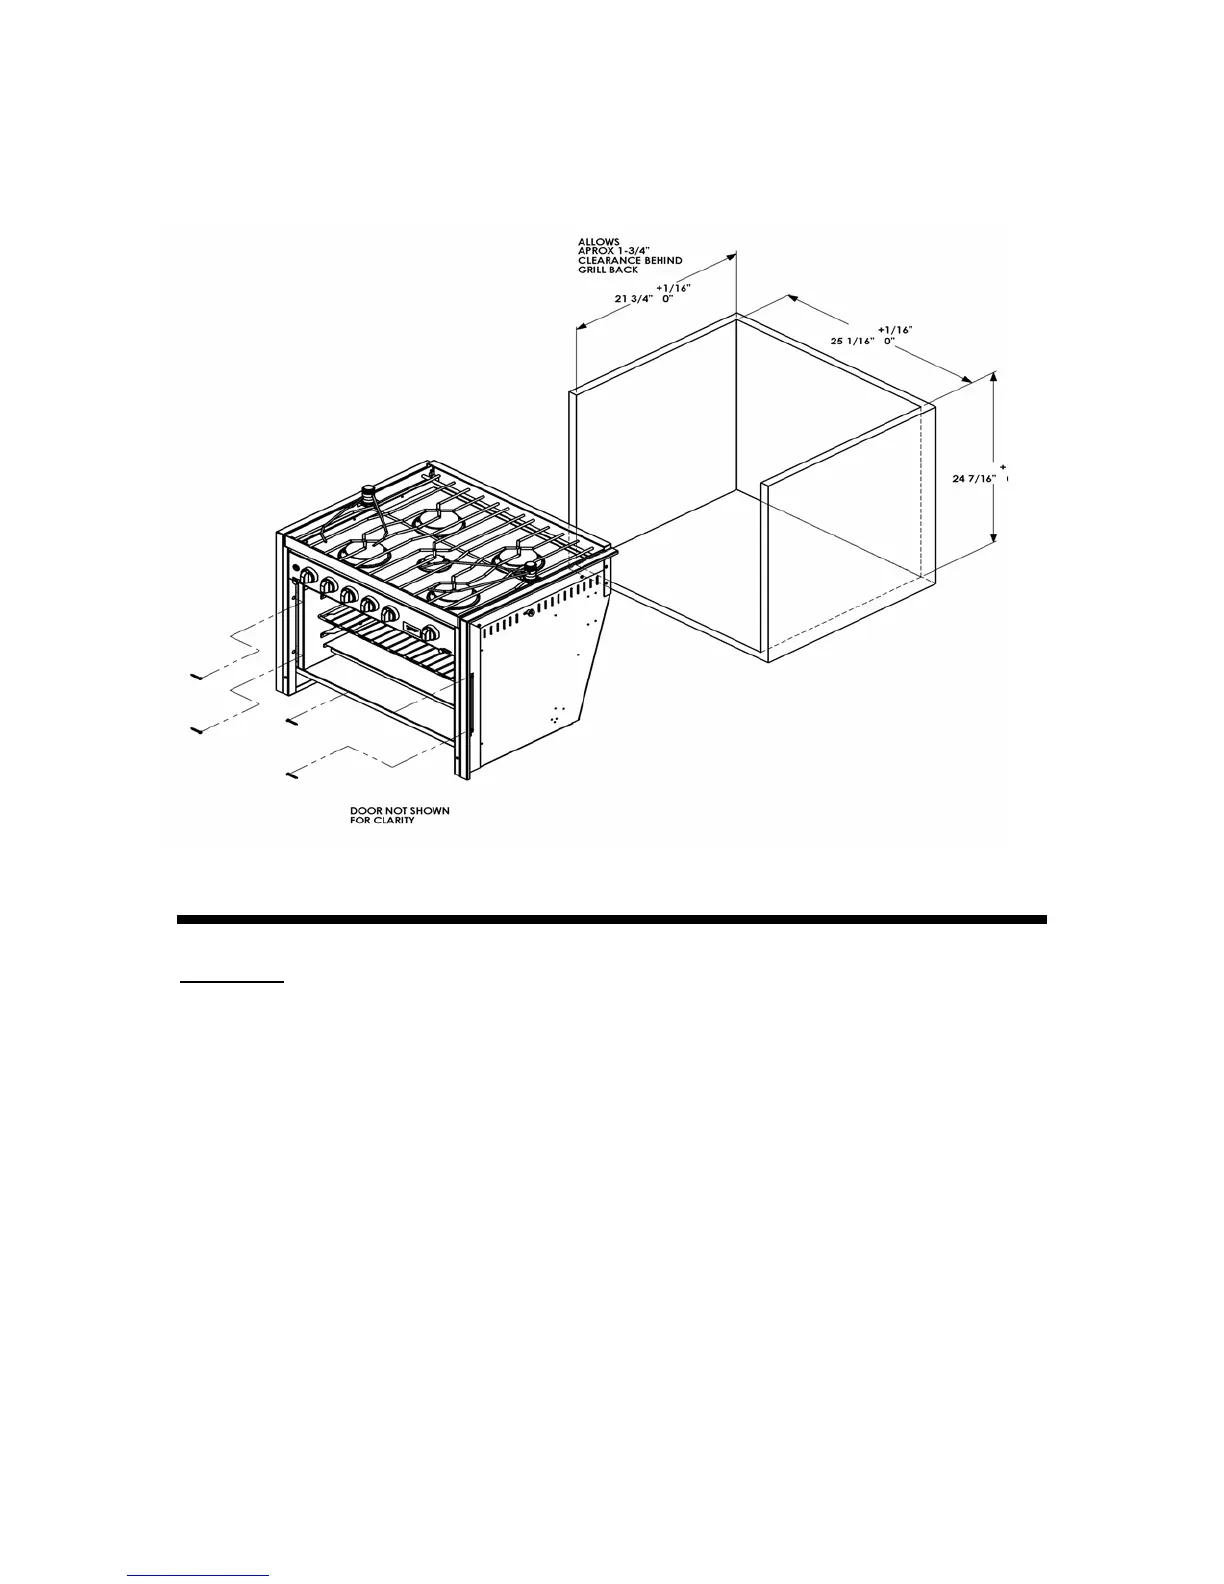
Secure the stove into position by screwing the stove sides to the walls of the cut out. The
mounting holes are located as shown. Use #6, 1” stainless steel wood screws (Screws not
included)
OPERATION
Features
Your Force 10 Professional Series range has a number of features to make your unit
easier to use.
Pot Holders - There are (2) sets of Pot holders included with your unit. These Pot
holders are designed to hold pots in place during movement. To install the pot holder,
screw the unit (clockwise) into the black base on either side of the top grill. Adjust the
width of the arms by loosening the black knob (counter-clockwise) and separating the
arms to the desired width.
Removable Top Grill - This range is equipped with a removable top grill for ease of
cleaning and maintenance.
To remove:
Rotate the two clasps located on each end of the grill frame up ward approximately 45
degrees until the clasp disengages the spool. (The clasp when properly engaged will ride