- 3 -
Drilling Outboard Mounting Holes
IMPORTANT: Before drilling any mounting holes,
carefully read “Determining Recommended Out-
board Mounting Height,” preceding. There is a 3/4
in. (19 mm) difference between outboard mount-
ing holes in transom brackets.
!
WARNING
DO NOT, under any circumstances, allow upper
outboard mounting bolts to be closer than 1 in.
(25.4 mm) from top of boat transom. Upper
mounting bolts must never be installed thru
shims.
NOTE: When drilling into a fiberglass boat, place
masking tape directly onto boat where mounting
holes will be drilled to help prevent fiberglass from
chipping.
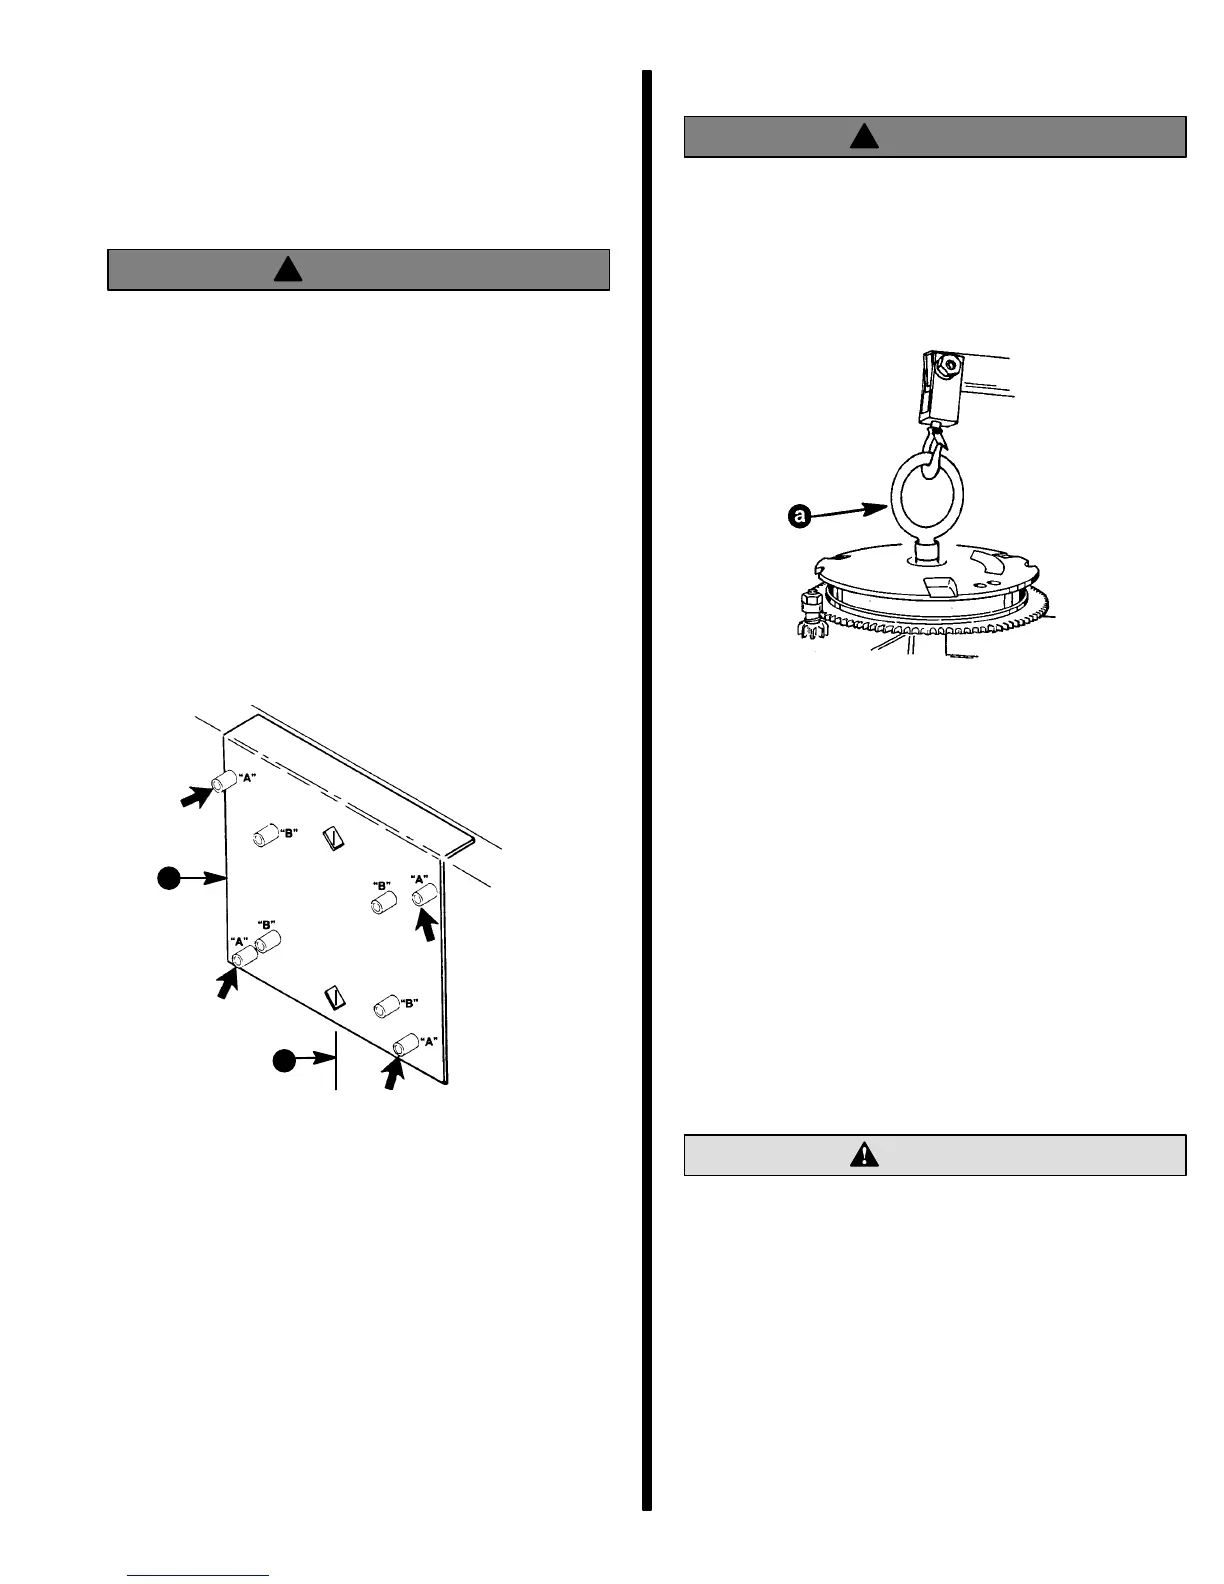
IMPORTANT: When using “Transom Drilling Fix-
ture” (part number 91-98234A2), use drill guide
holes marked “A” when drilling outboard mount-
ing holes.
a
b
a - Centerline of Transom
b - Transom Drilling Fixture (91-98234A2)
1. Use a 17/32 in. (13.5 mm) diameter drill bit to drill
4 mounting holes perpendicular to and thru tran-
som.
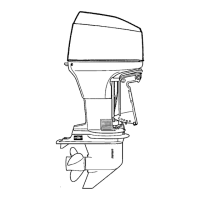
Lifting Outboard
!
WARNING
Make sure lifting ring is threaded on flywheel a
minimum of 5 turns and that hoist has a maximum
lift capacity over 500 lbs. (227 kg) BEFORE lifting
outboard.
Remove top cowl from outboard. Thread lifting ring
(a) on flywheel a minimum of 5 turns.
a - Lifting Ring (91-90455)
Connect hoist [maximum lifting capacity over 500 lbs.
(227 kg)] to lifting ring and lift outboard onto boat tran-
som.
Securing Outboard to Boat Transom
IMPORTANT: If boat is equipped with thru tilt tube
steering, steering cable end must be installed
into tilt tube of outboard before securing out-
board to transom. Refer to “Steering Cable and
Steering Link Rod Installation” following.
Position outboard on boat transom to align mounting
holes in transom brackets with those drilled in boat
that will place the outboard at the recommended
mounting height (refer to “Determining Recom-
mended Outboard Mounting Height,” preceding).
CAUTION
Marine sealer must be used on shanks of mount-
ing bolts (not threads) to make a water-tight in-
stallation.
IMPORTANT: DO NOT use an impact driver when
tightening transom mounting bolts.
Apply marine sealer to shanks of mounting bolts (not
threads). Secure outboard to transom using four (4)
bolts, flat washers and locknuts, as shown. Be sure
installation is water-tight.