Do you have a question about the Force JX-1125N and is the answer not in the manual?
Essential safety guidelines for using fitness equipment.
Instructions for cleaning and lubricating the machine.
Attaching guide rods and bumpers to the base frame.
Connecting base frame sections and brackets.
Attaching vertical supports and upper frame components.
Installing the main power tower support.
Assembling leg press and seat support frames.
Installing weight stacks and select rod.
Attaching guide rod holders and tower support.
Attaching seat support and arm curl stand.
Attaching left and right dip arms.
Installing chinning bar and foldable leg.
Attaching butterfly base supports and arms.
Attaching side handles and seat/backrest pads.
Attaching various pads to supports.
Attaching backrest and arm pads to supports.
Installing foam roll tubes and end caps.
Attaching long and short foam roll tubes with foam rolls.
Installing various cables and pulleys.
Attaching the leg press cable.
| Brand | Force |
|---|---|
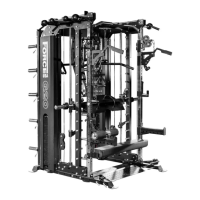
| Model | JX-1125N |
| Category | Fitness Equipment |
| Language | English |