EasyManua.ls Logo

Force F-G20-BASE User Manual

Force F-G20-BASE
61 pages
To Next Page IconTo Next Page
Page #1 background imageLoading...
Page #1 background image
OWNER’S MANUAL
F-G20
CAUTION!
Read all precautions and instructions in this manual before using this equipment.
OWNER’S MANUAL
F-G20-BASE
CAUTION!
Read all precautions and instructions in this manual before using this equipment.
Question and Answer IconNeed help?

Do you have a question about the Force F-G20-BASE and is the answer not in the manual?

Force F-G20-BASE Specifications

General IconGeneral
BrandForce
ModelF-G20-BASE
CategoryFitness Equipment
LanguageEnglish

Summary

Spare Parts List

Assembly Step 1: Initial Frame Assembly

Explosion Drawing: Step 1

Visual guide showing parts for Step 1.

Installation Instructions: Step 1

Step-by-step guide for completing Step 1.

Assembly Step 2: Weight Stack Attachment

Explosion Drawing: Step 2

Visual guide showing parts for Step 2.

Installation Instructions: Step 2

Step-by-step guide for completing Step 2.

Assembly Step 3: Chin Bar Installation

Explosion Drawing: Step 3

Visual guide showing parts for Step 3.

Installation Instructions: Step 3

Step-by-step guide for completing Step 3.

Assembly Step 4: Decorate Plate & Frame Connection

Explosion Drawing: Step 4

Visual guide showing parts for Step 4.

Installation Instructions: Step 4

Step-by-step guide for completing Step 4.

Assembly Step 5: Guide & Sliding Tube Attachment

Explosion Drawing: Step 5

Visual guide showing parts for Step 5.

Installation Instructions: Step 5

Step-by-step guide for completing Step 5.

Assembly Step 6: Pulley & Wire Installation

Explosion Drawing: Step 6

Visual guide showing parts for Step 6.

Installation Instructions: Step 6

Step-by-step guide for completing Step 6.

Assembly Step 7: Reinforcing Plate & Cable Routing

Explosion Drawing: Step 7

Visual guide showing parts for Step 7.

Installation Instructions: Step 7

Step-by-step guide for completing Step 7.

Assembly Step 8: Back Shield Attachment

Explosion Drawing: Step 8

Visual guide showing parts for Step 8.

Installation Instructions: Step 8

Step-by-step guide for completing Step 8.

Assembly Step 9: Barbell Tube & Clamp Installation

Explosion Drawing: Step 9

Visual guide showing parts for Step 9.

Installation Instructions: Step 9

Step-by-step guide for completing Step 9.

Assembly Step 10: Tube & Hook Assembly

Explosion Drawing: Step 10

Visual guide showing parts for Step 10.

Installation Instructions: Step 10

Step-by-step guide for completing Step 10.

Assembly Step 11: Frame & Tube Fitting

Explosion Drawing: Step 11

Visual guide showing parts for Step 11.

Installation Instructions: Step 11

Step-by-step guide for completing Step 11.

Assembly Step 12: Chin Up Bar & Clip Attachment

Explosion Drawing: Step 12

Visual guide showing parts for Step 12.

Installation Instructions: Step 12

Step-by-step guide for completing Step 12.

Assembly Step 13: Safety Catch & Support Pad Installation

Explosion Drawing: Step 13

Visual guide showing parts for Step 13.

Installation Instructions: Step 13

Step-by-step guide for completing Step 13.
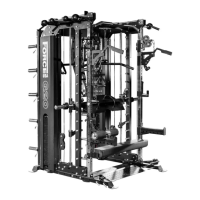
Extra Parts

Related product manuals