This document is a user manual for the Forest Master Direct Drive Wood Chipper, covering models FM9DD, FM14DD, and FM18DD. It provides comprehensive information on the product's function, technical specifications, assembly, operation, maintenance, and troubleshooting.
Function Description
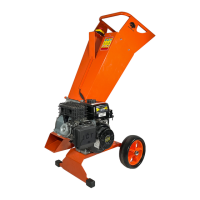
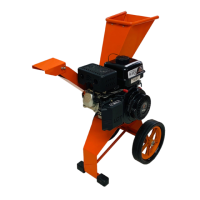
The Forest Master Direct Drive Wood Chipper is designed to chip freshly cut wood branches. The FM9DD, FM14DD, and FM18DD models are specifically engineered for processing soft and hard wood that has been recently cut, ideally within three days. It is crucial not to insert seasoned wood, roots, trunks, knots, stones, plastic, metal, or any other non-wood objects, as these can damage the machine and are not within its intended use. The chipper works by feeding wood into a hopper, where it is processed by a rotating drum with reversible blades, converting branches into wood chips.
Important Technical Specifications
The manual details specifications for three models: FM9DD, FM14DD, and FM18DD.
Engine:
- FM9DD: LCT Maxx 9hp 306cc 4 Stroke Petrol Engine.
- FM14DD: LCT Maxx 14hp 460cc 4 Stroke Petrol Engine.
- FM18DD: LCT Maxx 18hp 478cc 4 Stroke Petrol Engine.
Fuel: All models use Petrol.
Engine Oil Amount: All models require 1.1 litres of engine oil.
Chipper Blade: All models feature Twin Reversible Blades.
Dimensions (Approximate):
- Overall Height: FM9DD (1200mm), FM14DD (1220mm), FM18DD (1220mm).
- Overall Length: All models (1690mm).
- Overall Width: FM9DD (690mm), FM14DD (700mm), FM18DD (730mm).
Weight:
- FM9DD: 92kg.
- FM14DD: 97kg.
- FM18DD: 106kg.
Max Drum RPM: All models operate at 3600rpm.
Max Wood Diameter:
- FM9DD: 75mm (3 inch).
- FM14DD: 100mm (4 inch).
- FM18DD: 125mm (5 inch).
Starting Mechanism:
- FM9DD: Pullstart / Electric Start.
- FM14DD: Electric Start.
- FM18DD: Electric Start.
Usage Features
Assembly: The manual provides detailed instructions for assembling the chipper, including attaching the axle, wheels, engine, battery box (for electric start models), feed hopper, hopper tray, and discharge chute. It highlights that most bolts are loosely fitted for shipping and need to be tightened during assembly. A critical step is ensuring the lower hopper bolt is tight, as it deactivates an engine cut-out, preventing the engine from starting if loose. The engine is shipped dry of oil and must be filled with 5W-30 (winter) or 10W-30 (summer) oil before first use, without tilting the chipper.
Operation Safety: Operators must be over 18, not under the influence of substances, and have read the manual. The machine should be positioned on dry, level ground, free from tripping hazards. Only one person should operate the chipper, with bystanders at least 50 feet away. Essential PPE includes gloves, ear defenders, helmet, and safety glasses. The chipper should not be operated indoors due to carbon monoxide exhaust. Overloading or feeding materials beyond the specified diameter is prohibited. No body parts should be placed inside the feed hopper or discharge chute. If the chipper jams, the engine must be stopped immediately, the spark plug disconnected, and the drum allowed to stop rotating before clearing the blockage. The drum can be rotated in reverse using a 17mm socket on the hexagonal part of the drum shaft to clear stubborn blockages.
Starting the Engine:
- Electric Start (FM14DD & FM18DD): Ensure the fuel shut-off valve is "ON," move the choke control lever to "CHOKE" (adjust for warm starts), move the throttle control to "FAST," and turn the ignition key to "Start." Once started, allow the key to return to "Run." Avoid holding the key in "Start" to prevent flooding.
- Pull Start (FM9DD): Same initial steps as electric start. Grasp the recoil starter handle, pull slowly until resistance is felt (check for blockages if tight), then pull rapidly to start.
- After starting, slowly move the choke lever to "RUN" and warm up the engine at half throttle for 1-2 minutes before advancing to maximum speed.
Stopping the Engine: Allow the chipper to run for 1 minute without feeding material to clear any fragments, then move the throttle lever to "IDLE" and turn the ignition switch to "OFF."
Wood Chipping Guidelines:
- Use freshly cut wood (less than 3 days old) for best results.
- Do not push wood into the blades; let the machine draw it in.
- Avoid overloading the chipper.
- Do not chip wet wood, as it can cause blockages.
- The discharge chute should point upwards to reduce blockages.
Mulcher Accessory (Sold Separately): An optional mulcher accessory can be fitted by removing the discharge chute and replacing blanking plates. For mulching wet material, the discharge chute should point fully down, and a hosepipe can be used to aid feeding.
Adjusting Feed and Discharge Angles: The drum housing can be rotated up to 40 degrees to change the angle of the feed hopper and discharge chute, affecting feed rate and discharge angle. This is done by loosening three nuts, rotating the housing, and then retightening the nuts.
Maintenance Features
Regular Maintenance Checklist:
- Before Each Use: Check engine oil level, general equipment condition, and blades for sharpness/wear.
- Every 25 Hours: Clean engine exterior and cooling fins, and replace the air filter.
- Every 100 Hours: Change engine oil and replace the spark plug.
Engine Oil: The engine oil level should be checked by ensuring the specified quantity (FM9DD: 600ml, FM14DD/FM18DD: 1100ml) is present, not by using the dipstick, which may be inaccurate under operating conditions. Oil should be drained and refilled on a level surface.
Engine/Motor Servicing: Refer to the engine manufacturer's user manual for specific servicing procedures.
Replacing and Sharpening Blades:
- Blades are removed by undoing bolts after lifting the feed hopper.
- A 16mm socket with no leading taper is recommended to prevent rounding the bolt heads.
- Blades are reversible, offering a second cutting edge before sharpening is needed.
- After sharpening, the base block at the bottom of the drum must be adjusted to maintain a 0.25mm gap between the knives and the block.
- Use mild thread lock when refitting blades.
Cleaning:
- After Mulching: Spray water into the feed hopper with the engine running, then run the engine for a few minutes to dry it.
- After Chipping: Clean similarly, but remove the lower blanking plate first to allow water to drain.
Troubleshooting: The manual includes a troubleshooting table for common issues like the engine not starting, lacking power, or smoking. It advises checking the ignition switch, fuel valve, fuel quality, spark plug, oil level, carburettor cleanliness, and hopper securing bolt. For a tight pull cord or clicking starter motor, a drum blockage is indicated, requiring clearance as per instructions. For insufficient drawing or poor chipping, checking blade sharpness, branch thickness, and the gap between knives and the base plate is recommended. Sawdust production suggests chipping hard or seasoned wood, which the chipper is not designed for. The Forest Master website also provides an FAQ for common problems.
Warranty: The product carries a 1-year limited parts warranty from the date of purchase. Misuse, abuse, neglect, accident, improper maintenance, alteration, normal wear, routine maintenance items (lubricants, blade sharpening), and normal deterioration of the exterior finish are not covered. Modifications not authorized by Forest Master will void the warranty.