Manual - Formech 450DT V1.0 - 0317
20
Optional Extras and Accessories
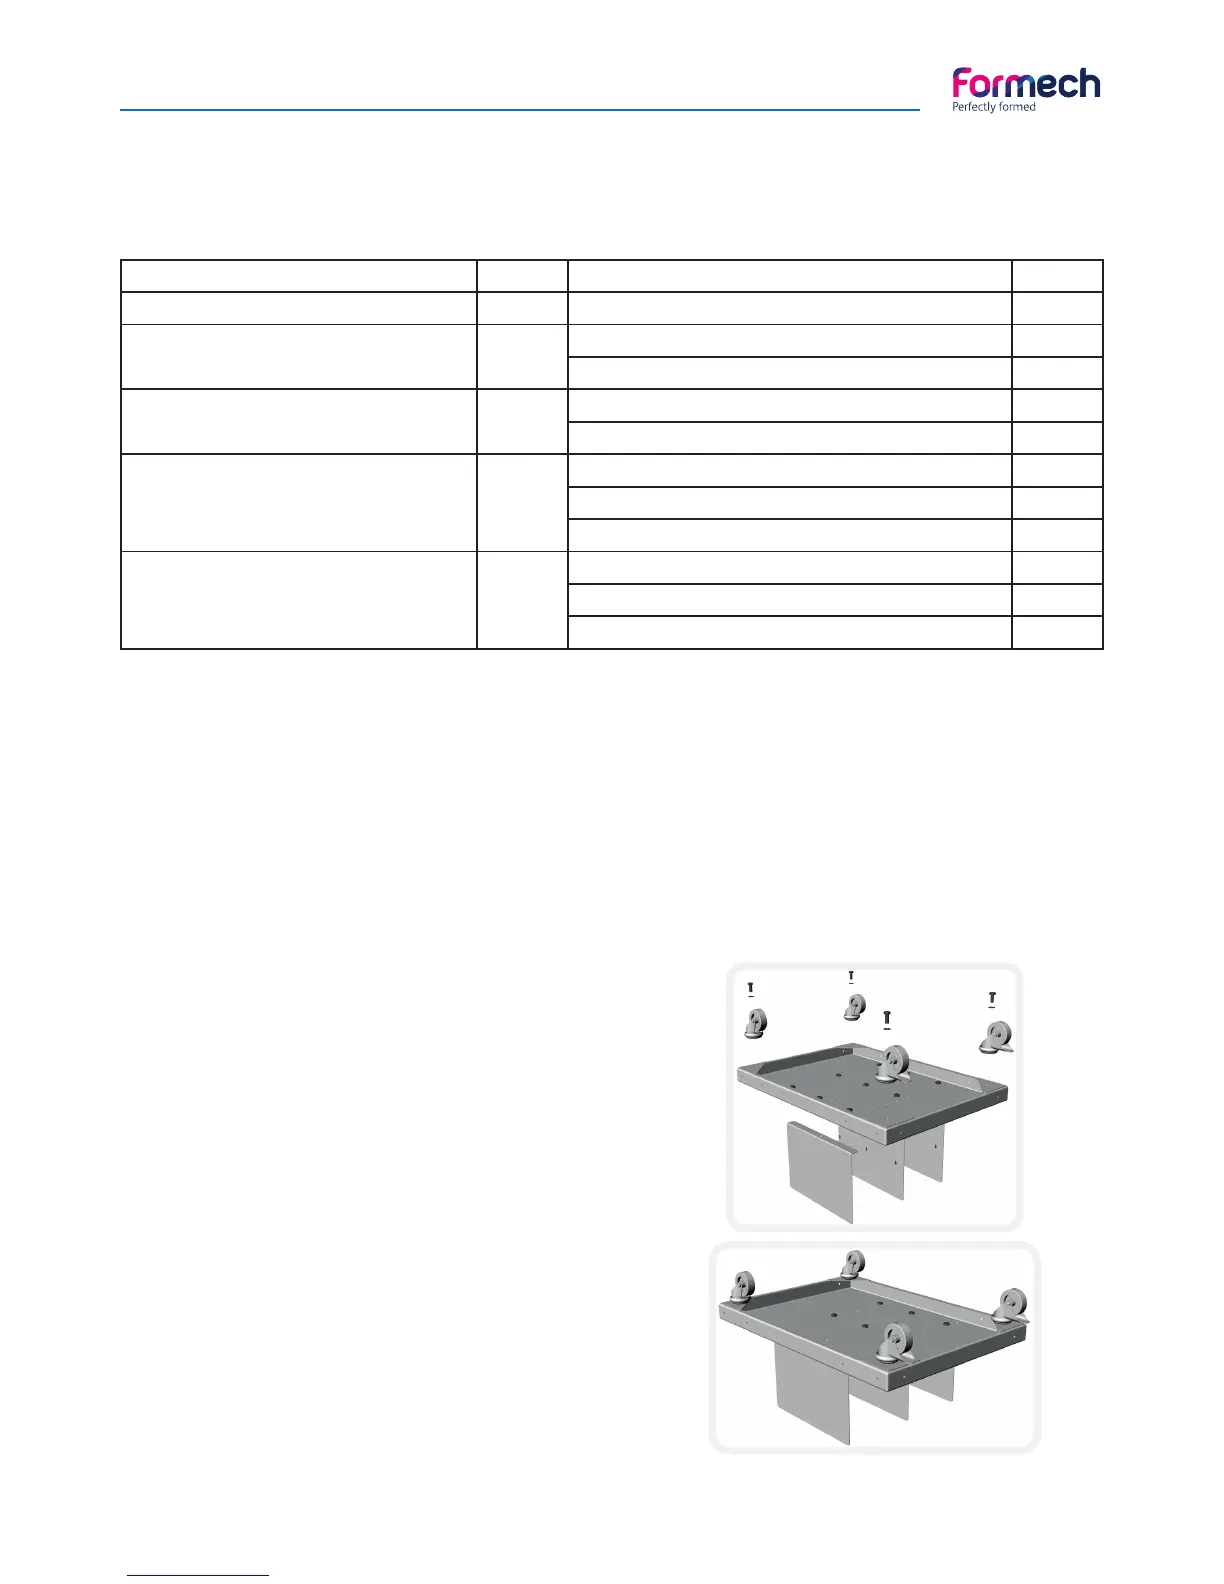
Trolley - Self Assembly Instructions (optional)
Item Qty Fixing Qty
Top Tray M6 x 16 Setscrew & Washer (Security) 2
Corner Strut 4 M6 x 16 Button Head Screw 24
M6 Plain washer 24
Storage Divider 3 M6 x 12 Button Head Screw 9
M6 Full nut 9
75mm Swivel Castors 2 M10 x 25 Setscrew 2
M10 Washer 2
M10 Split Washer 2
75mm Locking Swivel Castors 2 M10 x 25 Setscrew 2
M10 Washer 2
M10 Split Washer 2
A. Parts supplied
Before starting the assembly, prepare a clear area with suitable surface that will not scratch the painted
surfaces of the trolley.
B. Tools required
10mm spanner for the dividers and machine security fi xings.
13mm spanner for castor screws.
4mm Hex tool or screwdriver for button head screws.
C. Assembly
1. Start with the bottom tray that will need the four castors
and the dividing panels for material storage to be secured
in place.
• Ensure the two locking castors are fi tted at the front of
the lower tray.
• Fit castors using the M10 washers and M10 x 30mm
setscrews pushing the fi xing through the body of the castor
and tightening securely into the threaded bush of the lower
tray.
• It is easier to fi t the dividing panels at this stage.
Establish the desired position for the dividing panels and
tighten securely with three M6 button head screws and nuts
per divider.
Position the completed lower tray to one side and begin the
assembly of the top tray.