adapter is charging, or if there is no display indicating that it is not charging.
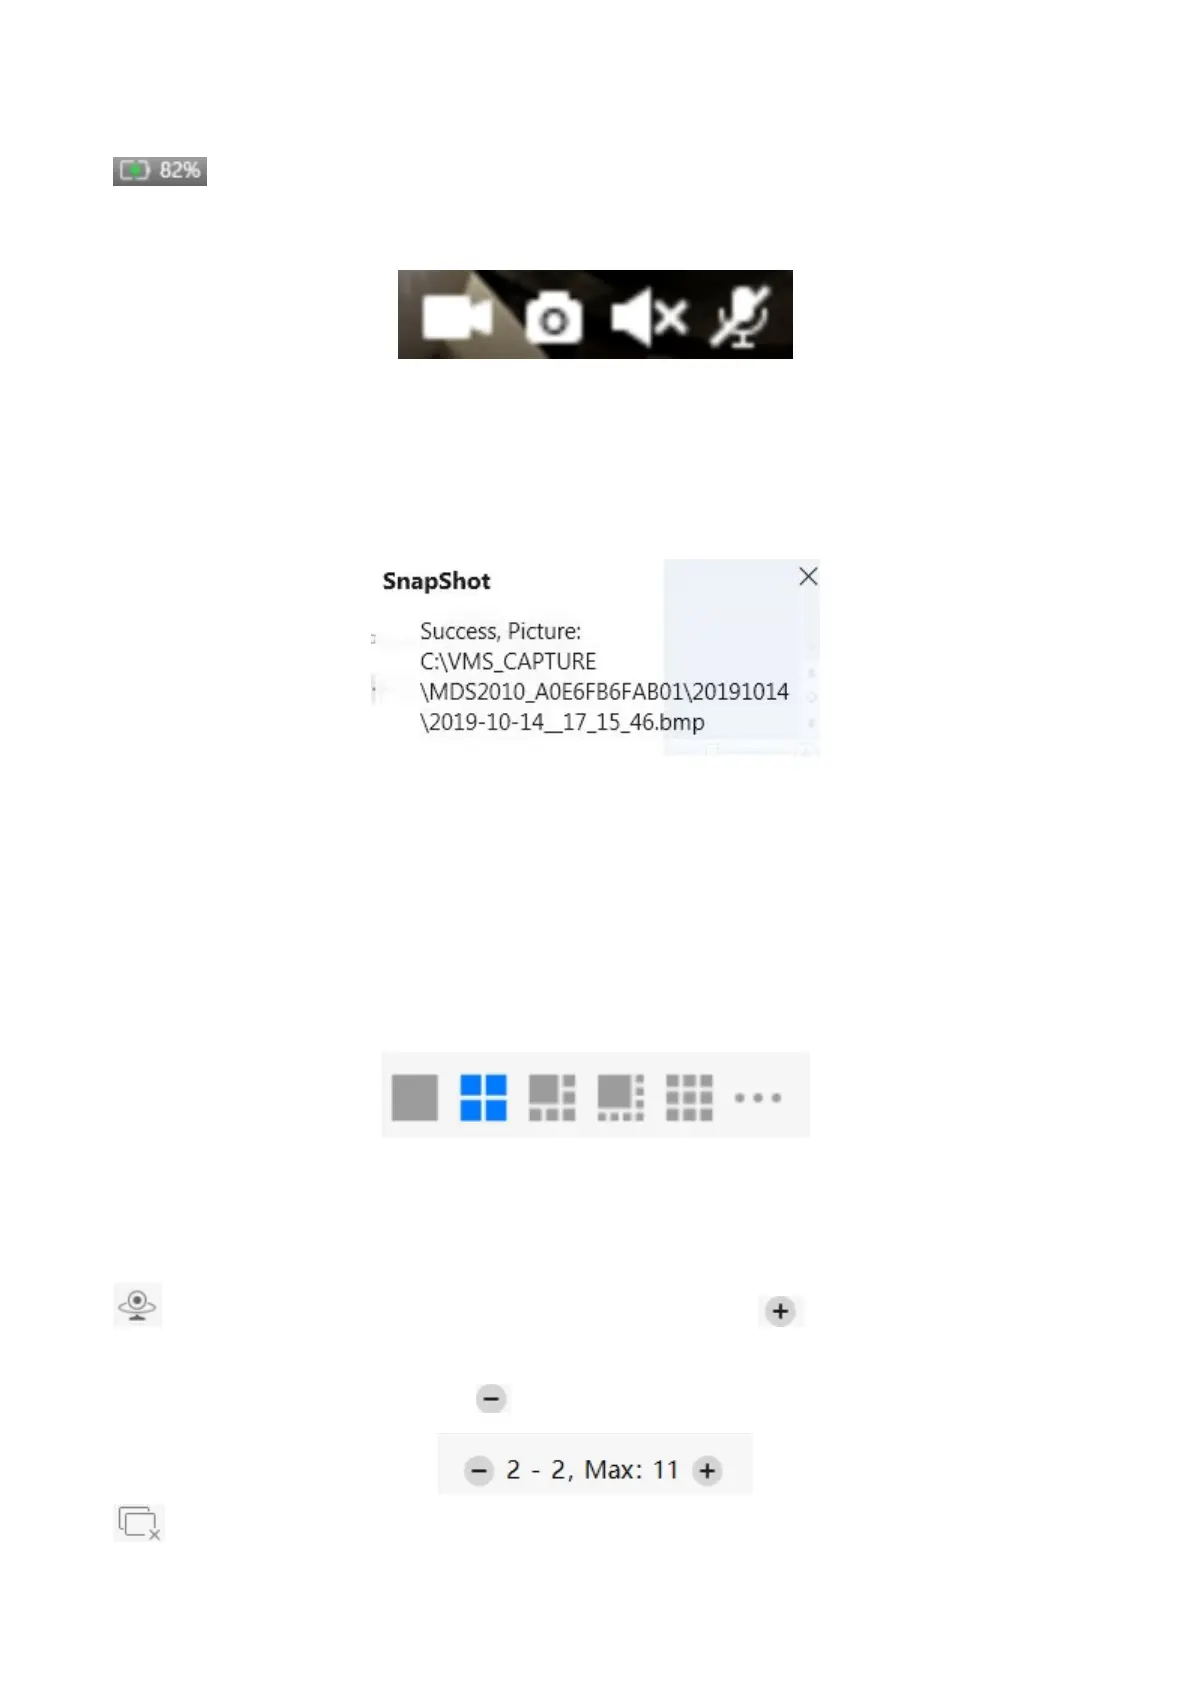
This shows how much battery power is left on the device.
4----- Record / Snap Shot / Sound / Talk button
Record ----- Click it and do manually recording. When recording, icon 1 will turn to blue. Click it again
and stop recording. The recording files will be stored to C disk automatically
Snap Shot ----- Click it to make snapshot. After snapshot, the button banner will prompt Captured
Successfully. And you can find the picture on default path C:\VMS_CAPTURE
Sound ----- Click the icon then you will hear sound captured by the camera's built-in microphone. You
may need to plug in earphones or enable the computer speakers to hear from the camera's microphone.
Make sure the camera supports audio. Click again and stop audio.
Talk ----- Click the button, then talk to the microphone that connected with PC, people around the
camera can here you voice. Click the icon again and stop talking.
Section4 The number of split-screen
Click this button to select the number of split-screen on one page.
The client can monitor many cameras at one page, here you can choose the display number. The
maximum number is 16.
Section5 Live Cruise / Close All / Full Screen / Hide Bar
Live Cruise ----- Click this button to Live Cruise, you can click button to add a loop page for
live
Cruise or click button to reduce the loop page for live Cruise.
Close All ----- Click this button to close all the cameras