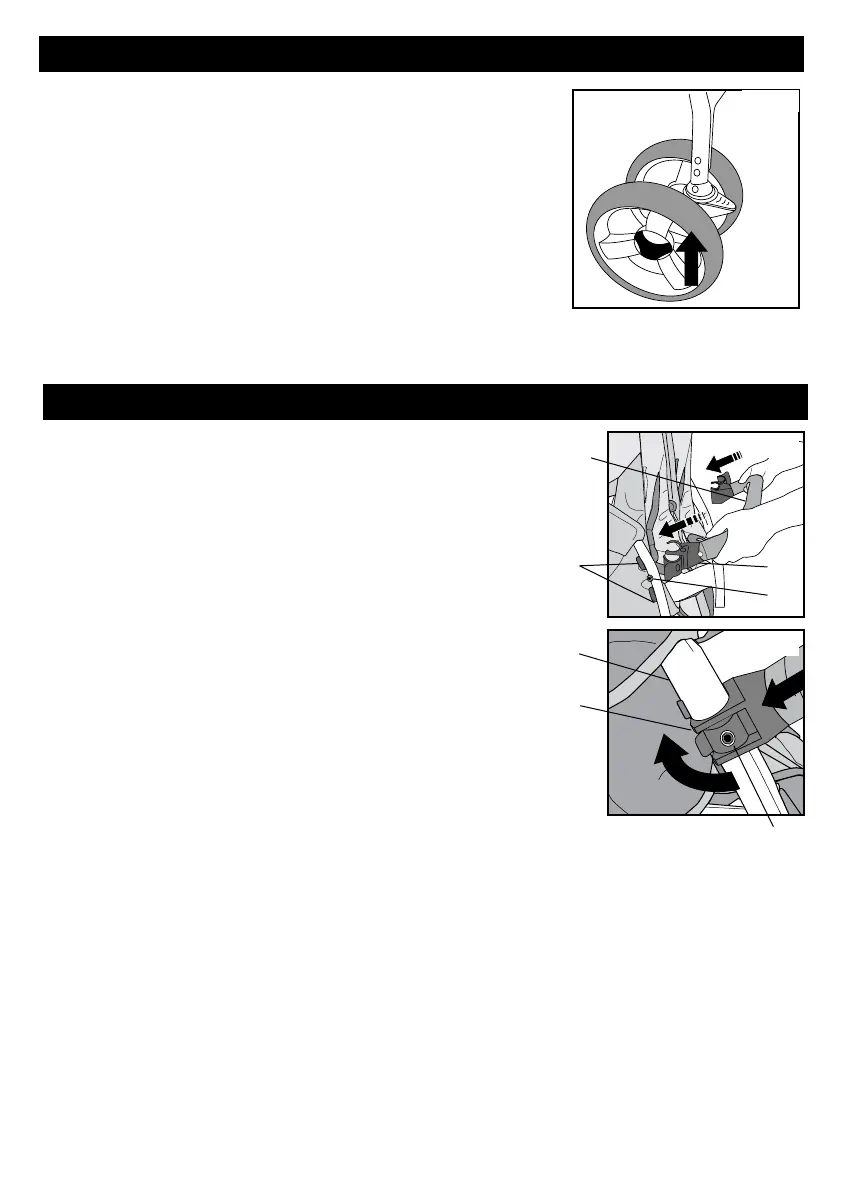
STEP 3 - Front Wheel Assembly
Fig. 1
1.Alignpivotshaftofstrollerframewithholein
wheelassembly.Wheellockinglevershouldbefacing
up.Slidewheelassemblyontopivotshaftuntilasolid
clickisheardandfeltfromthebuttonsengaging.
(Fig. 1)
2.Checkthewheelissecurebypullingdownonthe
wheels.Wheelsshouldstaysecurelyinplace.
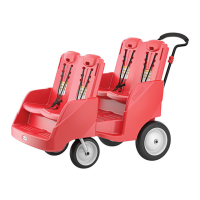
STEP 4 - Arm Bar Assembly
1. WithFoundations
®
logoonArm Bar (E) facingup,
slideArm Bar Clamp (1)betweenfabricseatsidecover
andfrontleg.PushArm Bar Clamp (1) ontofrontleg
tubesbetweenthetwoArm Bar Stops (2) andalignthe
holeintheclampwiththeStud(3)onthearm, onboth
sidesofthestroller(Fig. 1).
2. LockArmBartostrollerframebypushingArm Bar
Clamp(1) aroundfrontlegtube(4).Close
theLockleverbypressingthelockleverontotheArm
baruntilitclicksclosedandthestud(3)isfullythrough
theholeinthelever.(Fig. 2).
3. Repeatstep2foroppositeendofArmBar
CheckthattheArmbarissecurelyattached.
Fig. 1
Fig. 2
6
E
1
3
2
3
4
1