7
UK
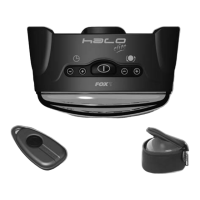
1. Ensure the Halo Elite is switched OFF.
2. Whilst HOLDING DOWN the “sensitivity +”
button, switch the unit on.
3. The light will start to flash. Release the
“sensitivity +” button.
4. Ensure the battery is fitted in your
remote keyfob.
5. Press and HOLD DOWN the button on
your keyfob.
6. After about 2 seconds, the light will stop
flashing and illuminate steadily for a brief
period, before it starts flashing again.
This indicates that registration has
been successful.
7. Switch the Halo Elite off and then on
again. You should now find that you can
operate the light from your keyfob.
PROCEDURE(2)
Registration without a receiver
This procedure should be followed if you own
radio-equipped bite alarms (EOS-R, RS series
or PSR), but DO NOT own an RX3 receiver or
I-COM Transceiver. Up to four bite alarms
may be used with the Halo Elite.
If you subsequently purchase an RX3 or
I-COM, then you will need to repeat the
registration process, using one of the
relevant procedures below.
1. Ensure the Halo Elite and all your bite
alarms are switched OFF.
2. Whilst HOLDING DOWN the “sensitivity +”
button, switch the unit on.
3. The light will start to flash. Release the
“sensitivity +” button
4. Switch on one of your bite alarms (note - the
bite alarms may be registered in any order).
5. The bite alarm should emit its usual
three-note start-up tone, followed by a
“tick-tock” sound. Also, the bivvy light will
stop flashing and illuminate steadily for a
brief period, before it starts flashing
again. This indicates that registration has
been successful.
6. Repeat steps (4) & (5) for your remaining
bite alarms (up to four alarms).
7. Ensure the battery is fitted in your remote
keyfob.
8. Press and HOLD DOWN the button on
your keyfob.
9. After about 2 seconds, the light will stop
flashing and illuminate steadily for a brief
period. This indicates that registration has
been successful.
10.If you have registered four bite alarms
and the keyfob, the light will now go out.

 Loading...