605-01-3 67 8
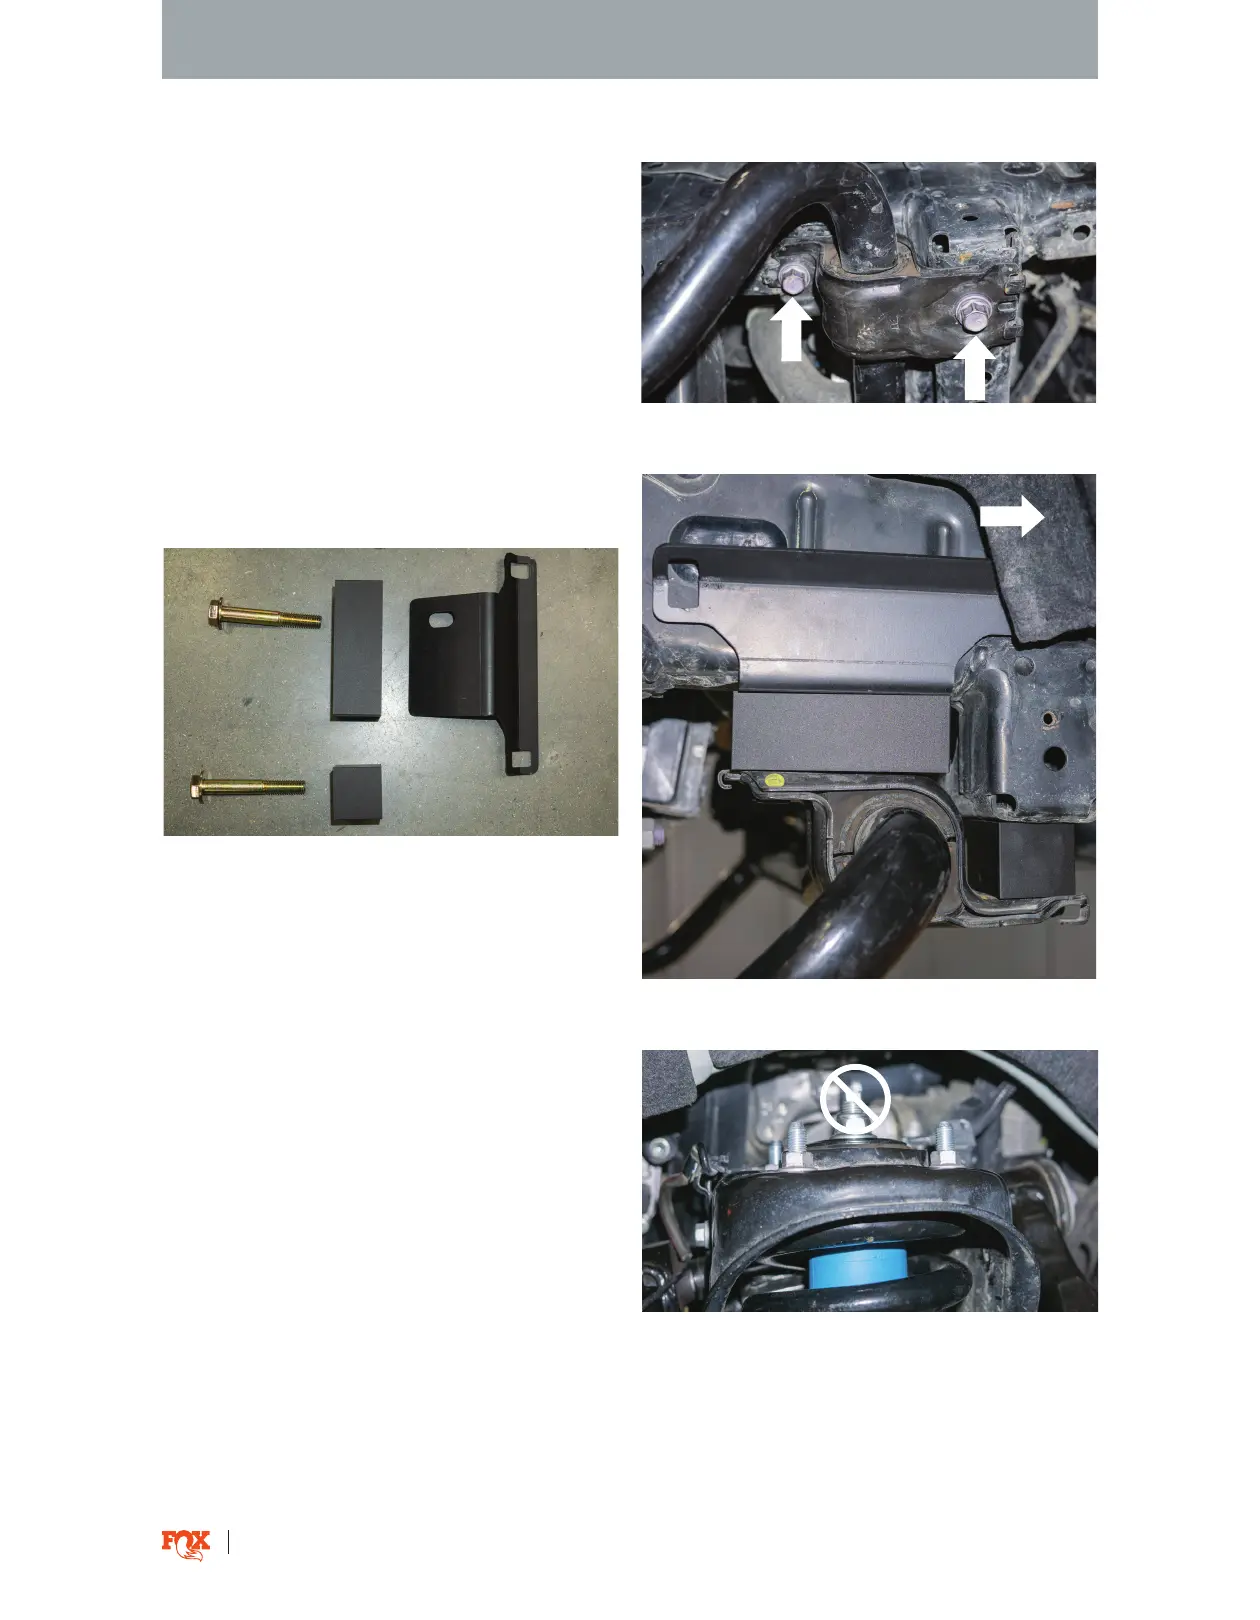
Fig. 4: Remove sway bar bracket.
Fig. 5: Reservoir bracket assembly.
Fig. 6: Install the reservoir bracket assembly.
7. Remove the four bolts that secure the sway bar to
the vehicle’s frame. Move the sway bar forward to
allow clearance for shock removal and installation
(Fig.4).
RESERVOIR BRACKET INSTALL
8. Install the reservoir bracket and spacer blocks to
the sway bar bracket’s mounting location with the
provided hardware (Fig. 5).
9. Reinstall the sway bar to the reservoir bracket
spacer and torque to OEM specification (Fig. 6). FRONT OF VEHICLE
10. Remove the four top hat nuts that secure the
stock shock assembly to the vehicle (Fig. 7). DO
NOT remove the center nut. Removal of the center
nut will release the spring from the stock assembly
and may result in SERIOUS INJURY or DEATH!
Fig. 7: Remove the four top hat nuts.