10
2
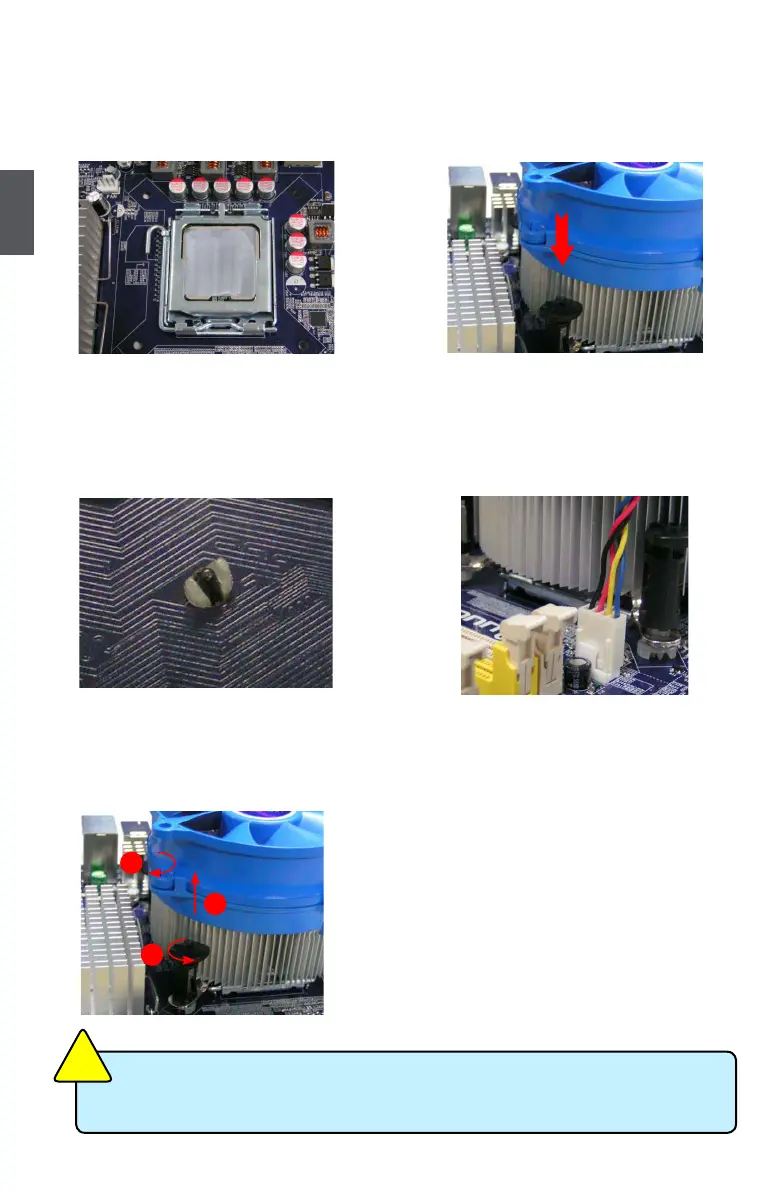
Install the CPU Cooler
Follow the steps below to correctly install the CPU cooler on the motherboard. (The following
procedures use Foxconn cooler as the example.)
1. Apply and spread an even thermal
grease on the surface of CPU.
2. Place the four bolts of the CPU
cooler to the holes of the motherboard,
push them straight down from the top,
and the bolts will be fastened on the
motherboard. That's it.
3. Check the solder side of the
motherboard, the push pin should be
xed as depicted in the picture.
3
2
1
4. Attach the 4-wire CPU cooler
connector to the CPU FAN socket on
the motherboard .
Release bolts of CPU cooler from
motherboard :
1. Turning the push pin (bolt)
along with the direction of arrow
(counterclockwise).
2. Pull the push pin straight up.
3. Turning push pin clockwise to its
default position.
Use extreme care when removing the CPU cooler because the thermal grease may
adhere to the CPU. Inadequately removing the CPU cooler may damage the CPU.
C
A
U
T
I
O
N
!
 Loading...