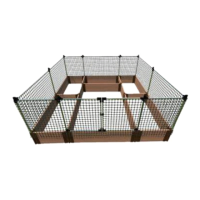
STEP 3: Attach the gates to the raised bed boards
Customer Service: 1800-914-9835 | support@frameitall.com
ASSEMBLY INSTRUCTIONS – continued
STEP 2: BUILD THE RIGHT GATE
FIRST: Slide the round tubes at the
bottom of each gate section into the
bracket connecting the raised bed
boards. (You may need to remove
the cap on top of these brackets--
the cap will be replaced with the cap
on the gate assembly (Part 21)
Second: Install gate stopper (12) with screws
(11) on the inner side of the board to prevent
the gate from swinging inward
View from the inner side of
the board.
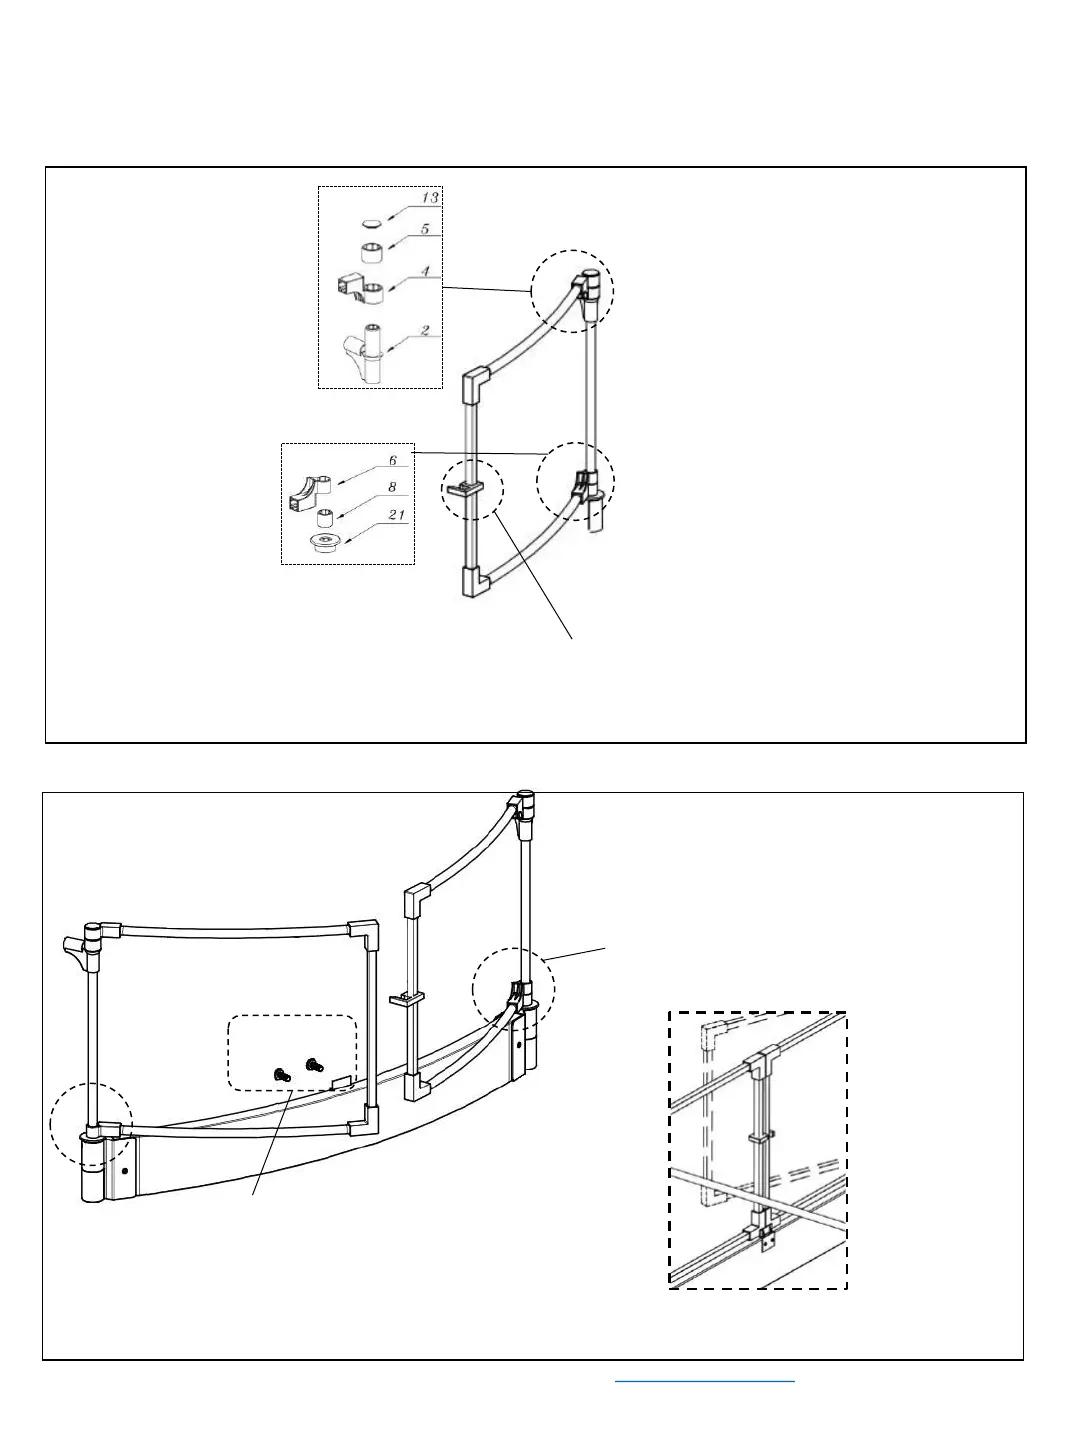
FIRST: Use connectors
2, 4, 5, & 13 to form the
upper right gate hinge
(as shown in the box to
the right). Next, insert
round metal tube (20)
into the bottom of of
the hinge assembly.
(see diagram in the
small box.)
SECOND: Use connectors
6, 8 & 21 to create the
lower hinge for the right
gate, as shown in the box
to the right. Slide the
lower hinge about 6" past
the bottom end of metal
tube (20).
FIFTH: Finish the right gate frame by
connecting this tube to the rest of the
frame to create a rectangle.
THIRD: Add two square tubes (18) to
create the top and the bottom of the right
gate frame. Insert one square tube into the
square connector of the top hinge and
another into the square connector of the
bottom hinge.
FOURTH: Add an "L" connector (9)
to each end of square tube (17,
which has the gate-latch) with the L
connectors opening in the opposite
direction from the gate latch.