B B
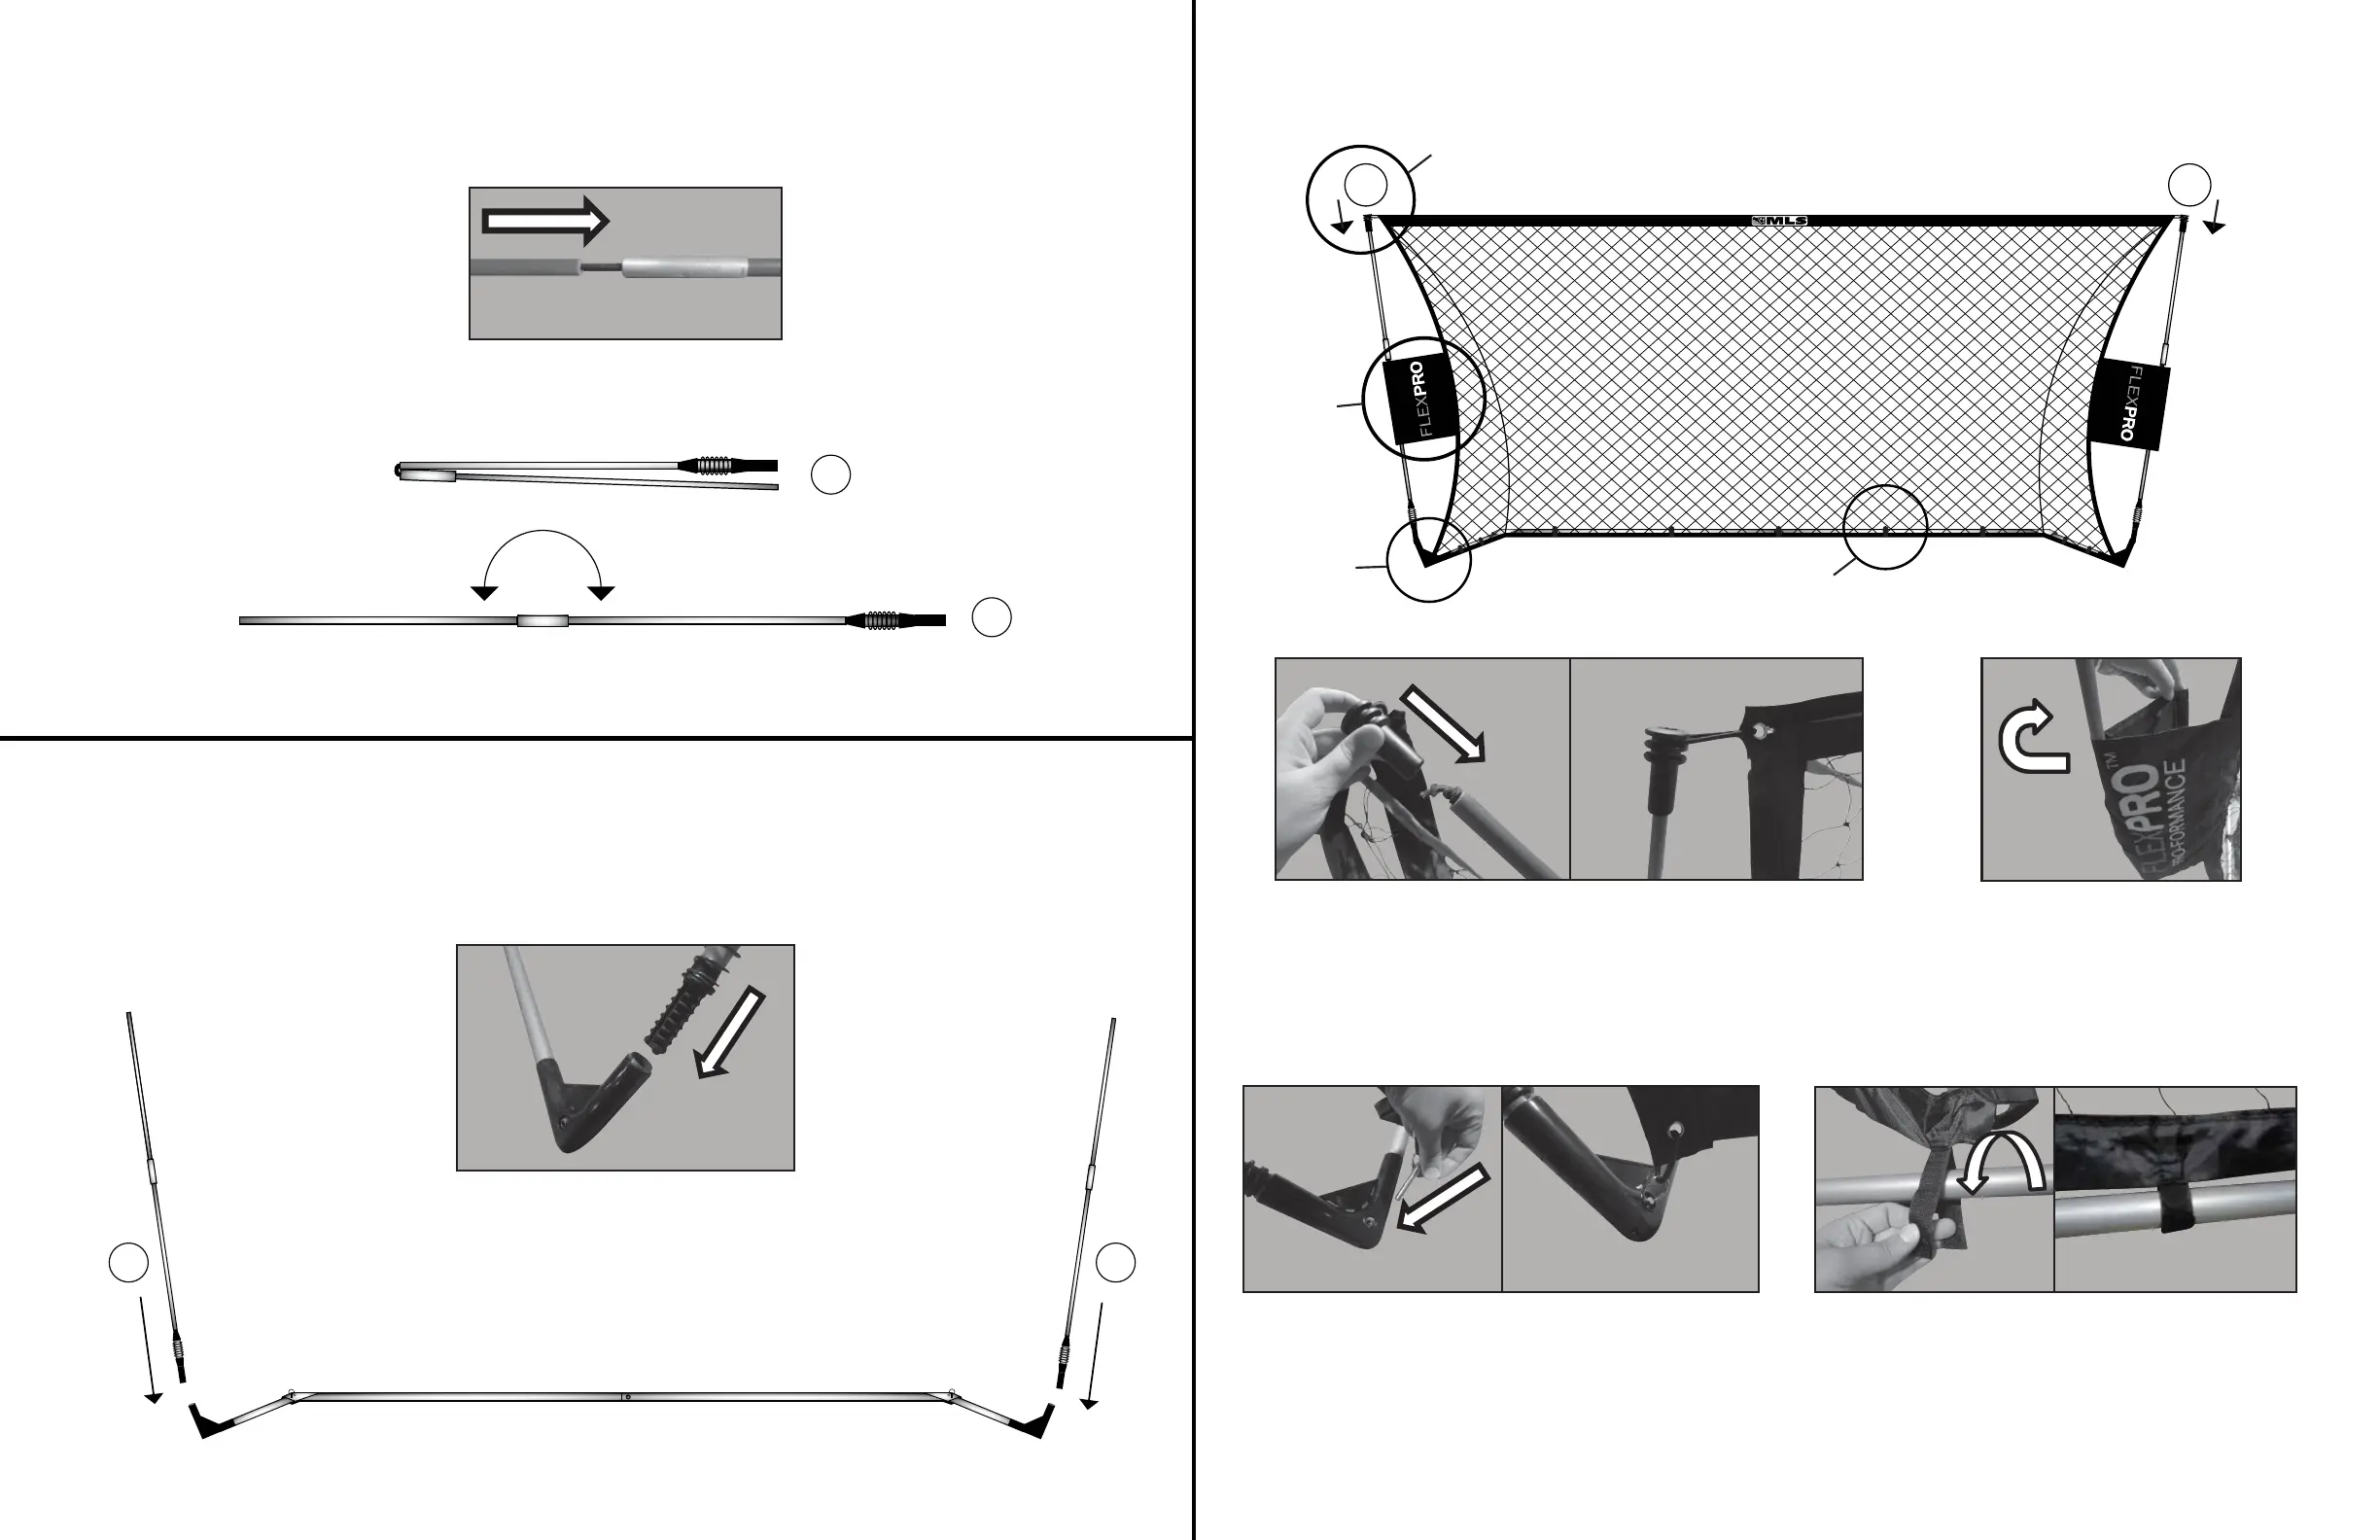
Step 4: Unfold the tension poles and slide together (see gure 3).
Step 5: Insert both tension poles into the frame (see gure 4).
Step 6: To Attach the Net: (The MLS logo indicates the front of the net)
Take the top right corner of the net and slide the
plastic pole cap, which is attached to the net onto
the tension pole. Repeat on the left. (The tension poles
will ex during this process). (See gure 5)
Wrap the right and left side
panels around their respective
tension poles. (See gure 6)
Lock the bottom of the net in place with the
locking pins found on the bottom right and
left of the net. (See gure 7)
Secure the back of the net by wrapping the
self-stick straps around the base frame of
the goal. (See gure 8).
Figure 3
B
B
Figure 4
CC
™
™
5
6
7
8
Figure 5 Figure 6
Figure 7 Figure 8