3
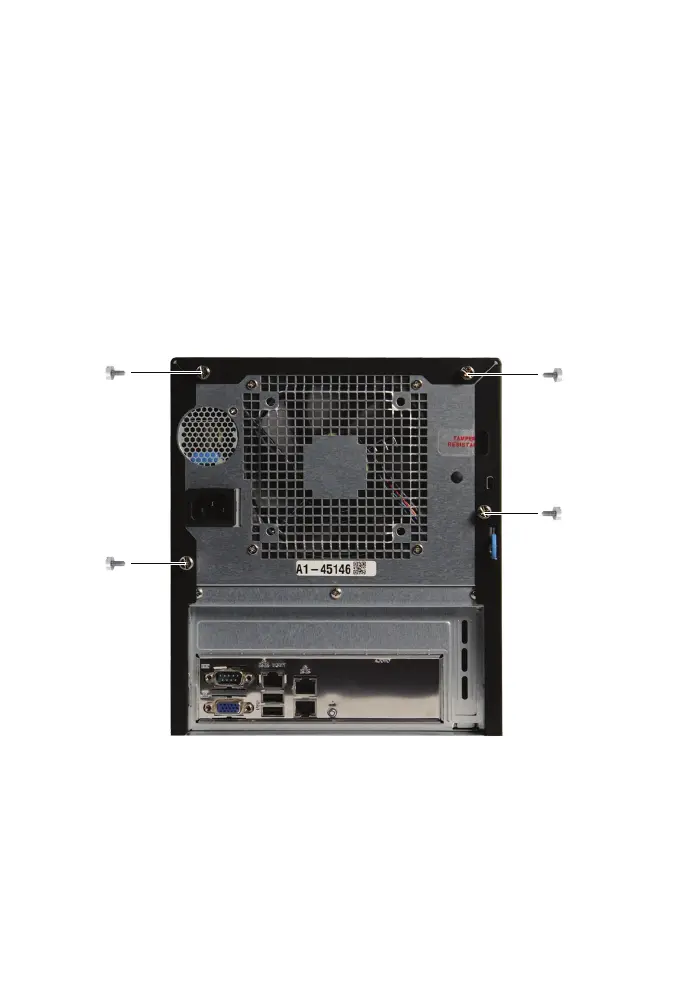
OPENING THE FREENAS MINI CASE
Unscrew the four thumbscrews on the rear of the Mini:
1
3
2
4
PREPARATION
A Philips screwdriver will be needed for internal screws. Shut down the
FreeNAS system and unplug the power cable. Make a note of where the
data cables are connected and unplug them also. If a “Tamper Resistant”
sticker is present, removing or cutting it to remove the case will not aect
the warranty on the unit.
Slide the black metal cover o the back of the chassis.